Art Storage Shelf with Caddies
DIY Art Storage Cart – with Cut List & Step-by-Step Diagrams Keep your creative supplies neat and accessible with this DIY Kids Art Storage Cart woodworking plan. Designed for versatility and ease, this compact yet spacious cart features three sturdy open shelves perfect for organizing paints, paper, brushes, and craft tools. Whether you're building for a child’s art corner, a home classroom, or your own crafting nook, this project delivers both function and charm. This includes: • A complete shopping list of materials and hardware • An easy-to-follow cut list for efficient prep • Step-by-step building diagrams with clear measurements • Beginner-friendly instructions – ideal for weekend builders • Compact design that fits in tight spaces but holds plenty Made from affordable wood and basic tools, the cart is customizable with your choice of paint or stain. Plus, it’s designed to hold standard-size craft trays and storage bins. Perfect for: • Organizing kids' art supplies • Rolling homework or homeschool stations • Compact craft or sewing supply storage • Makerspaces and creative studios Start building today and create a practical, beautiful addition to your space with this free DIY art shelf plan.

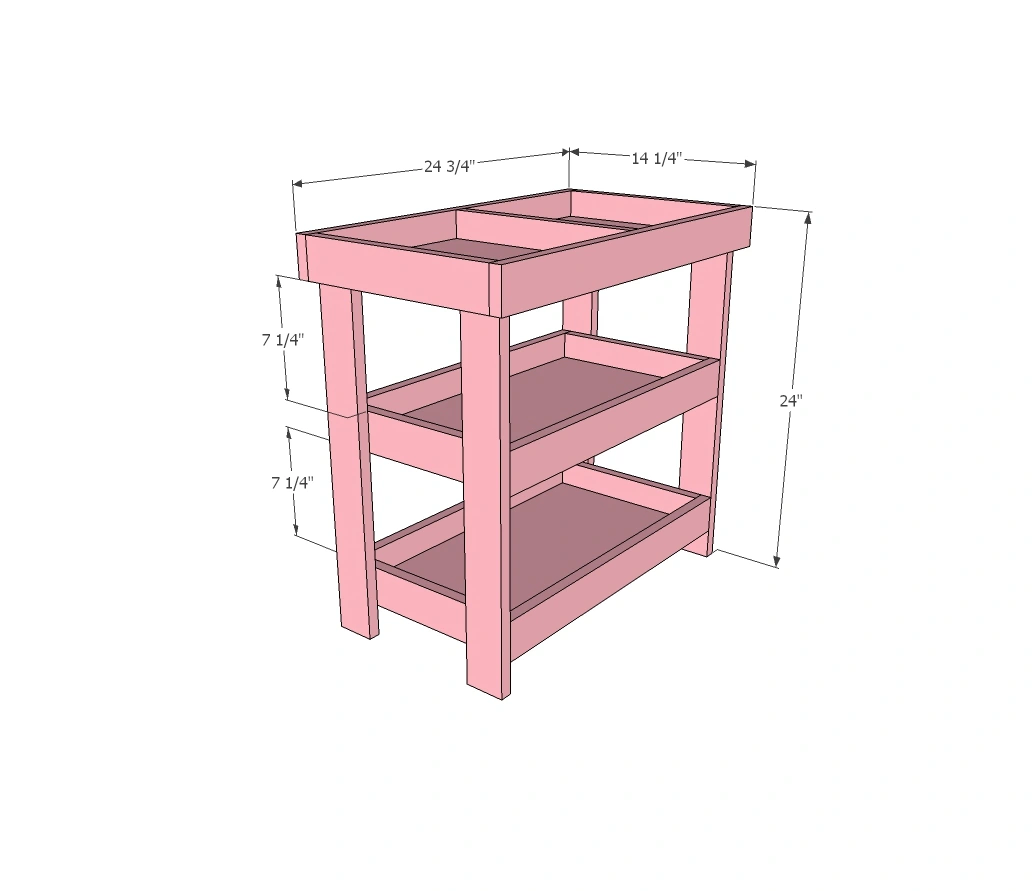
Dimensions
Use the size-specific shopping and cut lists below.
What you need
- 6 feet 1x12 board
- 4 - 1x3 @ 8 feet long
- 2 - 1x12 @ 12-3/4" (top shelf bottom)
- 3 - 1x3 @ 12-3/4" (top shelf divider/ends)
- 2 - 1x3 @ 24-3/4" (top shelf sides)
- 2 - 1x12 @ 20-1/4" MUST BE 4-1/2" less than top shelf side boards (bottom shelf bottoms)
- 4 - 1x3 @ 11-1/4" (bottom shelf ends)
- 4 - 1x3 @ 21-3/4" MAY NEED TO ADJUST TO FIT (bottom shelf sides)
- 4 - 1x3 @ 21-1/2" (legs)
CUT LIST
- measuring tape
- pencil
- safety glasses
- hearing protection
- kreg-jig
- drill
- compound miter saw
- nailer
- sander
Step by step
Step 1
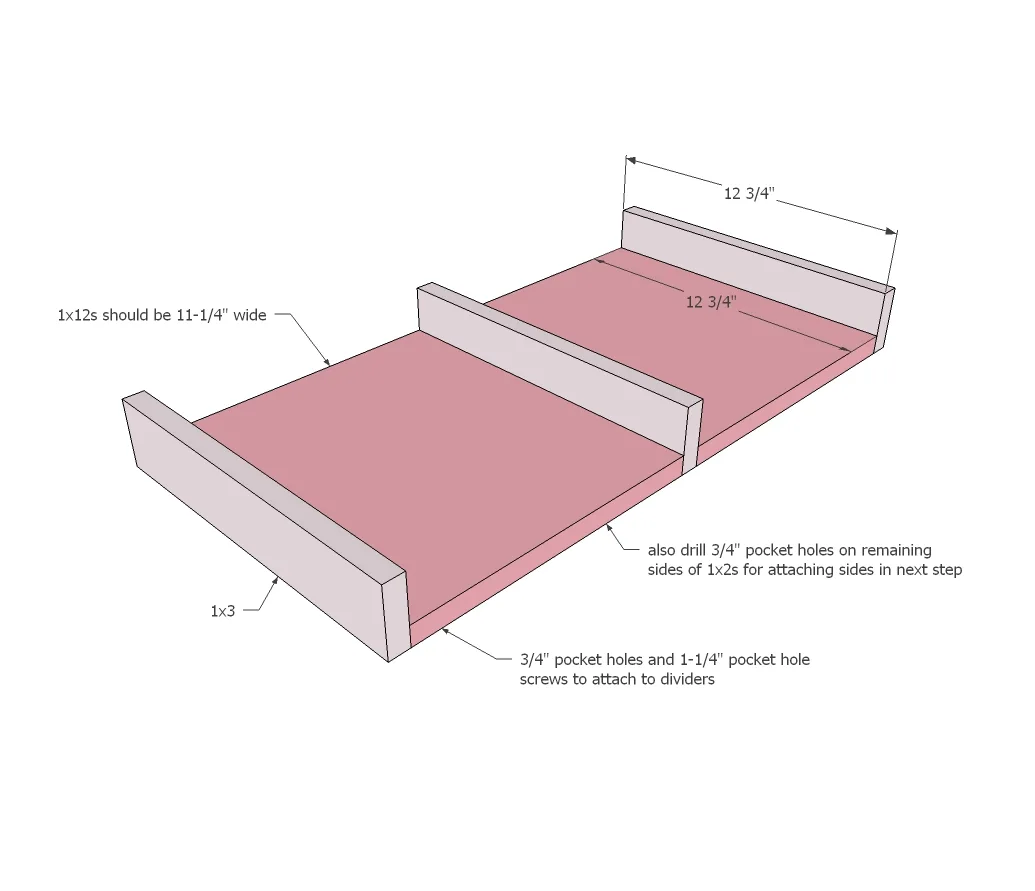
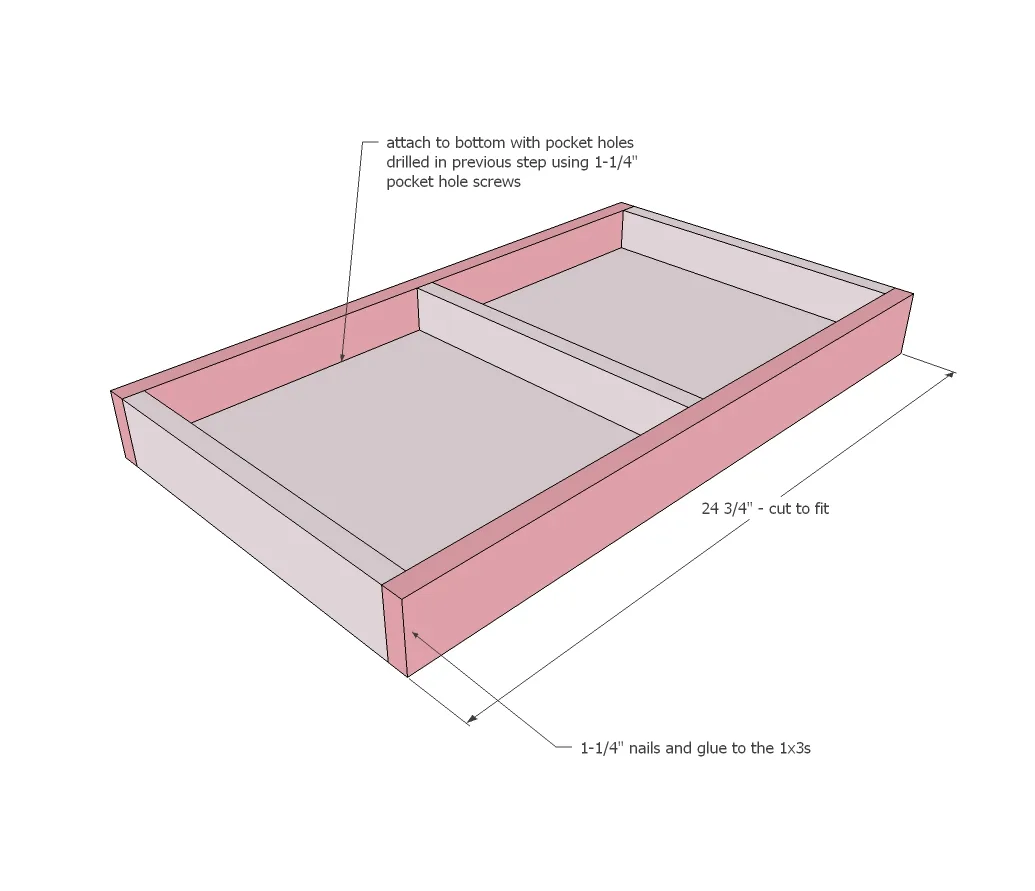
Drill 3/4" pocket holes on all four sides of the smaller 1x12 board pieces, 2 per side. Attach to the 1x3s as shown with 1-1/4" pocket hole screws.
Step 2
Measure and cut the side trim pieces to fit and attach with pocket holes on underside. Also attach with 1-1/4" brad nails to the 1x3 side trim. Set top aside.
Step 3
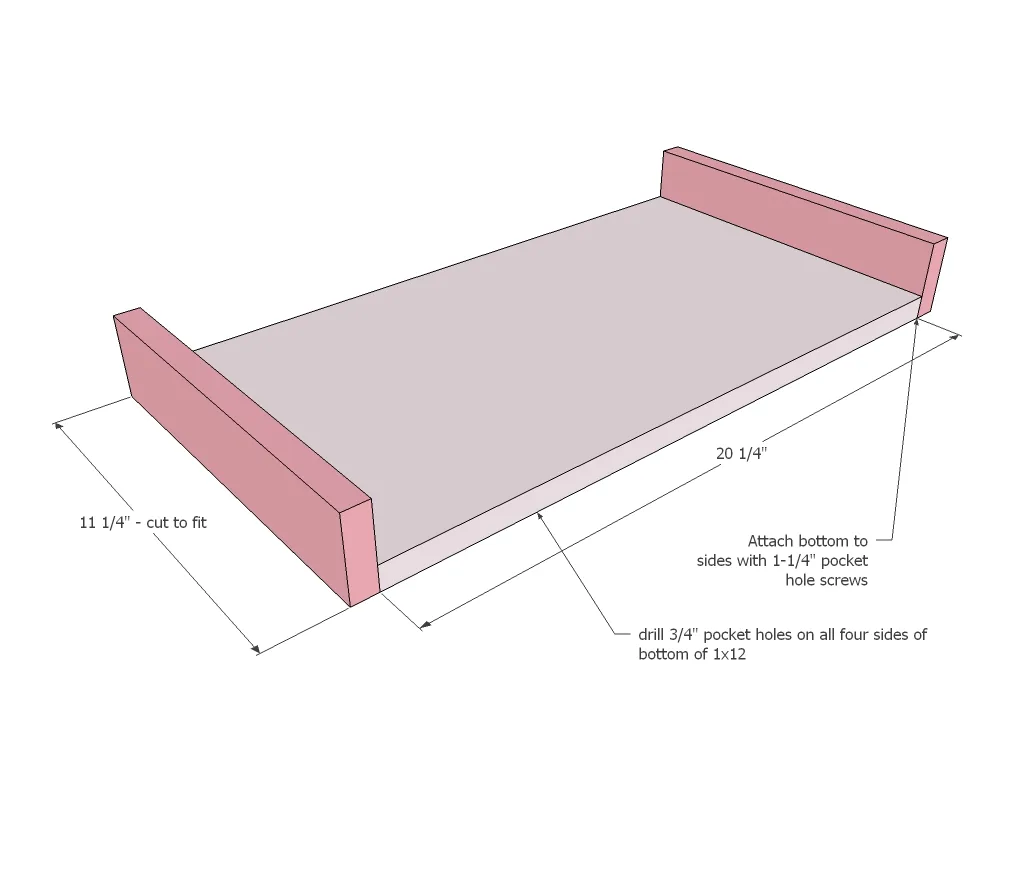
For the shelves, drill 3/4" pocket holes on all four sides of the remaining 1x12 boards. Attach 1x3 side trim pieces with 1-1/4" pocket hole screws, hiding on underside.
Step 4
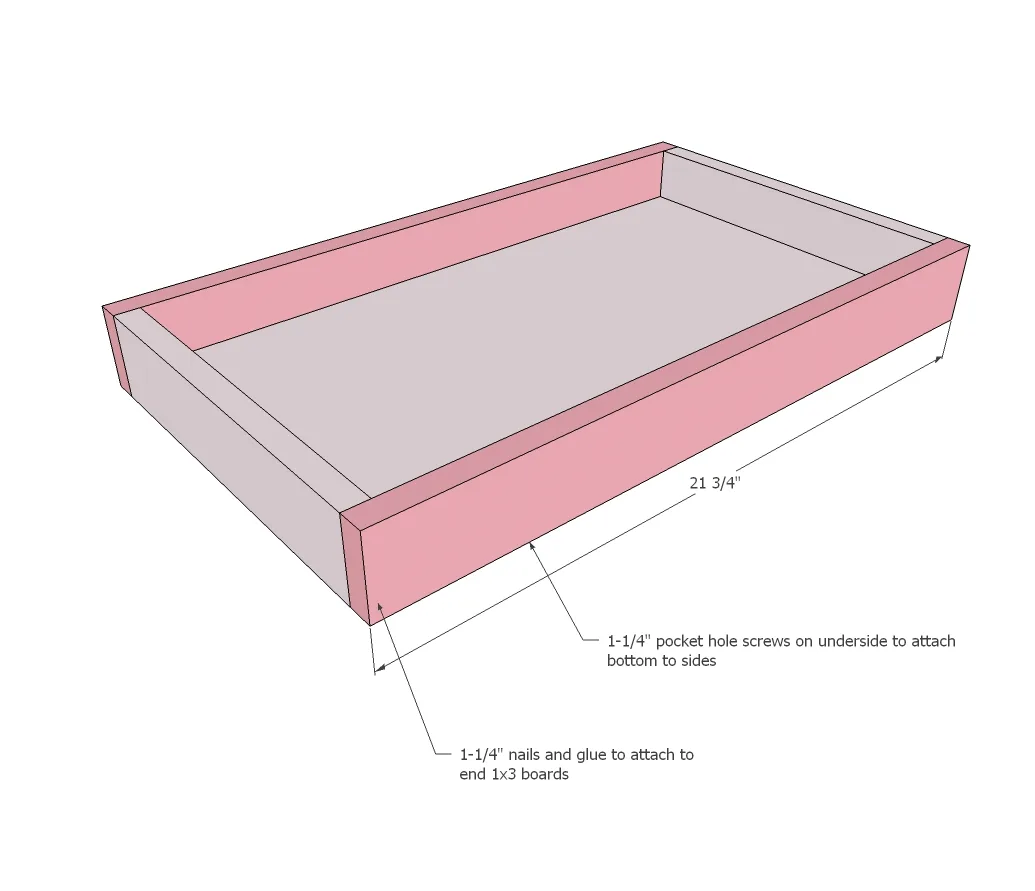
Finish front and back with 1x3 trim, attaching on bottom through predrilled pocket holes. Also nail to side trim with 1-1/4" brad nails and glue.
Step 5
Attach sides with 1-1/4" brad nails and glue.

Step 6
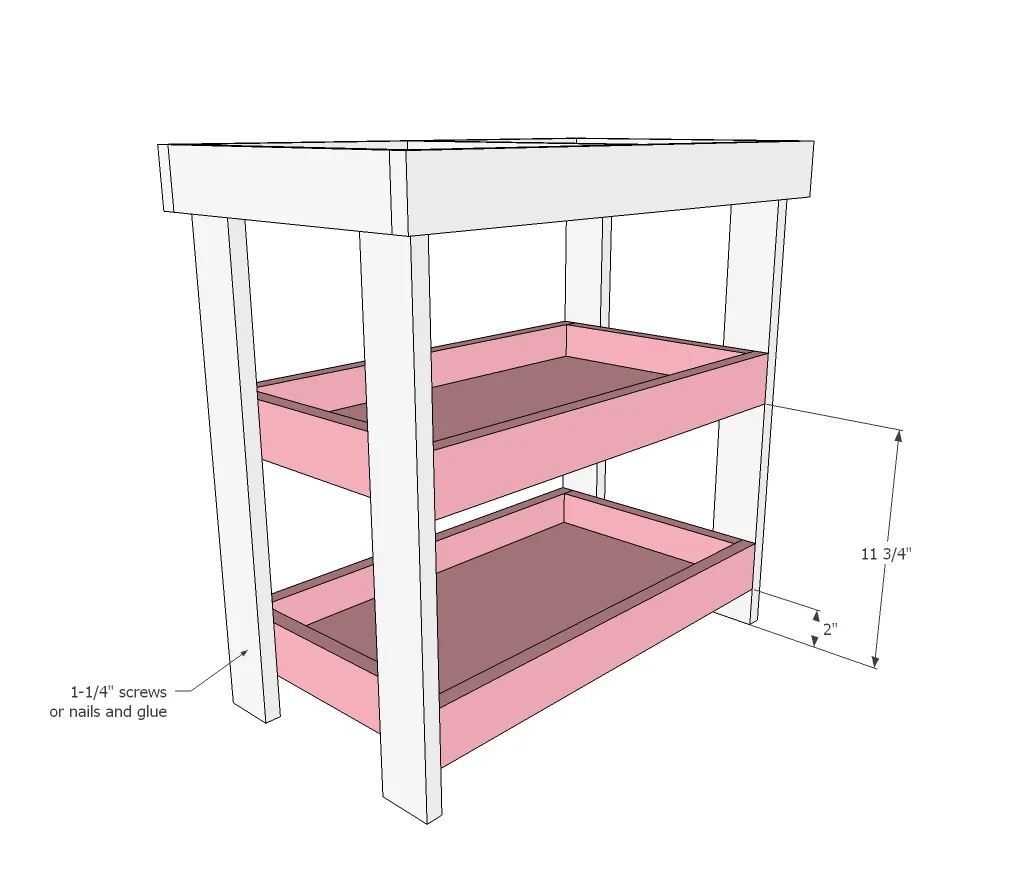
Now just attach the two shelves inside the legs with 1-1/4" screws or brad nails and glue.
Finishing
Sand all surfaces, starting with a medium grit and finishing with fine. Wipe off the dust, fill any holes or gaps with wood filler, and sand smooth once dry. Apply primer if you're painting, then finish with your choice of paint or stain and seal with a durable clear topcoat. For outdoor projects, use exterior-rated primer, paint or stain, and sealer so the piece stands up to the weather.