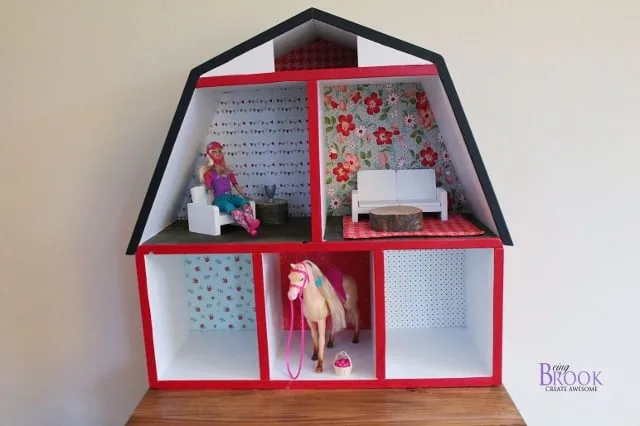
Barn Dollhouse
to build a barn dollhouse! This simple plan is big enough for horses on the bottom, dolls on top! Step by step instructions.
What you need
- 2 - 1x12 @ 8 feet long
- 6” of 1x6 scraps
- 29 x 28 1/2” 1/4” plywood piece for back
- 1 1/4” pocket hole screws or 2” trim screws or 2” finish nails and glue
- 1 - 1x12 @ 27” (bottom)
- 2 - 1x12 @ 11 1/4” (sides)
- 2 - 1x12 @ 10 1/2” (stable dividers)
- 1 - 1x12 @ 28 1/2” - both ends beveled at 22 1/2 degrees off square, long point to long point, ends NOT parallel (middle floor)
- 2 - 1x12 @ 15 1/4” - both ends beveled at 22 1/2 degrees off square, long point to long point, ends NOT parallel (lower roof)
- 1 - 1x12 @ 18” - both ends beveled at 22 1/2 degrees off square, long point to long point, ends NOT parallel (loft floor)
- 1 - 1x12 @ 12” (upper floor divider)
- 2 - 1x12 @ 10” - both ends beveled at 22 1/2 degrees off square, long point to long point, ends NOT parallel (upper roof)
- 2 - 1x6 @ 2 1/4” long point, cut at 22 1/2 degrees off square (optional loft siding)
Back plywood is 29” x 28 1/2” overall.
- measuring tape
- square
- pencil
- safety glasses
- hearing protection
- drill
- compound miter saw
- nailer
- sander
- countersink drill bit
Step by step
Step 1
Start by just putting together a small bookshelf. The only difference is the top has beveled ends for the barn style roof. NOTE: Dividers are optional! You could just add in 1x3s to make stables down there later too!

Step 2
It may be easier to dry fit the entire roof just to make sure everything fits and works first. Make sure you mark all joints first, then all you have to do is line up your marks with the other boards. If you have a nailer, those can be super handy in keeping things in place, or you can use clamps.

Step 3
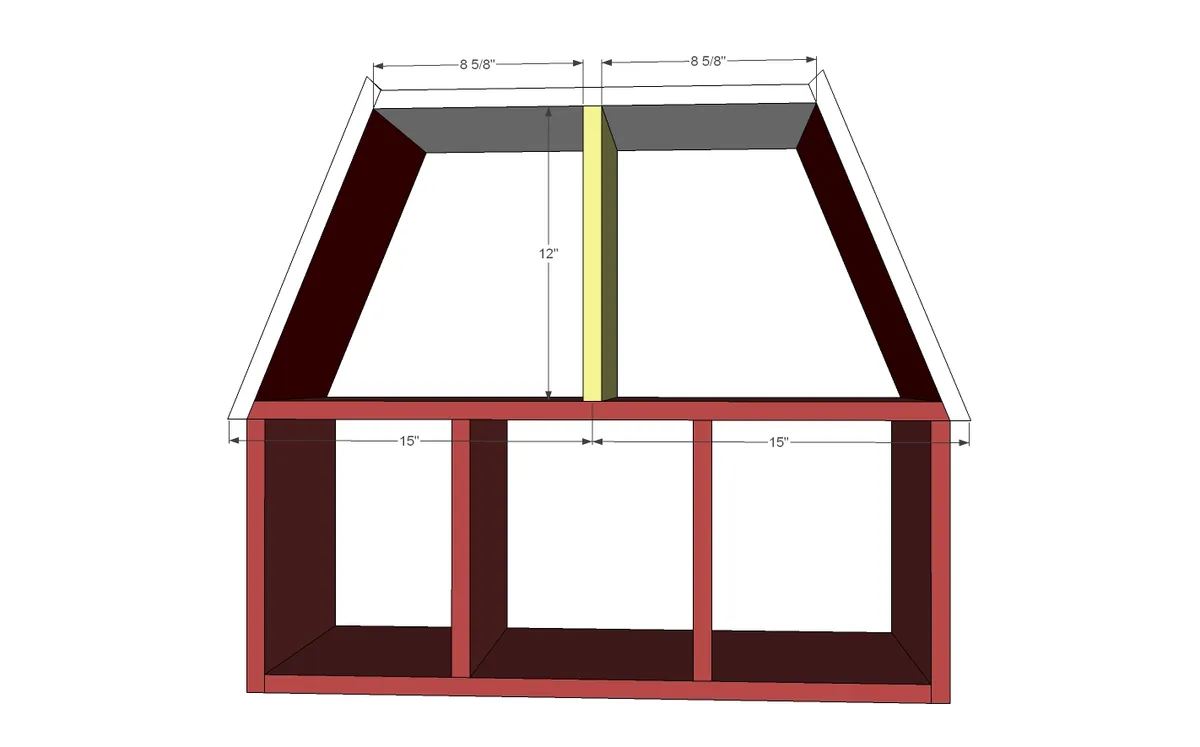
This will tie the two lower roofs in. Attach with screws or pocket hole screws.

Step 4
The center divider is optional.
Step 5

Step 6
Finally add the top roof - glue here is your friend! Nail to the pieces from step 5.

Back
For the back, lay the project on the 1/4" plywood and trace. Cut out with a jigsaw and attach to back with 1 1/4" finish nails or screws and glue. Attach to all fixed shelves and dividers for the best joint.
Finishing
Sand all surfaces, starting with a medium grit and finishing with fine. Wipe off the dust, fill any holes or gaps with wood filler, and sand smooth once dry. Apply primer if you're painting, then finish with your choice of paint or stain and seal with a durable clear topcoat. For outdoor projects, use exterior-rated primer, paint or stain, and sealer so the piece stands up to the weather.