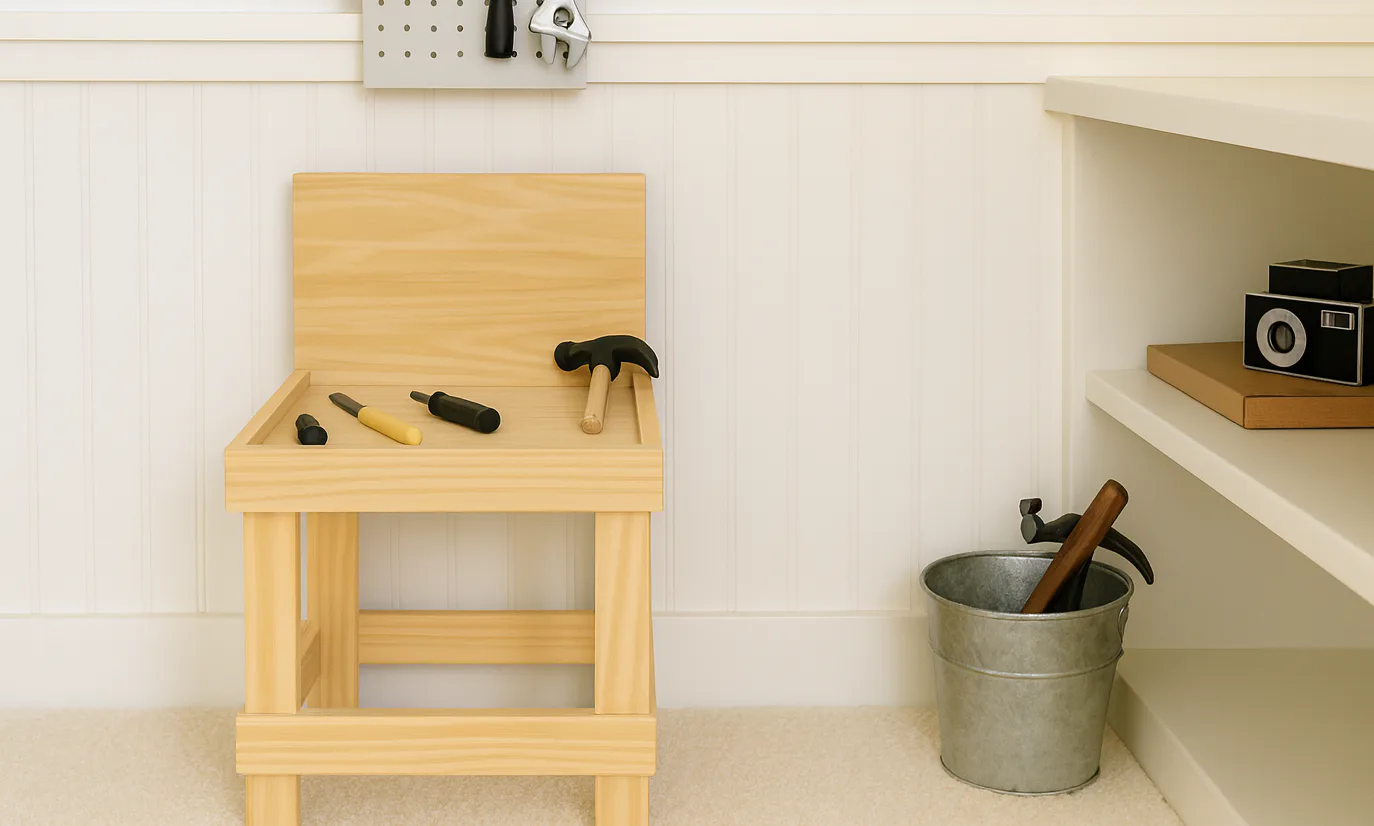
Basic Play Toy Workbench
to build a simple toy workbench using just 1x materials. Step by step diagrams, lots of reader submitted photos and complete shopping and cut lists from design image is rendered from plans.
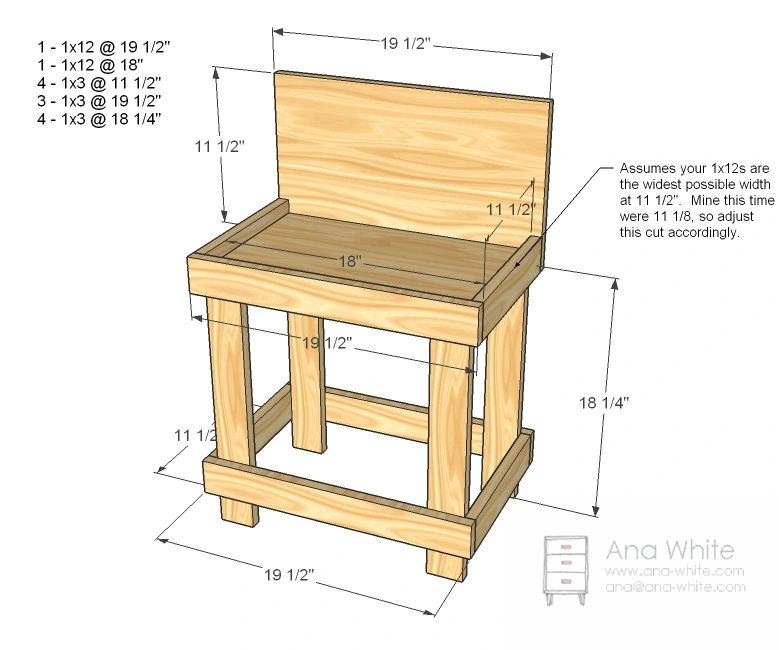
Dimensions
Use the size-specific shopping and cut lists below.
What you need
- 1 – 4′ long 1×12
- 2 – 8′ long 1x3s
- 1 1/4″ self tapping star bit screws
- 2″ self tapping star bit screws
- wood glue, filler paint and finishing supplies
- 1 – 1×12 @ 18″
- 1 – 1×12 @ 19 1/2″
- 4 – 1×3 @ 11 1/2″
- 3 – 1×3 @ 19 1/2″
- 4 – 1×3 @ 18 1/4″
- measuring tape
- square
- pencil
- safety glasses
- hearing protection
- circular saw
- sander
Step by step
Tabletop Sides
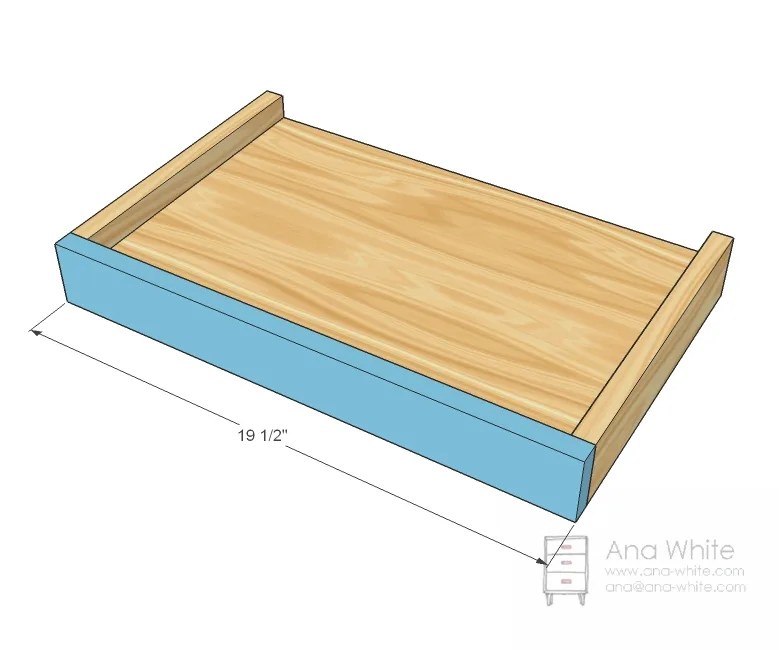
Here’s an easy trick – lay some 1×3 down on the table flat, then lay the 1×12 tabletop down on top of the 1x3s. That way the top is elevated 3/4″. Then simple screw the sides to the tabletop. Use glue, predrill pilot holes, and use 2″ screws or 1 1/4″ pocket hole screws.

Front
This is easy too. Just predrill holes and screw on. Use 2″ screws and glue.
Back
Attach the back to the top with 2″ screws and glue.

Legs
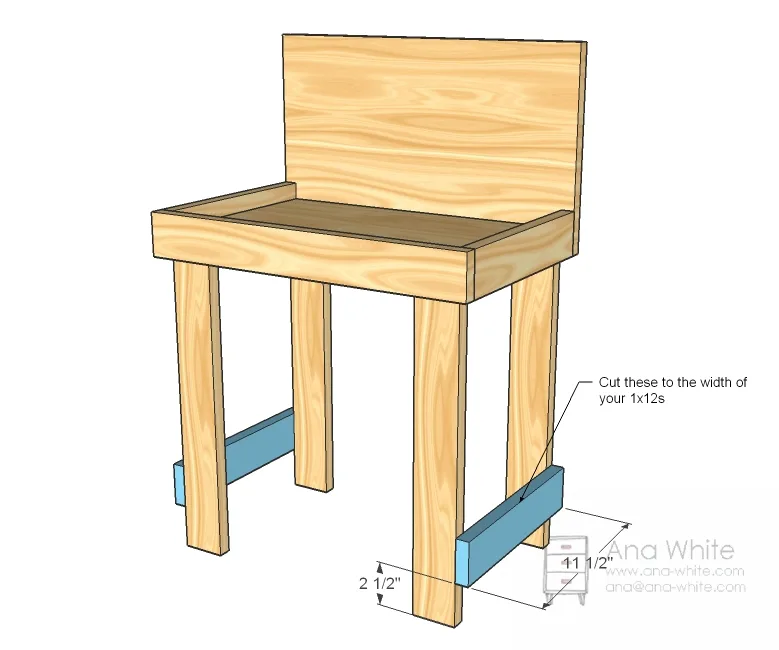
Predrill two holes along the top edges of the legs. Then attach to the tabletop with 1 1/4″ screws and glue.

Step 5
Bottom Front and Back
And now the front and back. Use 1 1/4″ screws and glue this time.

Finishing
Fill holes with wood filler and let dry. Make sure holes are completely filled – you may need to add a second coat. Sand with 120 grit sandpaper. Vacuum and wipe clean with a damp cloth. Prime and paint.
Step 8
I sure appreciate you reading my ramblings, and trusting my plans. Thank you!

Finishing
Sand all surfaces, starting with a medium grit and finishing with fine. Wipe off the dust, fill any holes or gaps with wood filler, and sand smooth once dry. Apply primer if you're painting, then finish with your choice of paint or stain and seal with a durable clear topcoat. For outdoor projects, use exterior-rated primer, paint or stain, and sealer so the piece stands up to the weather.