Big Kids Picnic Table
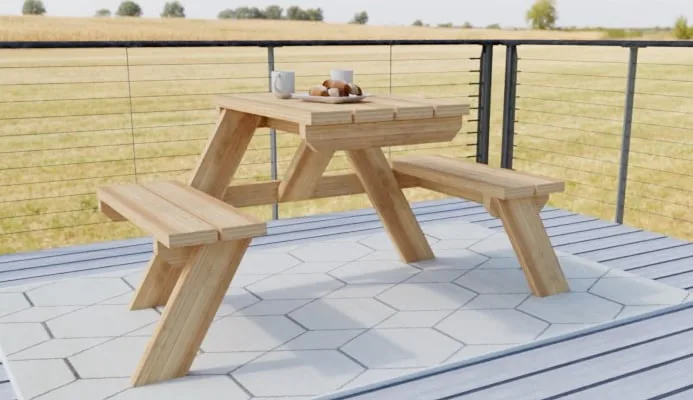
Our favorite kids picnic table! Designed to fit bigger kids, this super sturdy picnic table is big enough to sit a small adult too! Super easy to build design has been built hundreds of times already! Build your own kids picnic table with the best plans - Step by step diagrams, shopping and cut lists with video tutorial.
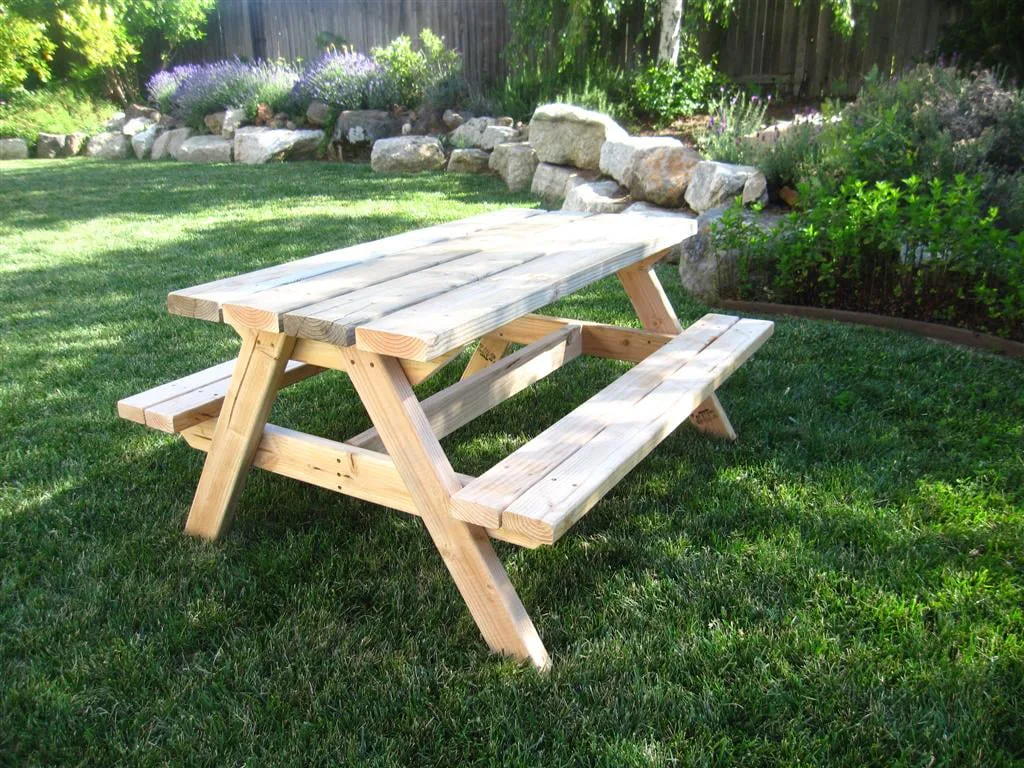
Dimensions
Use the size-specific shopping and cut lists below.

What you need
- 2 – 2×6 Boards, 8′ Long
- 6 – 2×4 Boards, 8′ Long
- 60 - 2 1/2″ self tapping star bit screws, exterior rated (can also be up to 2-3/4" in length)
- 4 – 2×6 @ 48″ (tabletop)*
- 2 – 2×4 @ 22 3/4″ (tabletop supports)**
- 1 – 2×4 @ 38″ (center tabletop support)
- 4 – 2×4 @ 26″ both ends cut at 30 degrees off square, long point to short point measurement, ends ARE parallel (legs)
- 2 – 2×4 @ 41″ (seat supports)**
- 4 – 2×4 @ 48″ (seat boards)*
- 2 - 2x4 @ 18-3/8" long point to short point measurements, ends ARE parallel (cross supports)***
*If your lumber measures exactly 96" long, simply cut in half - the cuts may end up 47-7/8" or similar, it won't matter in the project
**Soften the ends at 45 degrees as shown in the plans
***Additional cut is needed to fit inside the cross support
- measuring tape
- square
- pencil
- safety glasses
- drill
- circular saw
- sander
Step by step
Step 1
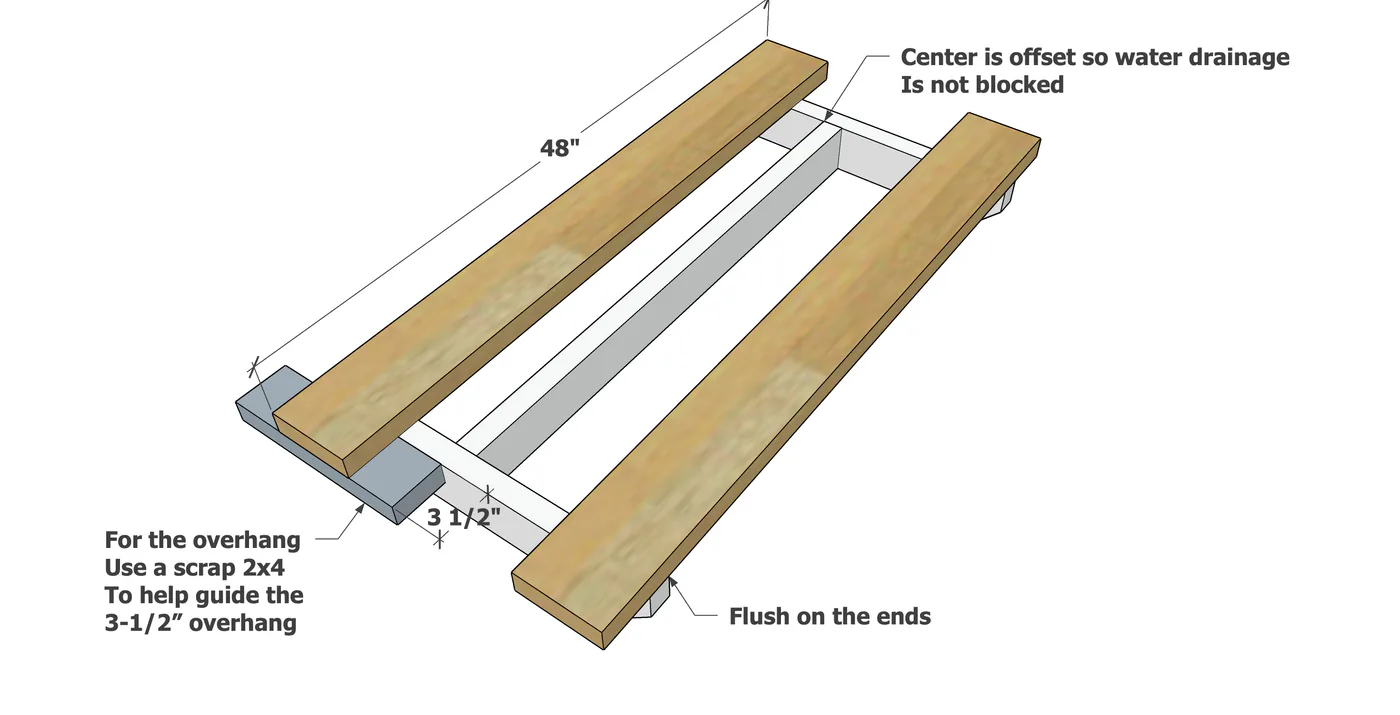
Cut the ends of the shorter tabletop support boards off at 45 degrees from the center of the end to soften sharp corners. Then attach to the center tabletop support. Notice this board is off center - this is intentional to allow water to drain between tabletop boards. Make sure the frame is "square" by taking opposite diagonals and adjusting until the opposite diagonal measurements match. This is to avoid the frame being a parallelogram instead of a rectangle.

Step 2
Attach the outer tabletop boards to the support frame with 2-1/2" screws through the top. Use a scrap 2x4 piece as a guide.
Step 3
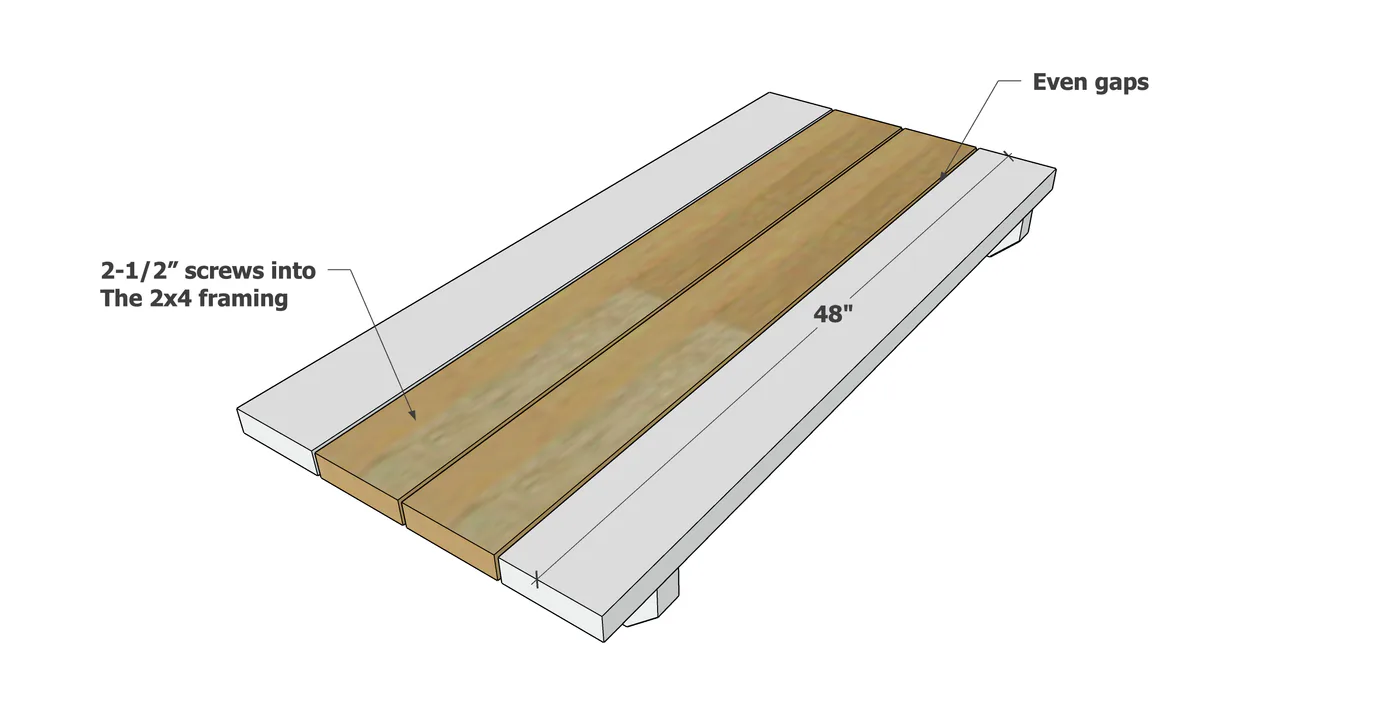
Fill in the center tabletop boards, and space the gaps evenly. Screw down.
Step 4
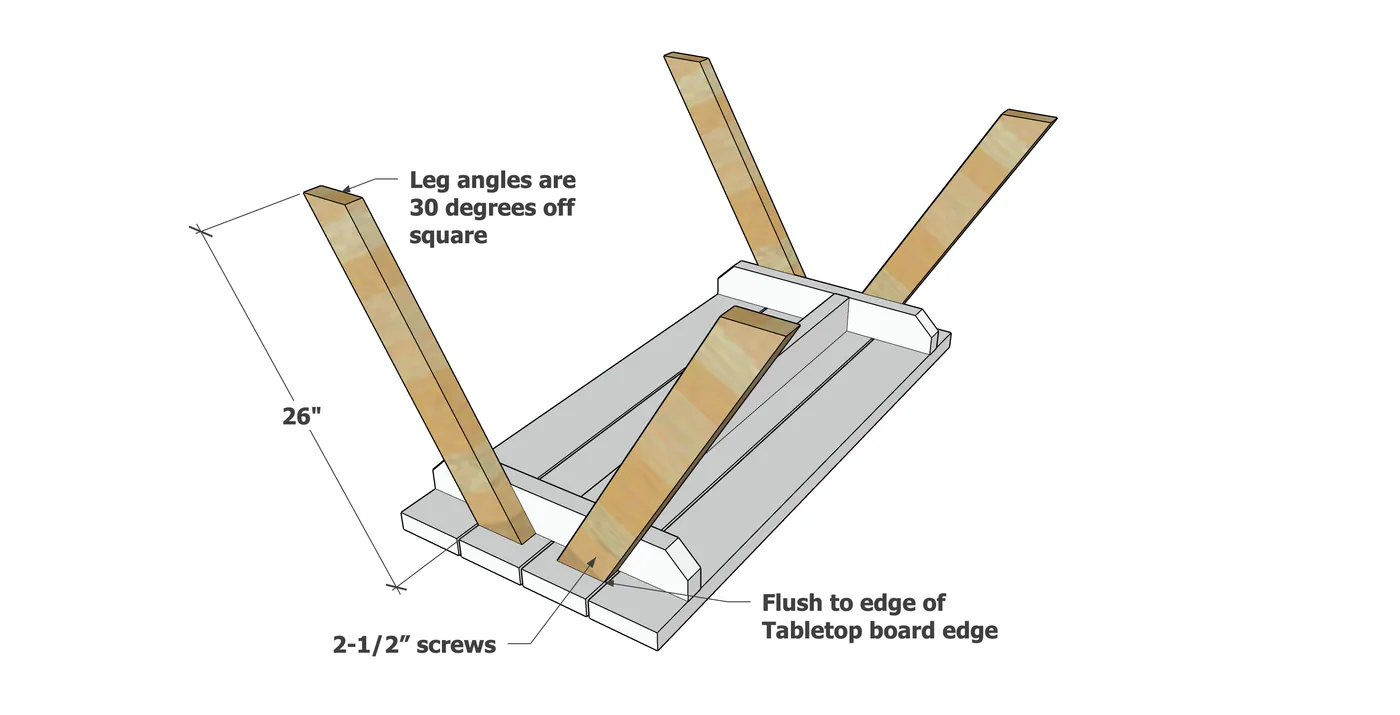
Attach the legs to the tabletop support frame with screws.
Step 5
Flip the project over on a flat, level surface. Make sure the table doesn't wobble - if it does, adjust a "short" leg by unscrewing and rotating to make it longer, and reattaching with screws. Cut the corners off of the seat stringers at a 45 degree angle. Set up on 9" tall wood scrap blocks, and adjust for an even overextension on both ends - about 9". Attach with wood screws to the legs.

Step 6
Attach the seat boards to the seat stringers, with even overhangs on both ends.
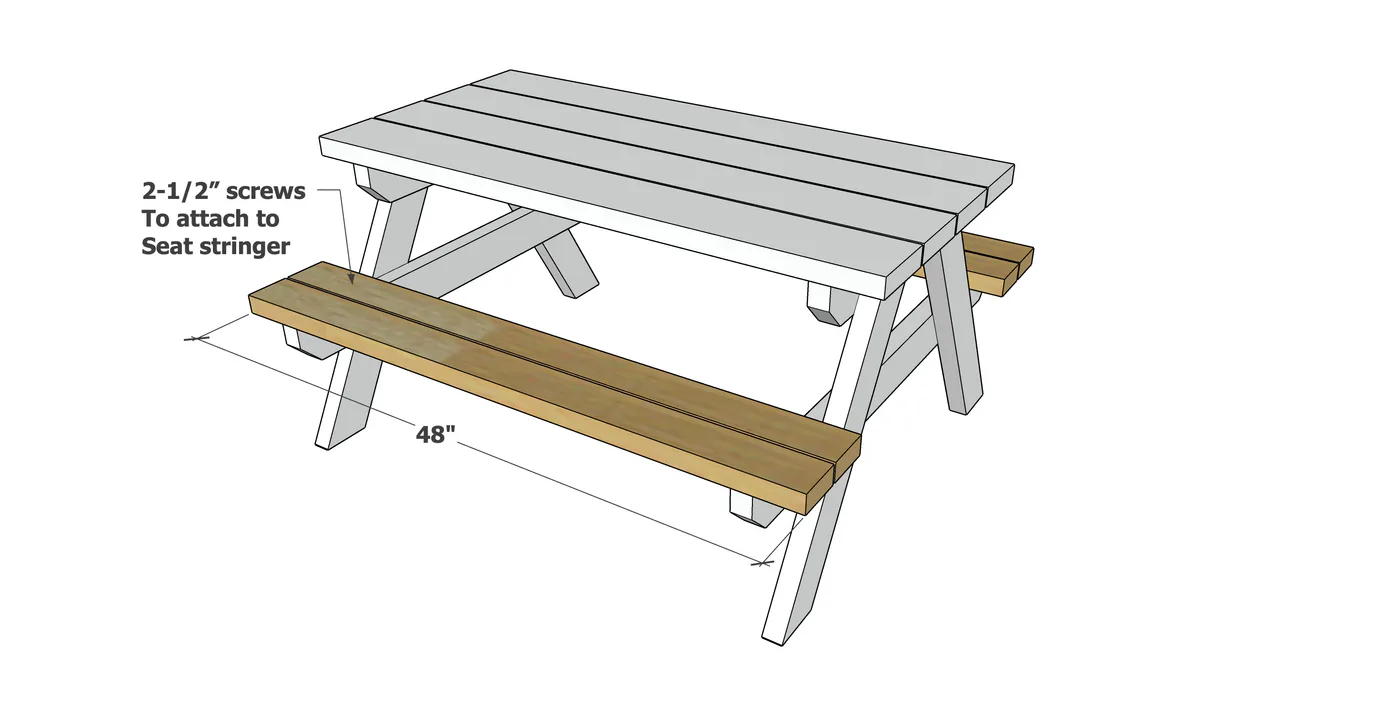
Ensure the picnic table is on a flat, level surface and there is no wobble.
Cut the cross supports and attach to the inside of the tabletop with screws.

Finishing
Sand all surfaces, starting with a medium grit and finishing with fine. Wipe off the dust, fill any holes or gaps with wood filler, and sand smooth once dry. Apply primer if you're painting, then finish with your choice of paint or stain and seal with a durable clear topcoat. For outdoor projects, use exterior-rated primer, paint or stain, and sealer so the piece stands up to the weather.