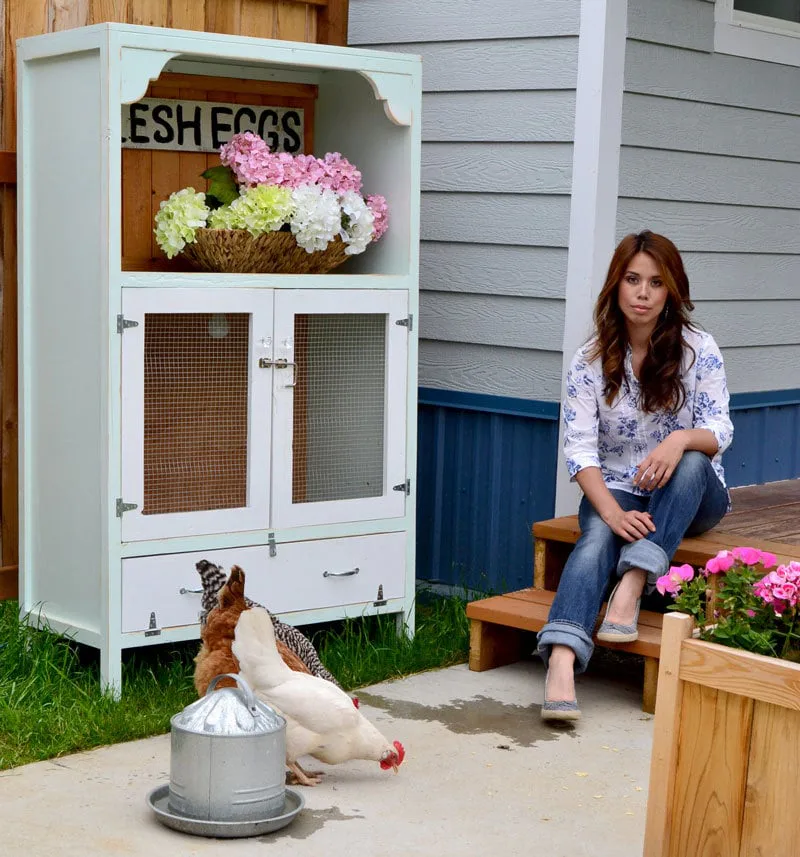
Chick Brooding Cabinet
Build a cabinet for brooding chicks! Use as a pet cage for birds and other animals!!
Dimensions
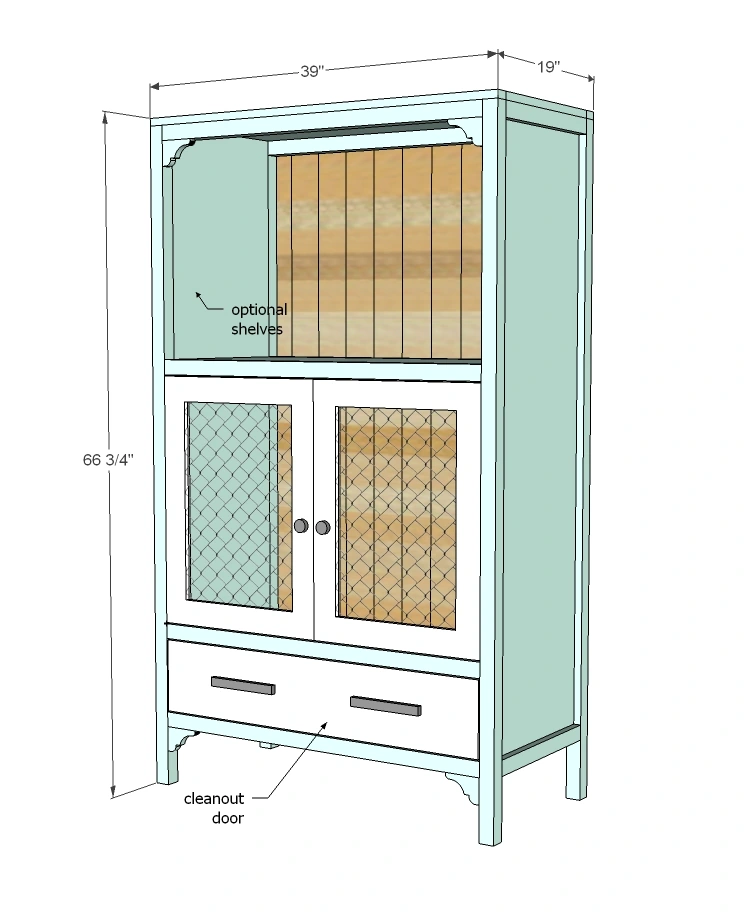
Use the size-specific shopping and cut lists below.
What you need
- 1 - sheet 3/4" plywood, ripped into 3 strips 15 1/2" wide by 8 feet long (referred to as 1x16 in this plan)
- 2 - 1x2 @ 8 feet long
- 2 - 1x3 @ 8 feet long
- 8 - 2x2 @ 8 feet long
- 1 - 1x8 @ 3 feet long
- 36" wide hardware cloth or chicken wire - I used about 4 feet total
- 3 sets of hinges
- 1/2" staples
- knobs, handles and latches
- 2 - 1x16 @ 60" (sides)
- 4 - 1x2 @ 15 1/2" (side trim)
- 4 - 2x2 @ 66" (legs)
- 8 - 2x2 @ 36" (front/back trim)
- 3 (or more) 1x2 @ 15 1/2" (for supporting grated bottom)
- 3 - 1x16 @ 36" (shelves) - extra is optional shelf not shown
- 1 - 1x16 @ 39" (top)
- 2 - 1x2 @ 39" (top)
- 1/4" plywood or other materials 38 1/2" x 60" (back)
- 1 - 1x8 @ 35 3/4" (bottom door tilts down)
- DOORS
- 4 - 1x3 @ 24 3/4"
- 4 - 1x3 @ 12 3/4"
- Hardware cloth or chicken wire stapled to back
- measuring tape
- square
- pencil
- safety glasses
- hearing protection
- kreg-jig
- drill
- circular saw
- jigsaw
- sander
- staple gun
- level
Step by step
Step 1
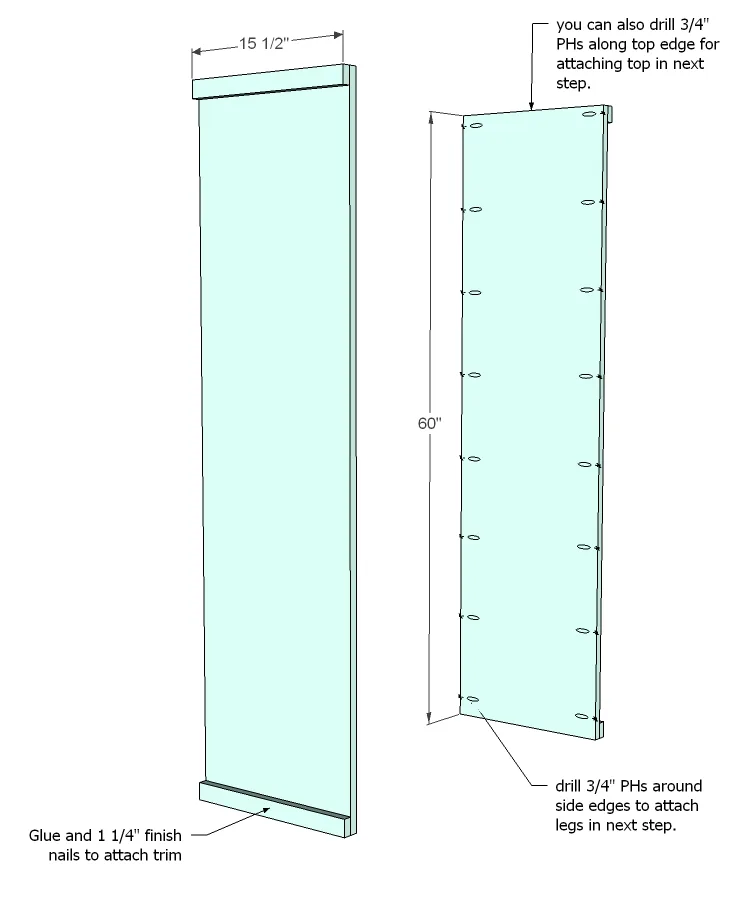
Start with the sides. Drill 3/4" PHs along sides and top edge. Attach side trim.
Step 2
Attach legs with 1 1/4" PH screws through predrilled holes.

Step 3
Now join the two sides to start making the box.

Step 4
This is for the mesh bottom. If you mesh needs more support, add more boards to support.

Step 5

Step 6
Followed by upper shelf.
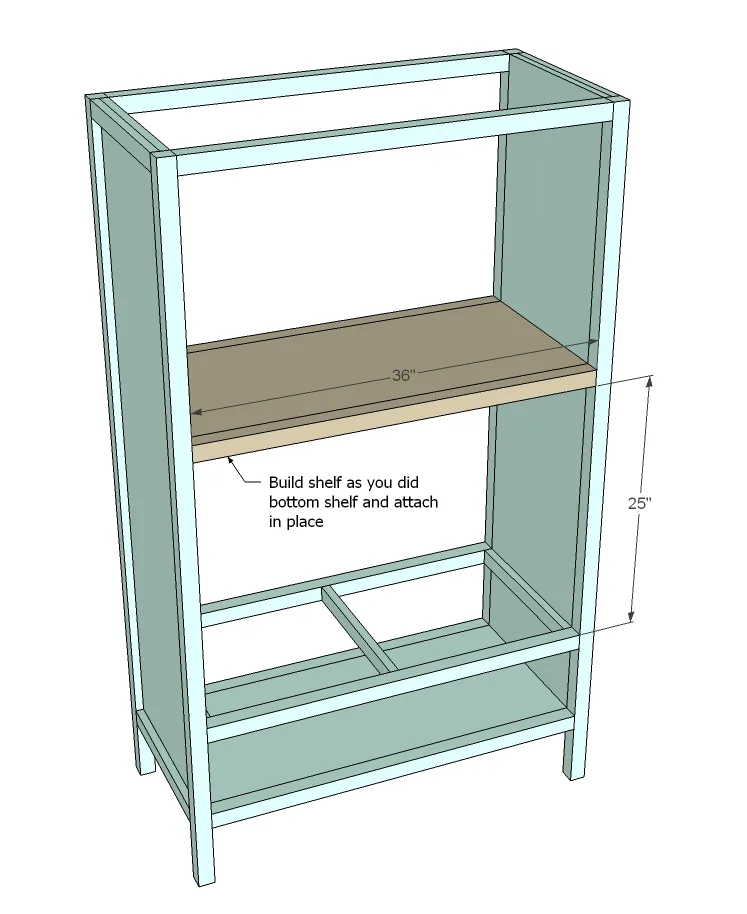
Step 7
And the top.

Step 8
Followed by adding the back.

Step 9
Build doors to fit openings. I stapled hardware cloth to back. Staple hardware cloth to bottom of middle shelf as well.
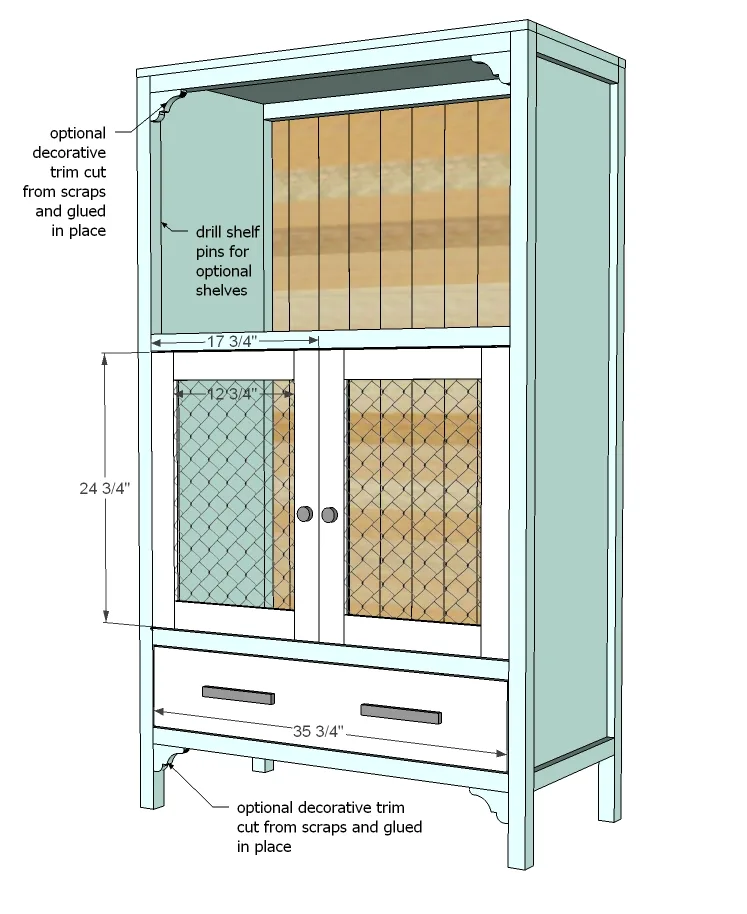
Finishing
Sand all surfaces, starting with a medium grit and finishing with fine. Wipe off the dust, fill any holes or gaps with wood filler, and sand smooth once dry. Apply primer if you're painting, then finish with your choice of paint or stain and seal with a durable clear topcoat. For outdoor projects, use exterior-rated primer, paint or stain, and sealer so the piece stands up to the weather.