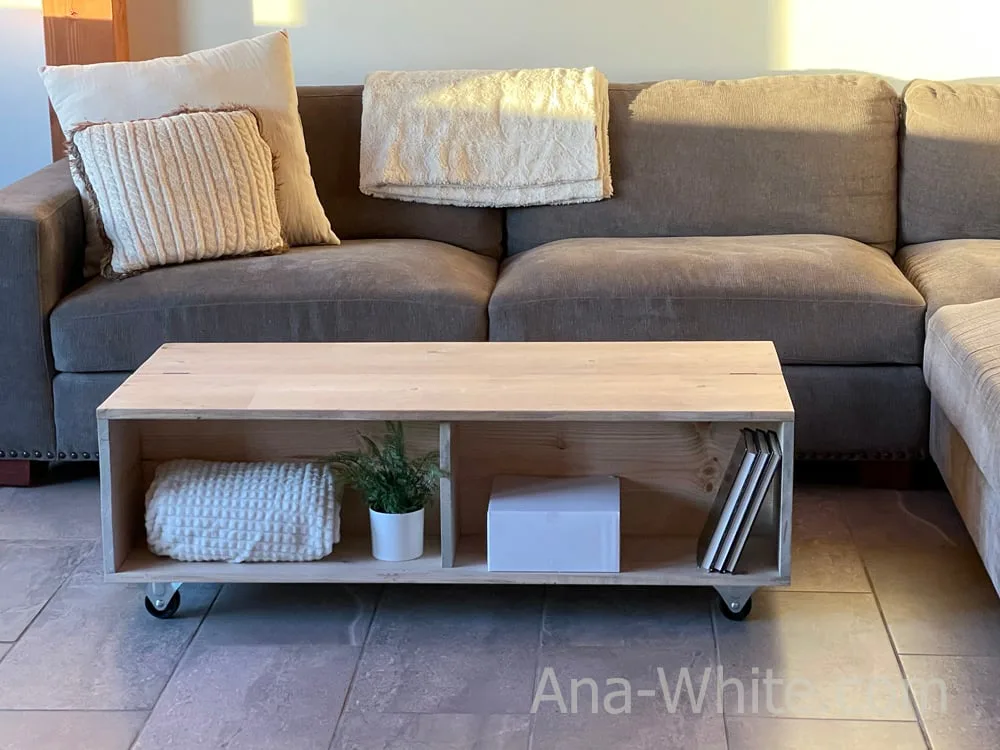
Coffee Table [Modern Farmhouse Collection]
This modern farmhouse coffee table is so gorgeous! You can build it for about $60 using basic tools. include shopping, cut lists and step by step diagrams.

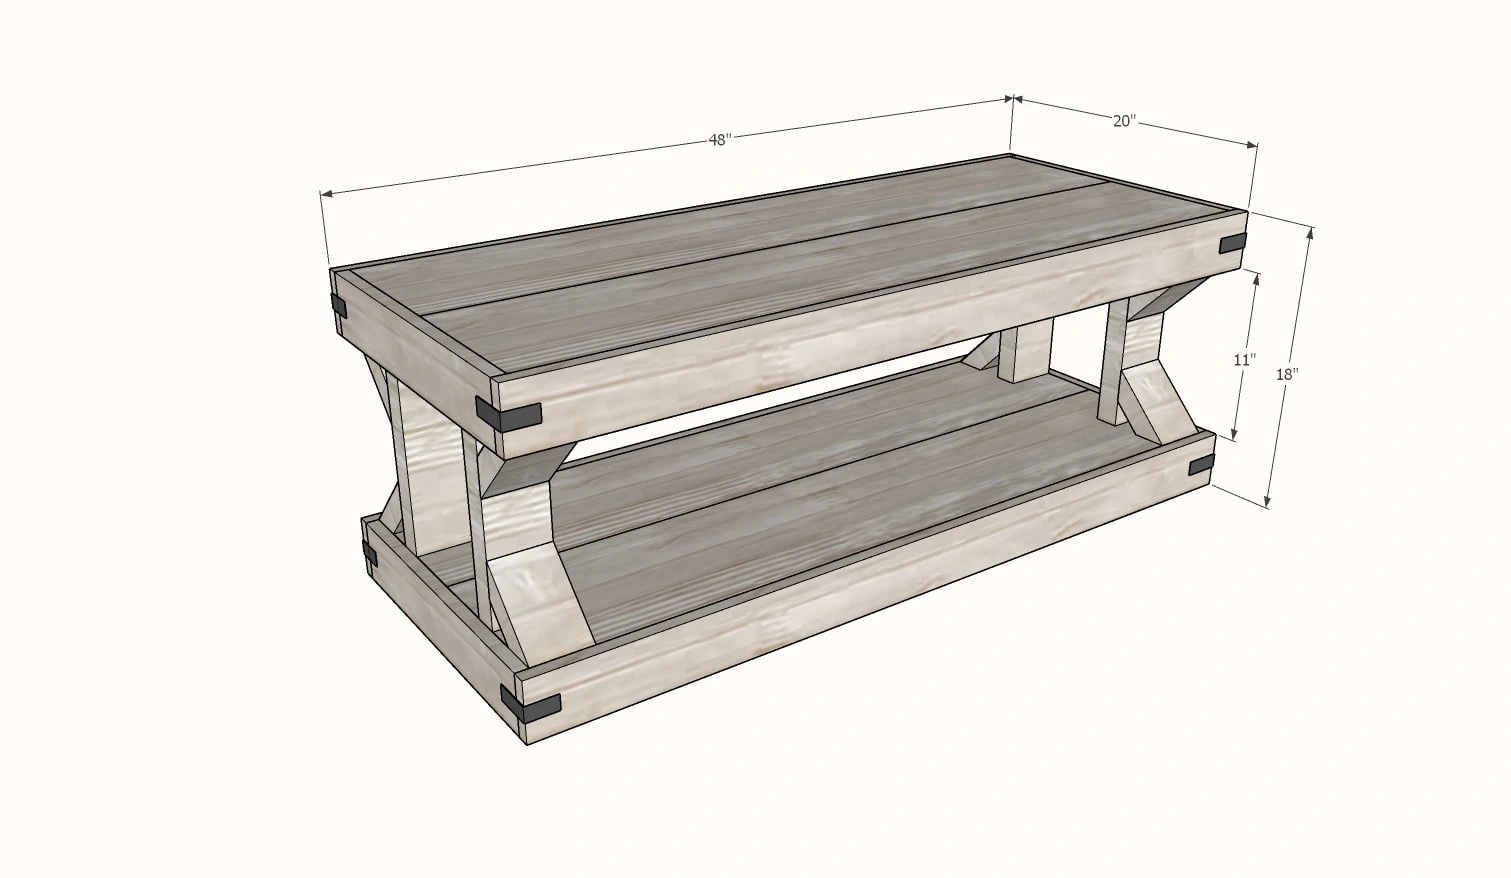
Dimensions
Use the size-specific shopping and cut lists below.
What you need
- 2 - 1x10 @ 8 feet long *
- 3 - 1x4 @ 8 feet long
- 2 - 2x4 @ 8 feet long
- 2" and 1-1/4" brad nails
- 1-1/4" pocket hole screws recommended
- We used these corner brackets from Home Depot
*You can substitute the 1x10 tops for an off the shelf edge glued panel or a plywood panel of your choice in size
* Humid climates may wish to use 3/4" thick plywood or MDF instead of the 1x10s, as they will not swell as much as soft woods
- 4 - 1x10 @ 46-1/4" (or can be substituted for plywood)
- 4 - 1x4 @ ~18-1/2"
- 4 - 1x4 @ 47-3/4"
- 2 - 2x4 @ ~18-1/2"
- 4 - 2x4 @ 11"
- 8 - 2x4 @ 5-1/2" - long point to long point measurement, both ends cut at 45 degrees, ends NOT parallel
- measuring tape
- square
- pencil
- safety glasses
- hearing protection
- drill
- compound miter saw
- nailer
- sander
Step by step
Step 1
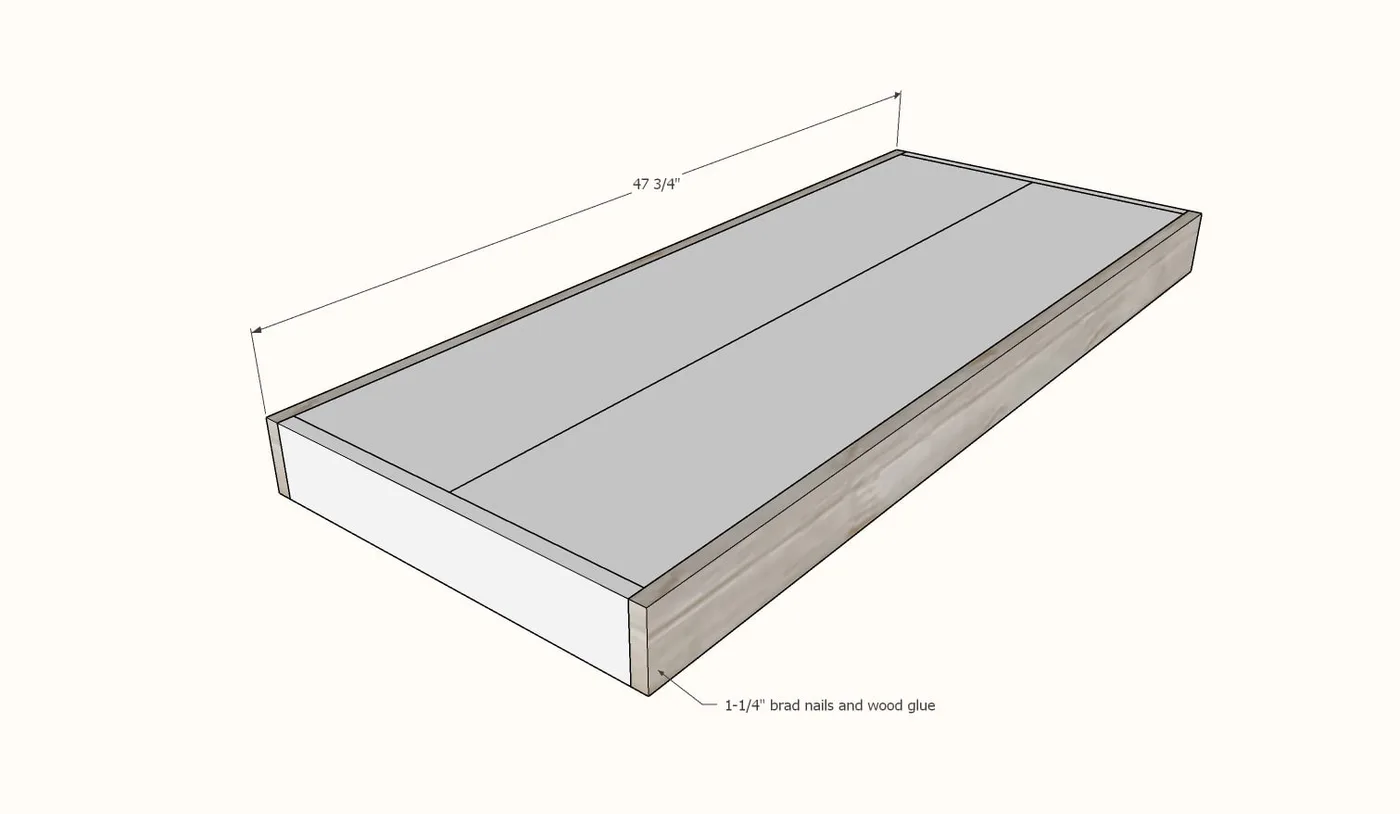
If using the 1x10s for the shelf tops, join along the long edge with 3/4" pocket holes and 1-1/4" pocket hole screws. Then attach 1x4 trim to ends with 1-1/4" brad nails and glue.

Measure and cut the 1x4 long trim to fit, nail and glue to the top and the ends.
Build two exactly to match.
Step 3
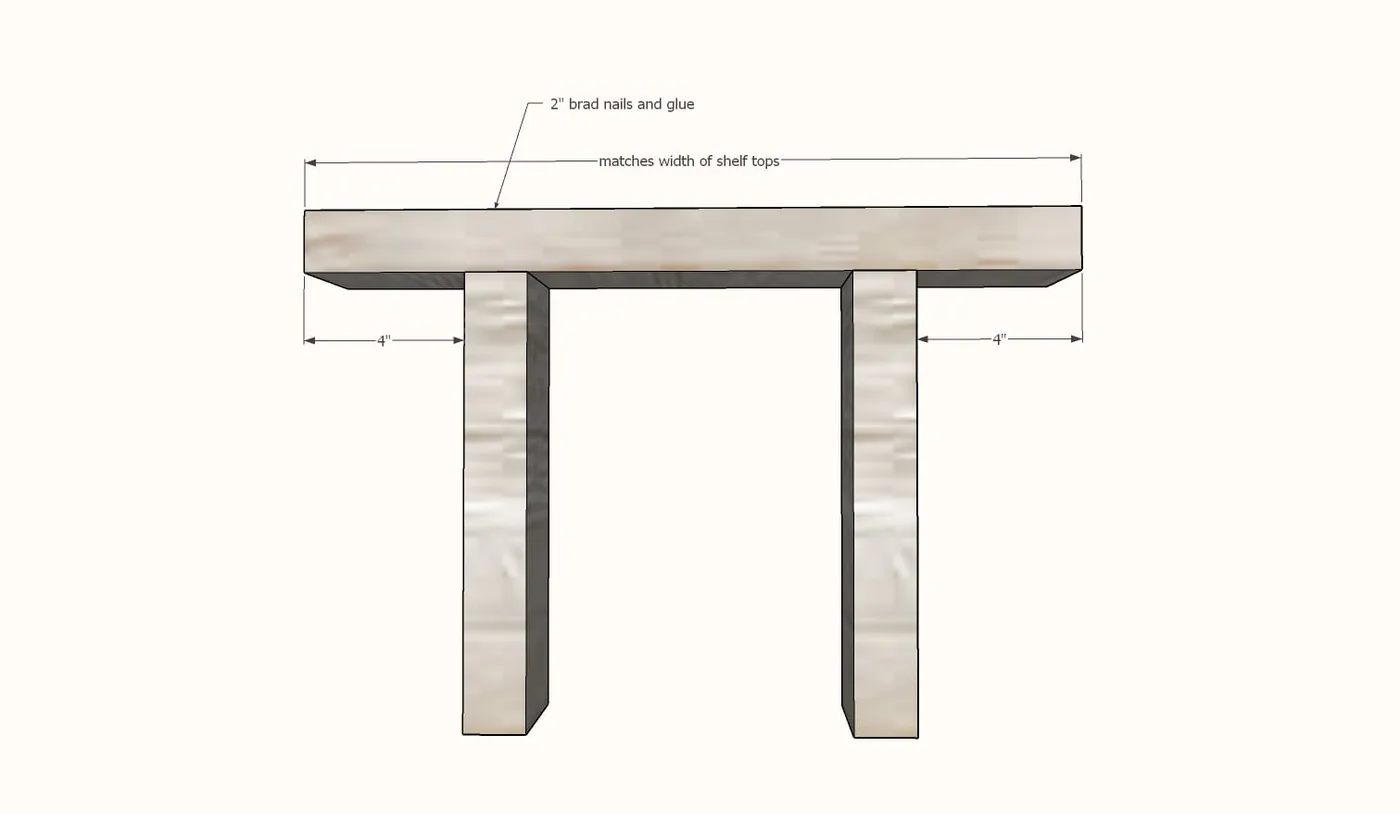
Cut the top 2x4 to match the 1x4 ends (if you cut your 1x4s to 18-1/2", then cut the top 2x4 @ 18-1/2") Attach coffee table legs to the bottom with 2" brad nails and wood glue.
Step 4
Attach angled supports, making sure the legs are square to the top with a carpenter's square.
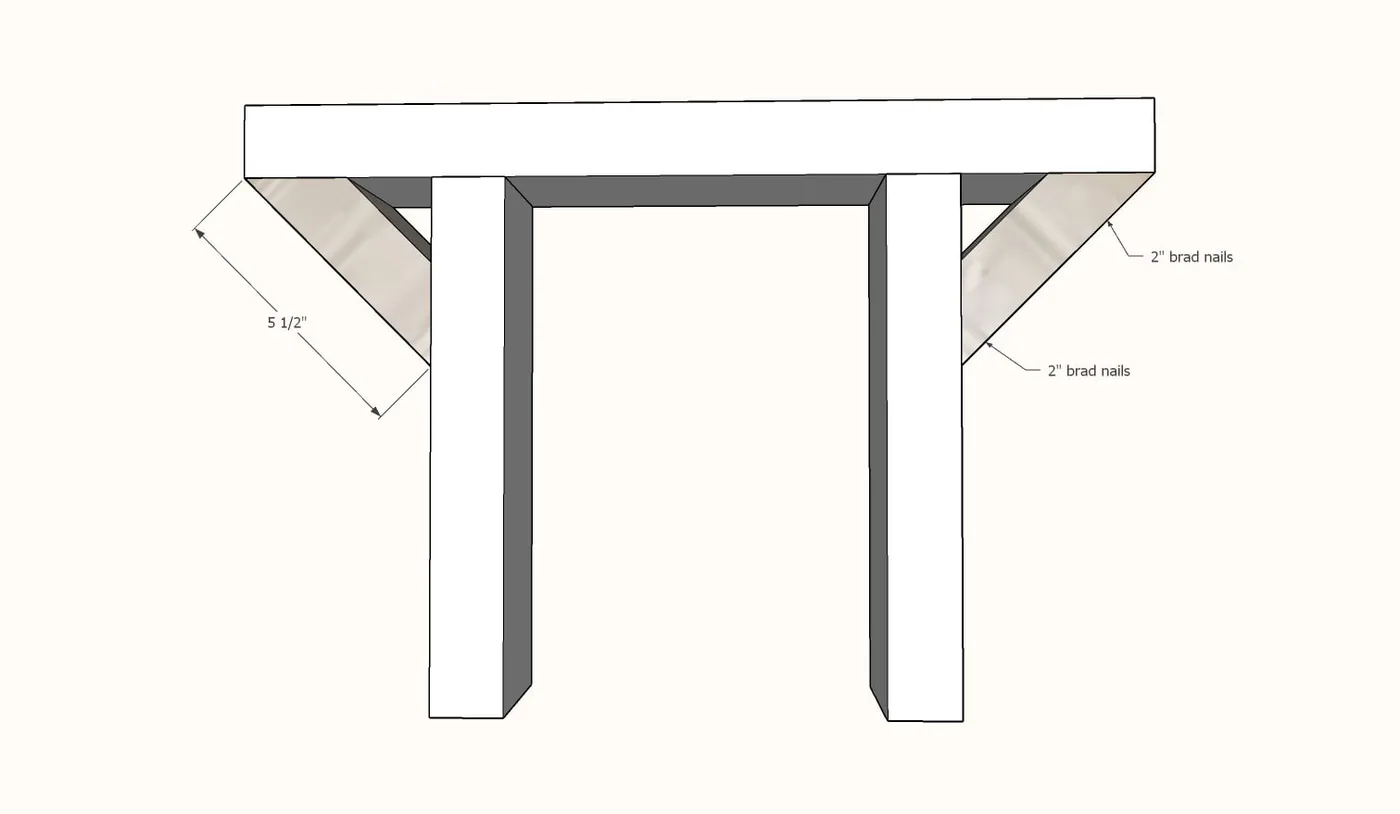
Shown upside down.
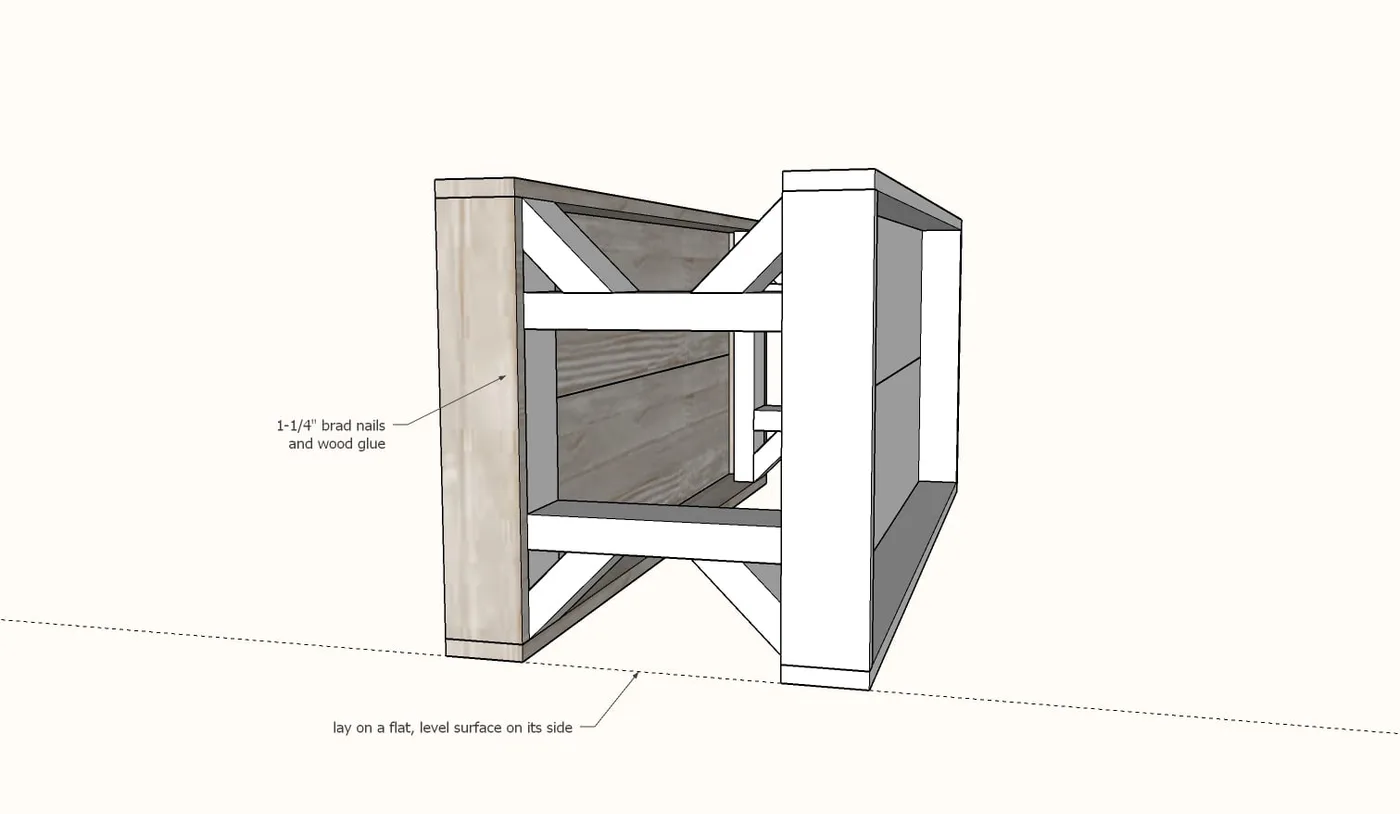
Attach the legs to the bottom shelf. I recommend using screws to attach the legs.

Place the coffee table on it's side on a level surface, with the legs set inside the top.
Attach with glue and 1-1/4" brad nails and glue.
Finishing
Sand all surfaces, starting with a medium grit and finishing with fine. Wipe off the dust, fill any holes or gaps with wood filler, and sand smooth once dry. Apply primer if you're painting, then finish with your choice of paint or stain and seal with a durable clear topcoat. For outdoor projects, use exterior-rated primer, paint or stain, and sealer so the piece stands up to the weather.