Tablet Stand
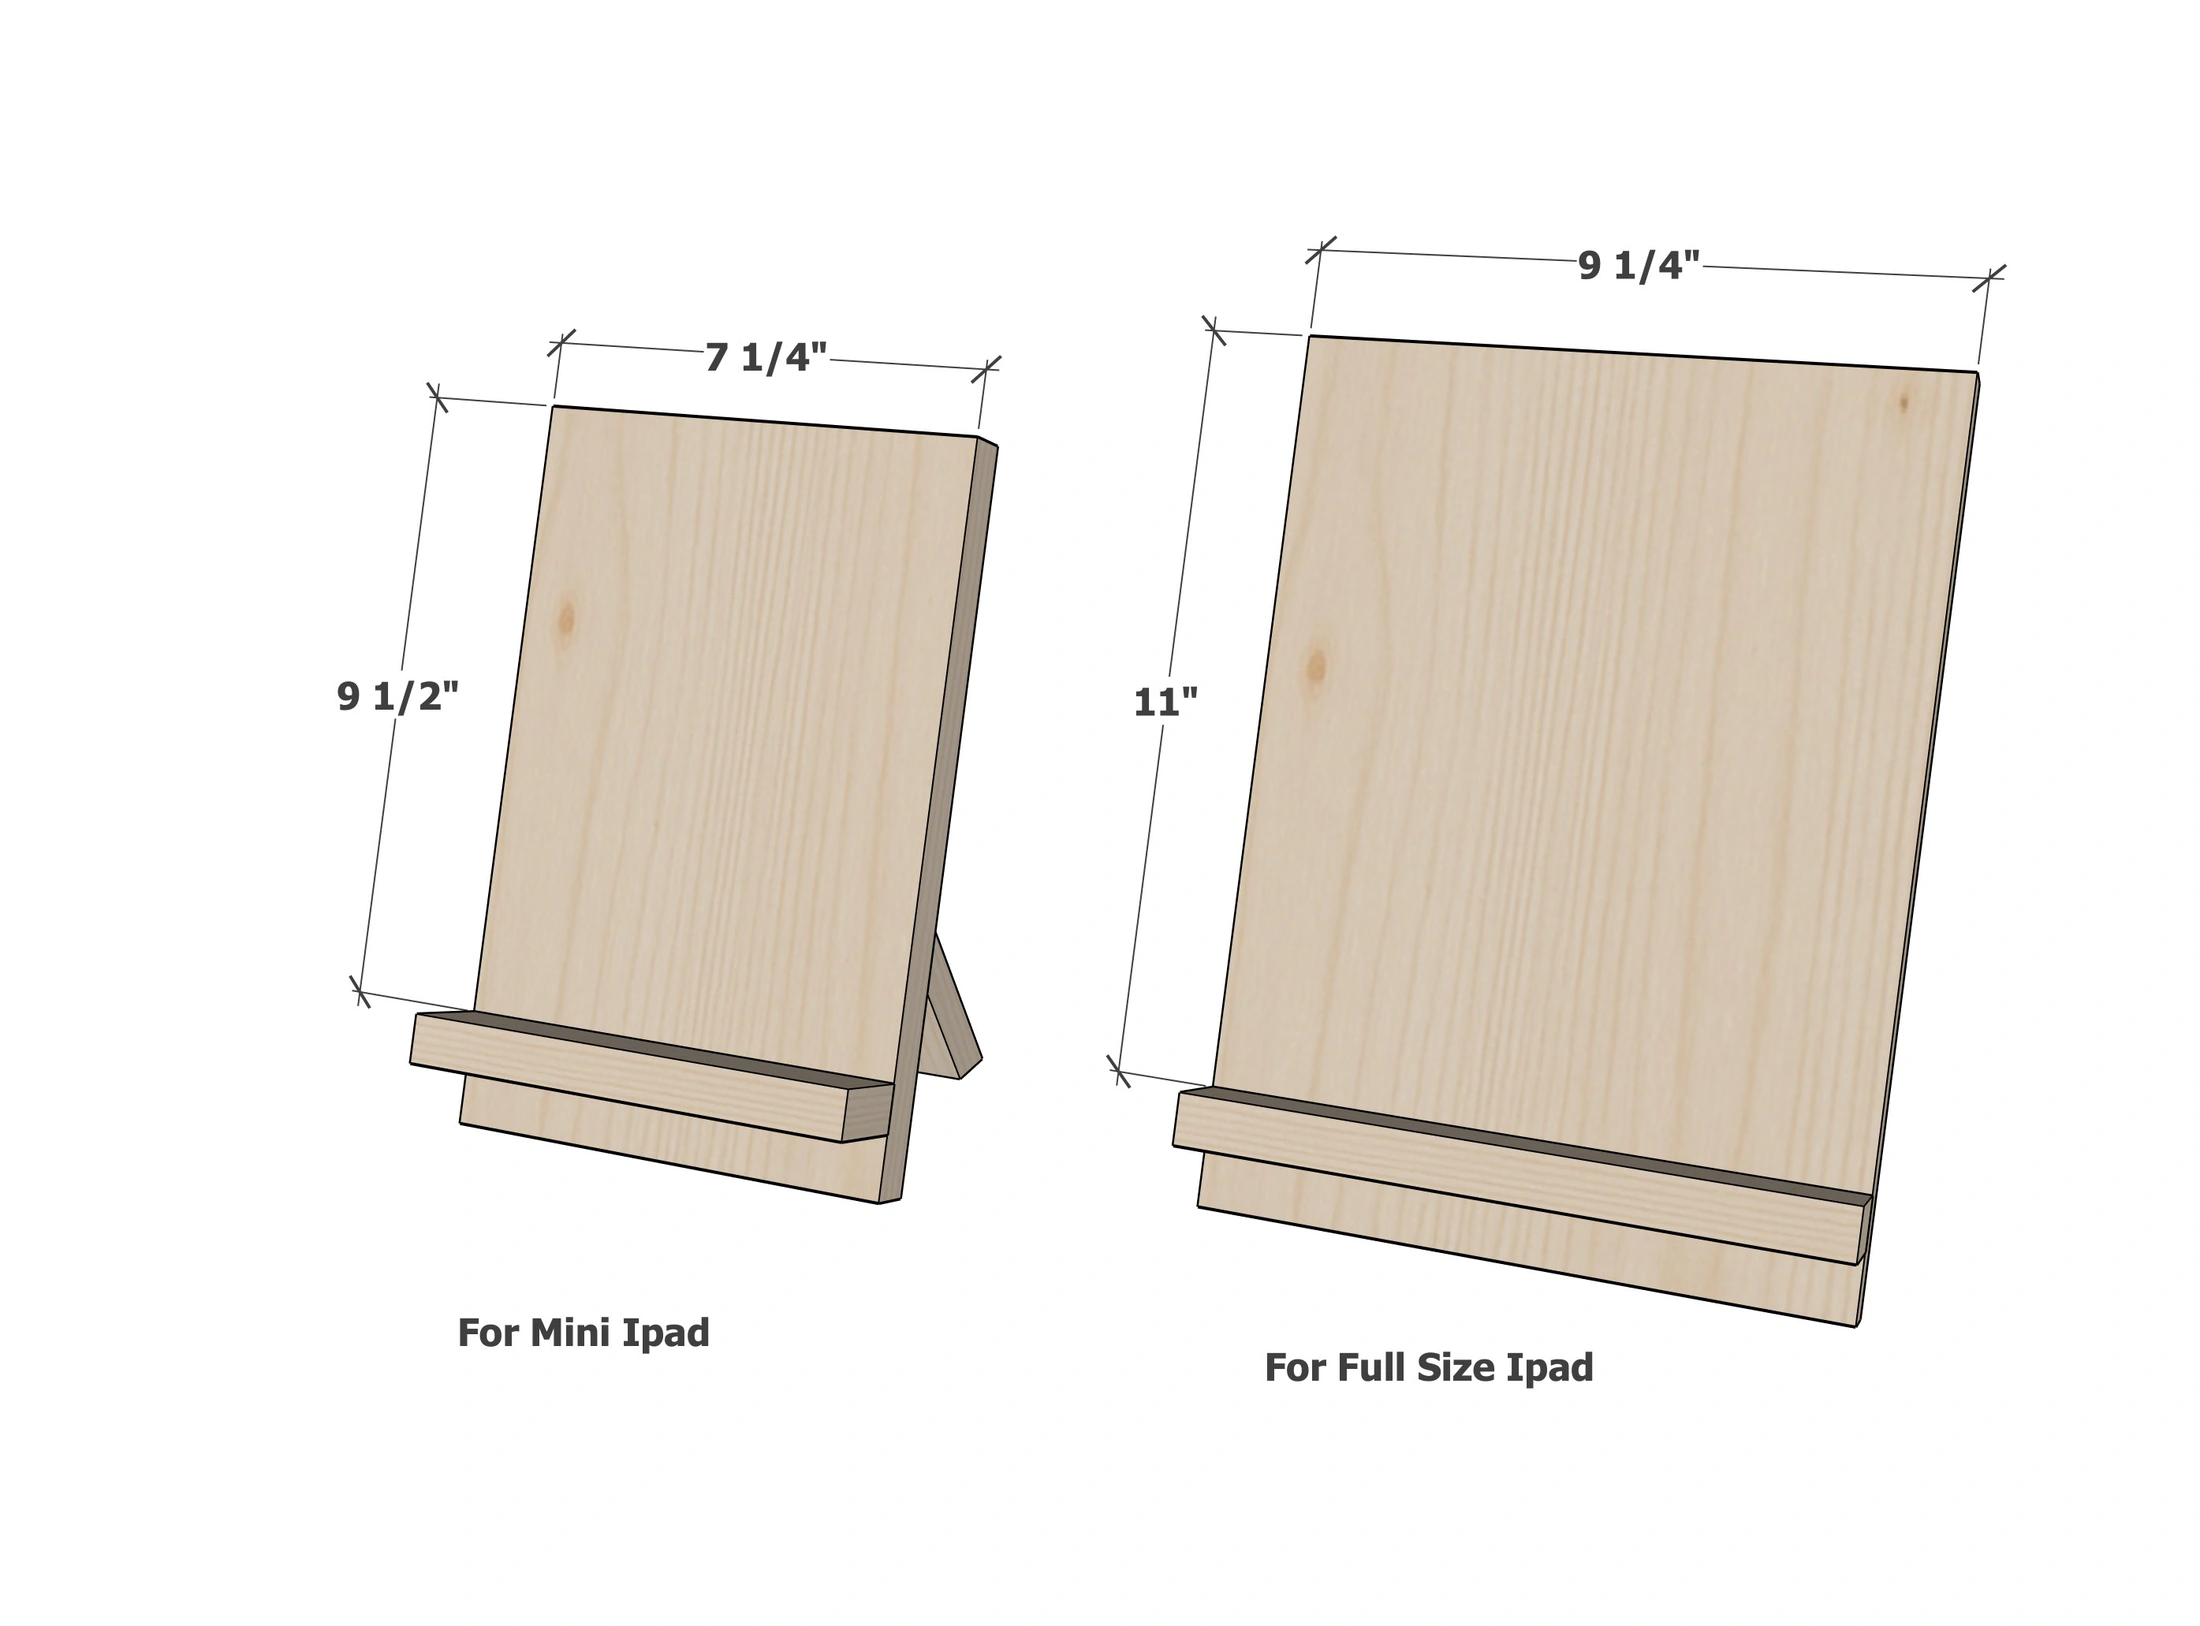
Make your own simple, sturdy wooden tablet stand—perfect for hands-free recipe viewing in the kitchen. This DIY plan includes two size options: one for a full-size iPad and another scaled for the iPad Mini. Each stand is made from just three pieces of wood with all square cuts, making it beginner-friendly and fast to build. Ideal for gifting, kitchen use, or work-from-home setups. Includes full dimensions, cut list, and build tips!

Dimensions
Use the size-specific shopping and cut lists below.
What you need
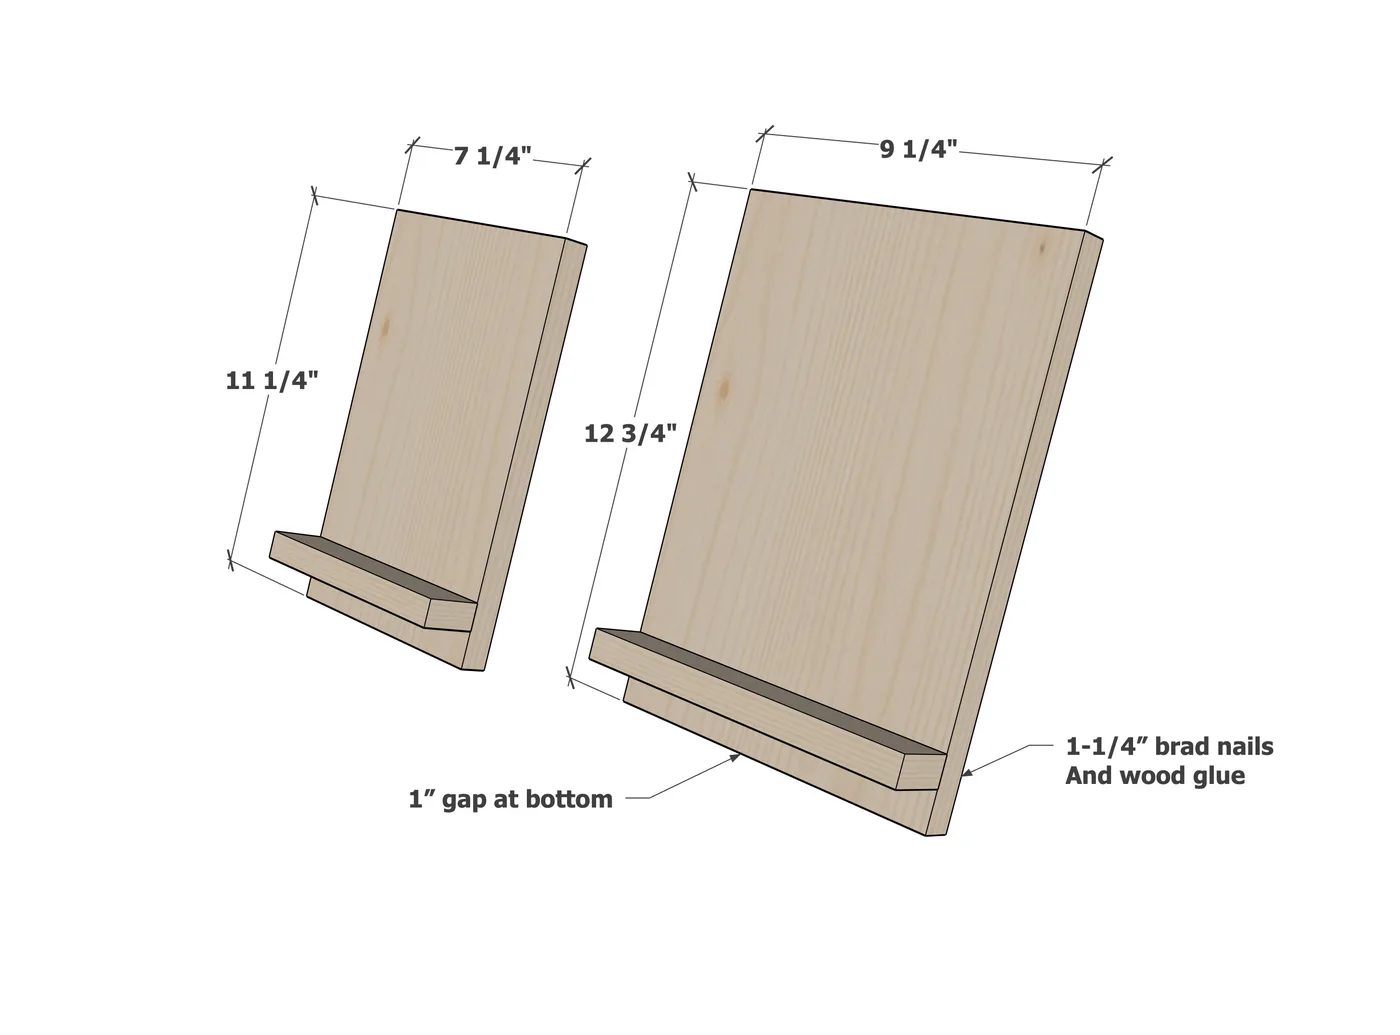
- 1 - 1x2 @ 7-1/4"
- 1 - 1x8 @ 11-1/4"
- 1 - 1x6 @ 6-1/4"
- 1-1/4" brad nails
- wood glue
- wood stain
- 1 - 1x2 @ 9-1/4"
- 1 - 1x10 @ 12-3/4"
- 1 - 1x6 @ 7-1/2"
- 1-1/4" brad nails
- wood glue
- wood stain
Small Tablet Holder Shopping List
Large Tablet Holder Cut List
- 1 - 1x2 @ 7-1/4"
- 1 - 1x8 @ 11-1/4"
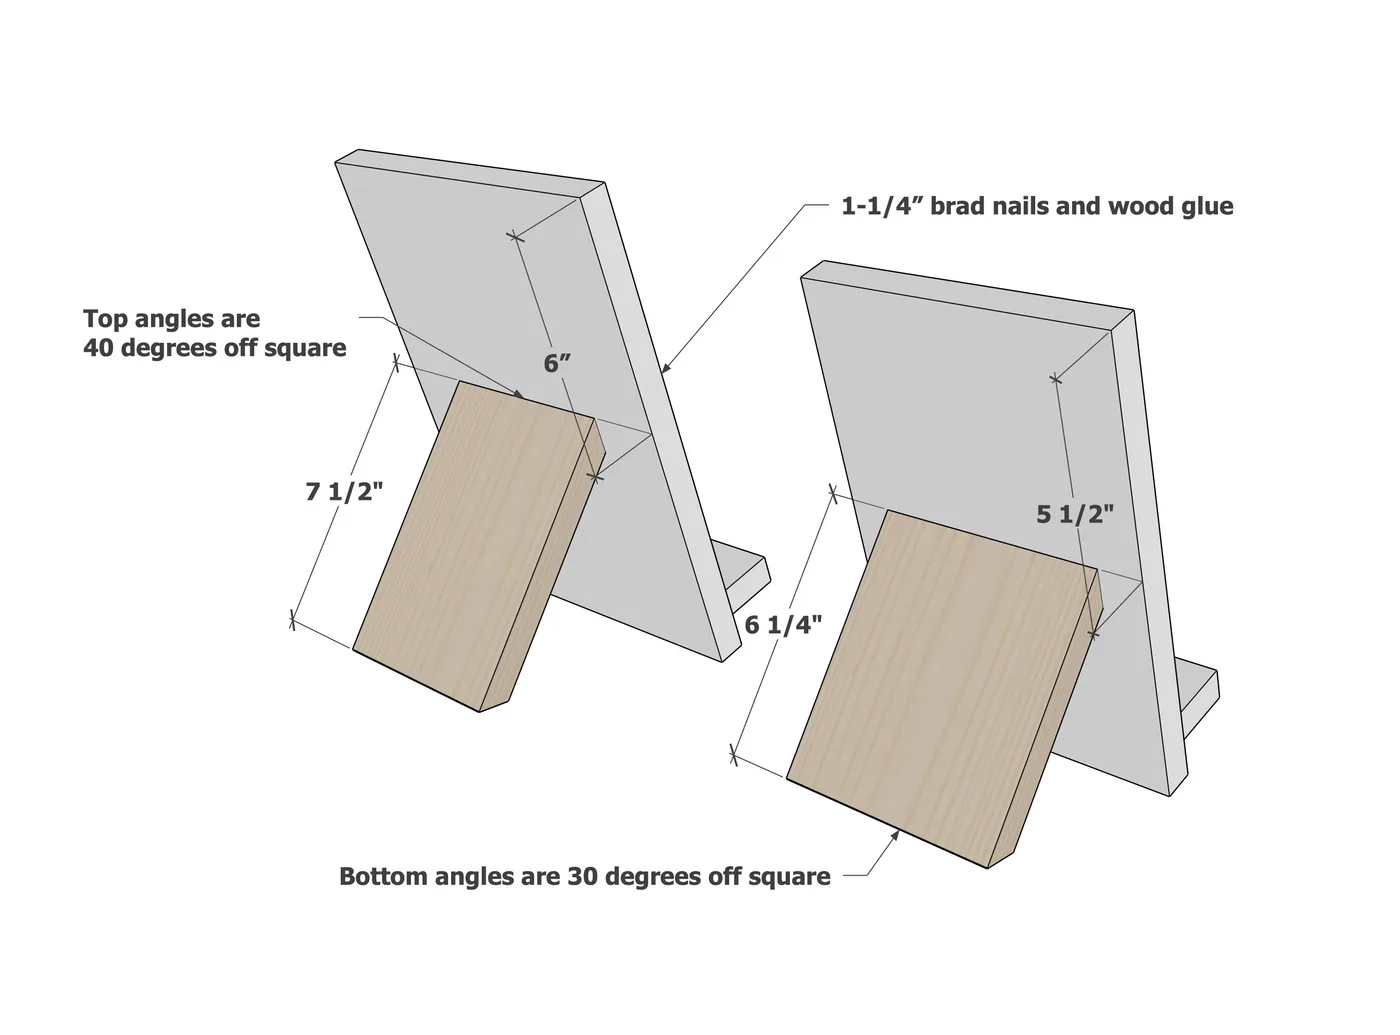
- 1 - 1x6 @ 6-1/4" - long point to long point measurement, one end cut at 30 degrees off square, other end cut at 40 degrees off square
- 1 - 1x2 @ 9-1/4"
- 1 - 1x10 @ 12-3/4"
- 1 - 1x6 @ 7-1/2" - long point to long point measurement, one end cut at 30 degrees off square, other end cut at 40 degrees off square
Small Tablet Holder Cut List
Large Tablet Holder Cut List
- measuring tape
- pencil
- safety glasses
- compound miter saw
- nailer
Step by step
Step 1
Attach the 1x2 to the 1x2 to the main piece with glue and brad nails.
Step 2
Attach the back support to the back with brad nails and glue.
Finishing
Sand all surfaces, starting with a medium grit and finishing with fine. Wipe off the dust, fill any holes or gaps with wood filler, and sand smooth once dry. Apply primer if you're painting, then finish with your choice of paint or stain and seal with a durable clear topcoat. For outdoor projects, use exterior-rated primer, paint or stain, and sealer so the piece stands up to the weather.