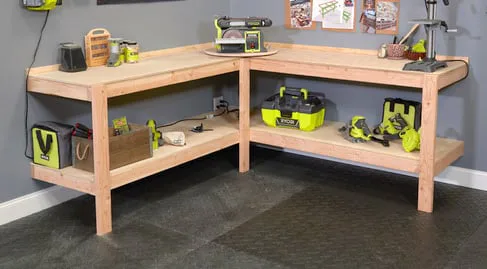
Easy DIY Garage Workshop Workbench
Make a workbench for your garage with these easy, beginner friendly build plans! with step by step diagrams and cut list/shopping list.

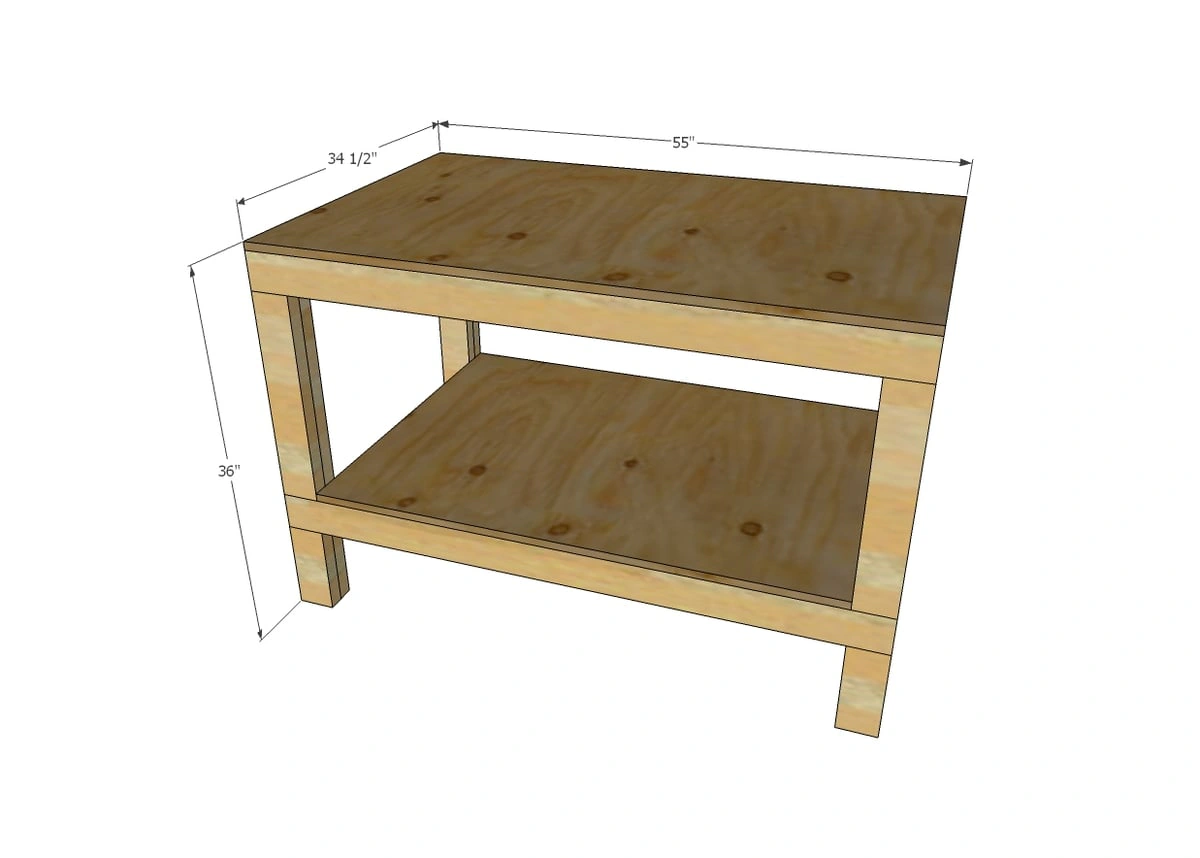
Dimensions
Use the size-specific shopping and cut lists below.
What you need
- 8 - 2x4 @ 8 feet long
- 1 - sheet of 3/4" thick plywood (AC grade most economical option)
- 2-1/2" self tapping wood screws
- 1-5/8" self tapping wood screws
- 4 - 2x4 @ 55" - side aprons
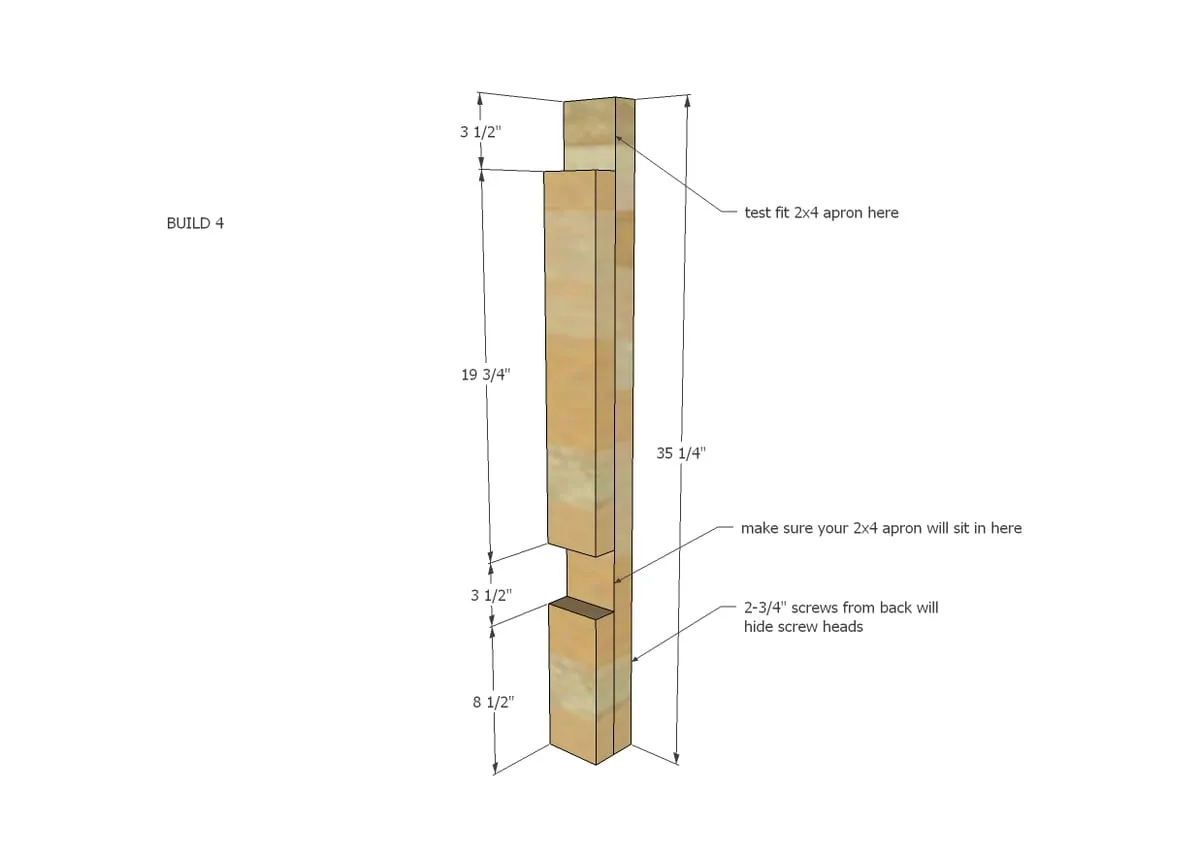
- 4 - 2x4 @ 35-1/4" - legs
- 8 - 2x4 @ 31-1/2" - supports and end aprons
- 4 - 2x4 @ 19-3/4" - leg blocking
- 4 - 2x4 @ 8-1/2" - leg blocking
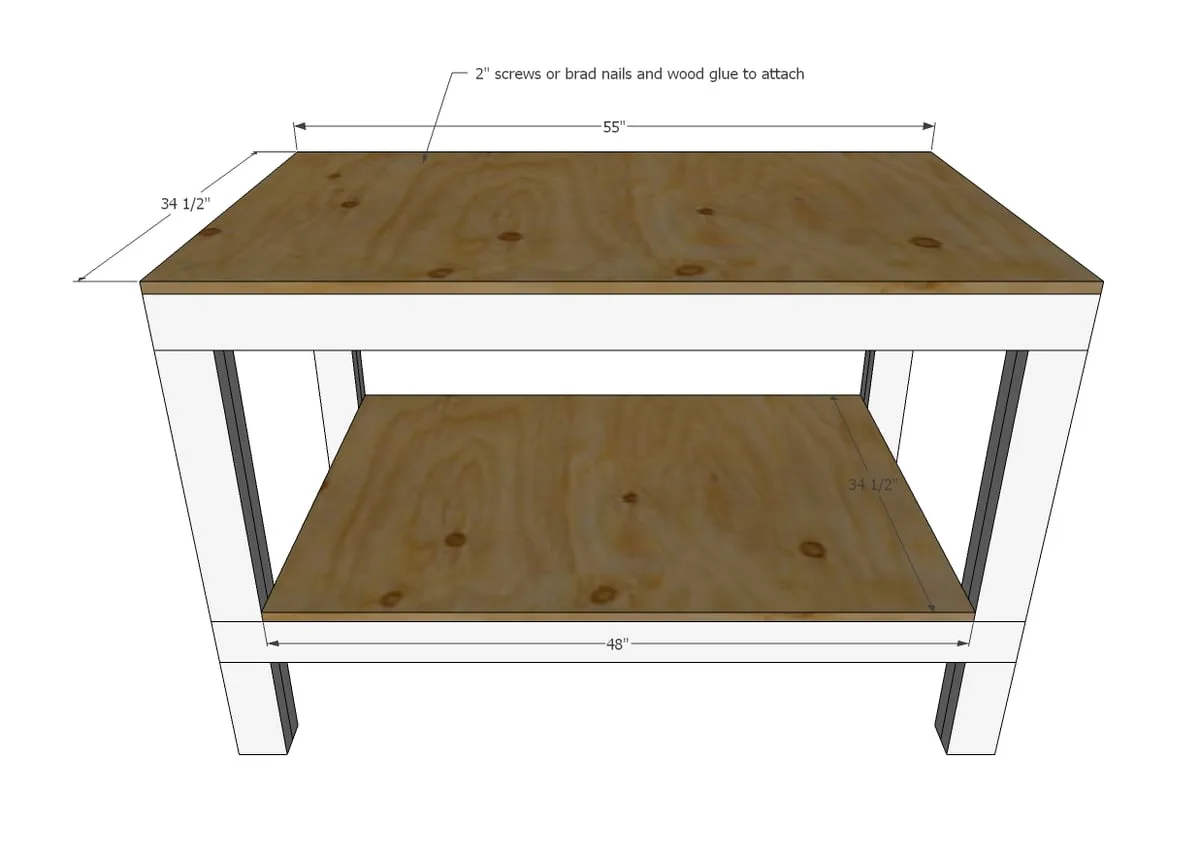
- 1 - 3/4" plywood @ 34-1/2" x 48" - bottom shelf
- 1 - 3/4" plywood @ 34-1/2" x 55" - top
- measuring tape
- square
- pencil
- safety glasses
- hearing protection
- drill
- circular saw
- compound miter saw
- nailer
Step by step
Step 1
Build four of the legs by attaching with glue and 2-3/4" screws the long leg pieces to the leg blocking. Make sure your 2x4s will fit in openings.
Step 2
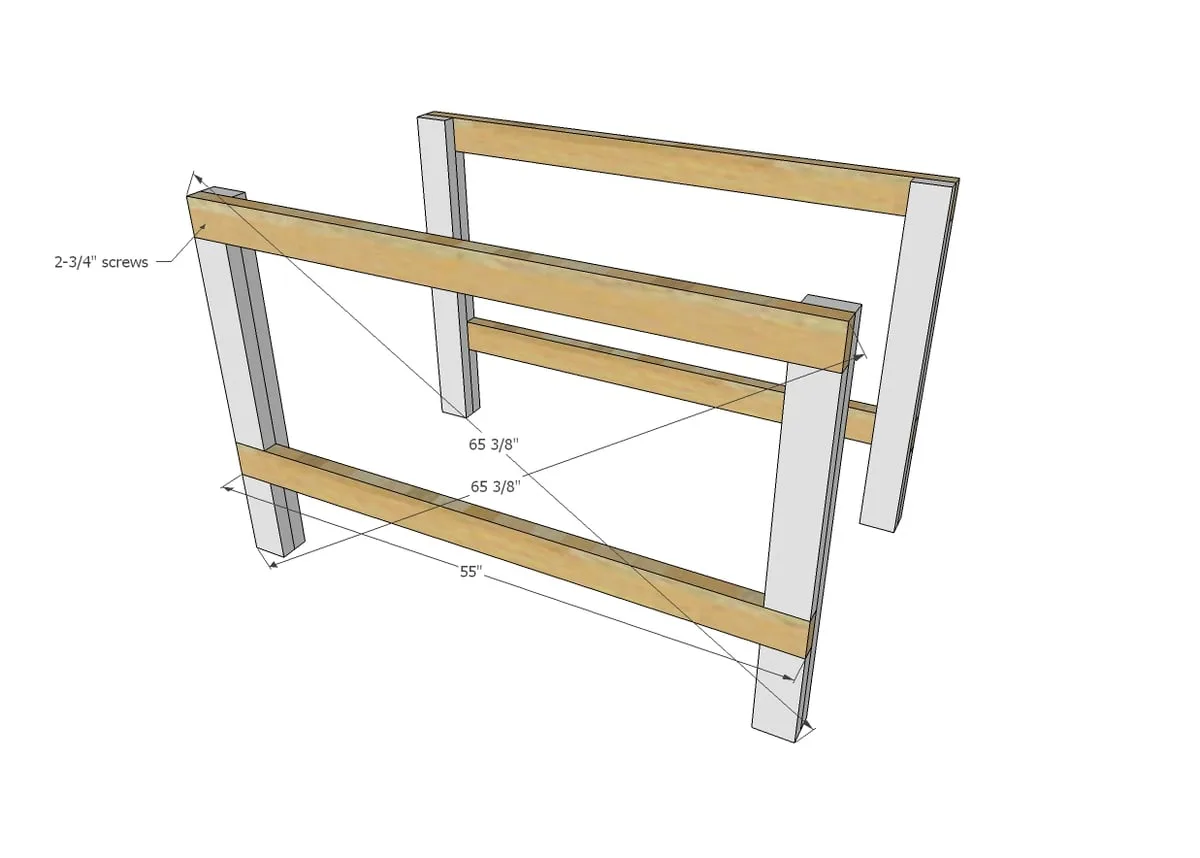
Attach long aprons to leg sets, 2-3/4" screws and glue. Check to make sure the leg sets are square by taking diagonal measurements from opposite corners as shown in diagrams. If the diagonal do not match, push the two opposite corners on the longer diagonal to adjust, then check for square again.
Step 3
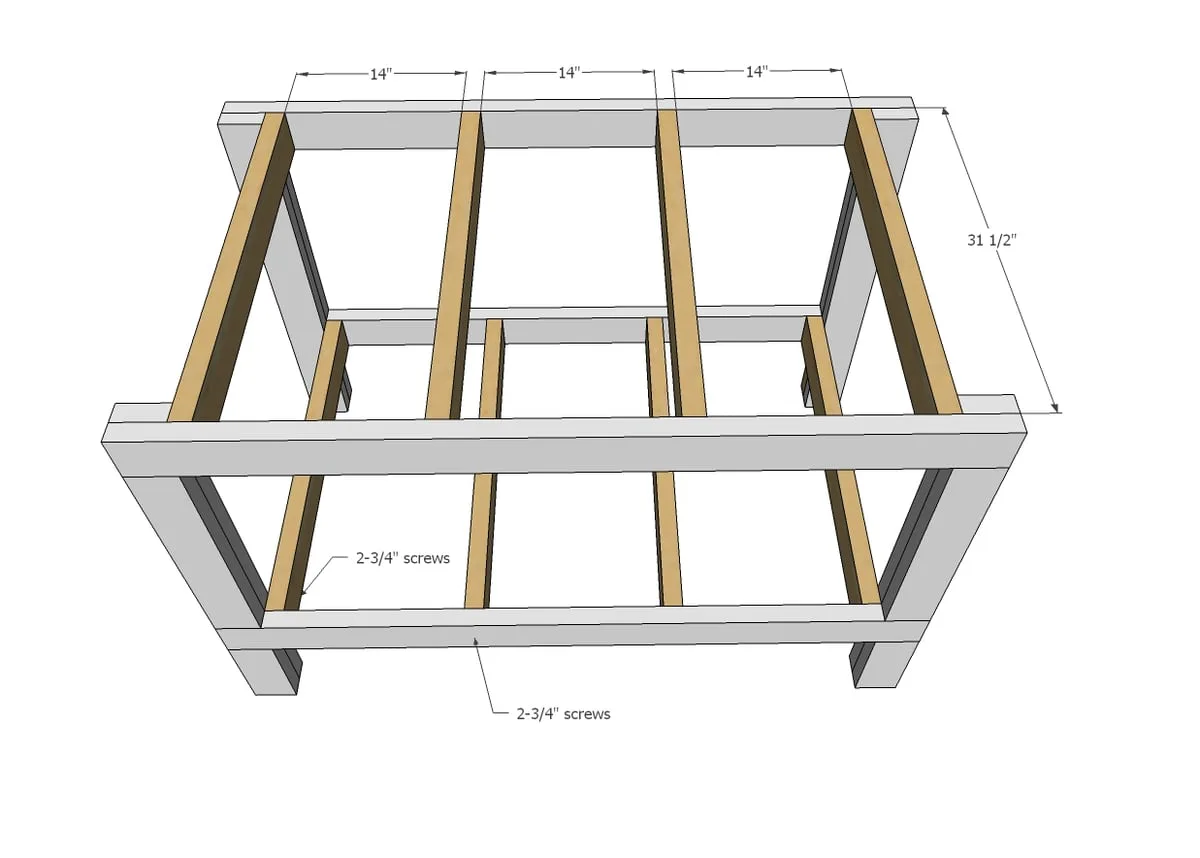
Now attach the two leg sets together with the supports. Use 2-3/4" screws and glue.
Step 4
Finally, attach plywood to tops of shelving with screws or brad nails and glue.
Finishing
Sand all surfaces, starting with a medium grit and finishing with fine. Wipe off the dust, fill any holes or gaps with wood filler, and sand smooth once dry. Apply primer if you're painting, then finish with your choice of paint or stain and seal with a durable clear topcoat. For outdoor projects, use exterior-rated primer, paint or stain, and sealer so the piece stands up to the weather.