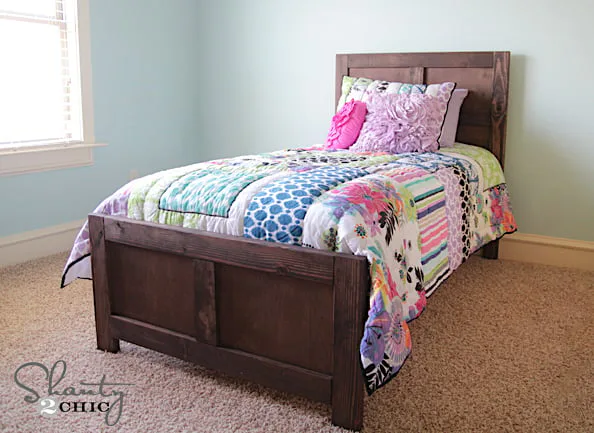
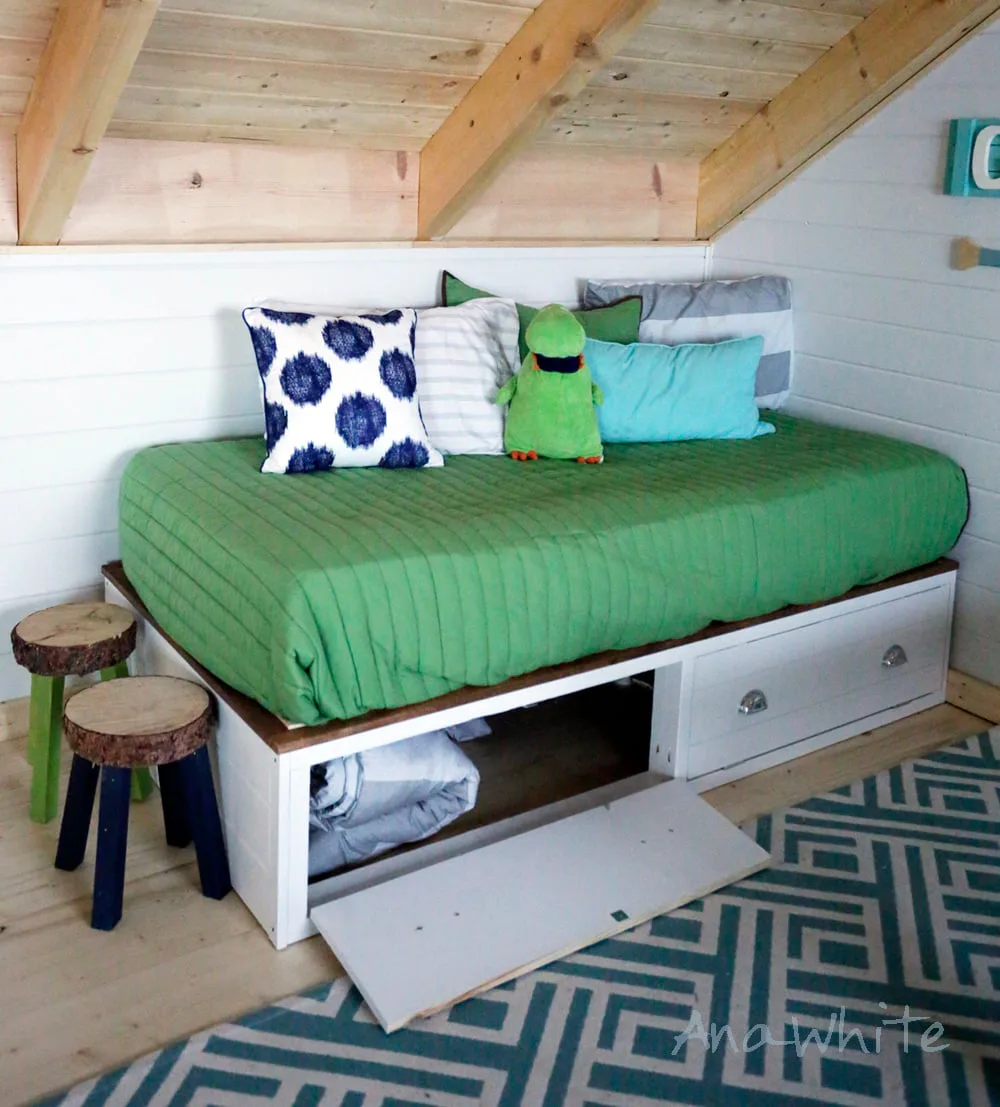
Easy Upholstered Bed
The easiest upholstered bed tutorial - use any fabric you choose! Step by step plans.

Dimensions
Use the size-specific shopping and cut lists below.

What you need
- 6 - 2x4 @ 8' or stud length (construction grade lumber ok)
- 2 - 1x8 @ 8' (I used whitewood boards)
- 1 - 1x8 @ 6' (I used whitewood boards)
- 2 - 2x2 @ 8' (furring strips are fine)
- 7 - 1x3 @ 8' (furring strips are fine)
- 1 - 48" x 96" plywood panel
- 4 - 8" hairpin legs
- 3-5 yards of fabric (depending on width and pattern)
- 3-5 yards of batting
- wood staples
- 30 - 3" wood screws
- 100 - 2" wood screw
- 10 - 1-1/4" wood screws or brad nails
- 6 - 2x4 @ 8' or stud length (construction grade lumber ok)
- 2 - 1x8 @ 8' (I used whitewood boards)
- 1 - 1x8 @ 6' (I used whitewood boards)
- 2 - 2x2 @ 8' (furring strips are fine)
- 6 - 1x3 @ 8' (furring strips are fine)
- 1 - 48" x 96" plywood panel
- 4 - 8" hairpin legs
- 3-5 yards of fabric (depending on width and pattern)
- 3-5 yards of batting
- wood staples
- 30 - 3" wood screws
- 100 - 2" wood screw
- 10 - 1-1/4" wood screws or brad nails
- 4 - 2x4 @ 8' or stud length (construction grade lumber ok)
- 2 - 1x8 @ 8' (I used whitewood boards)
- 1 - 1x8 @ 4' (I used whitewood boards)
- 2 - 2x2 @ 8' (furring strips are fine)
- 5 - 1x3 @ 8' (furring strips are fine)
- 4 - 8" hairpin legs
- 1 - 1/4" plywood panel 48" x 48"
- 3-4 yards of fabric (depending on width and pattern)
- 3-4 yards of batting (same amount as fabric)
- wood staples
- 25 - 3" wood screws
- 75 - 2" wood screw
- 10 - 1-1/4" wood screws or brad nails
Queen Shopping List
Full Shopping List
Twin Shopping List
- QUEEN - 60" x 80" Mattress
- 2 - 2x4 @ 80" - mattress frame sides
- 2 - 2x4 @ 57" - mattress frame top and bottom
- 1 - 2x4 @ 77" - mattress frame center support
- 2 - 1x8 @ 80" - siderails
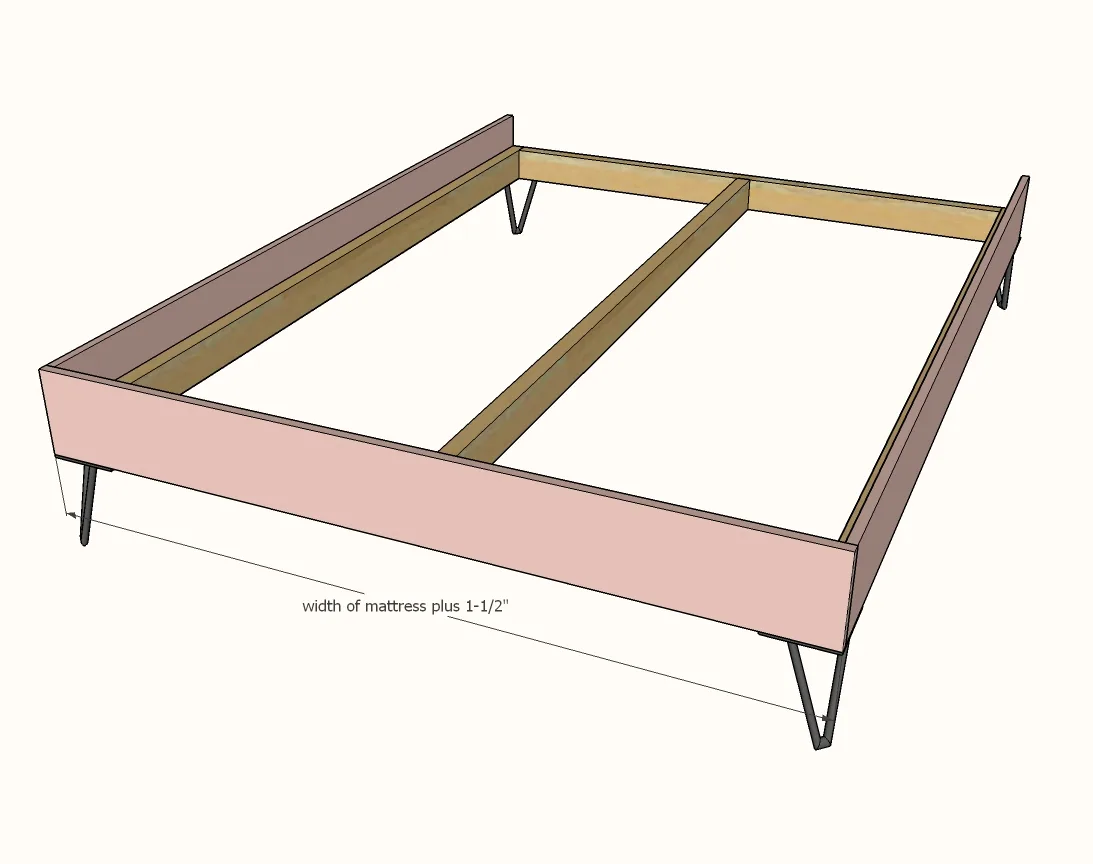
- 1 - 1x8 @ 61-1/2" - footboard
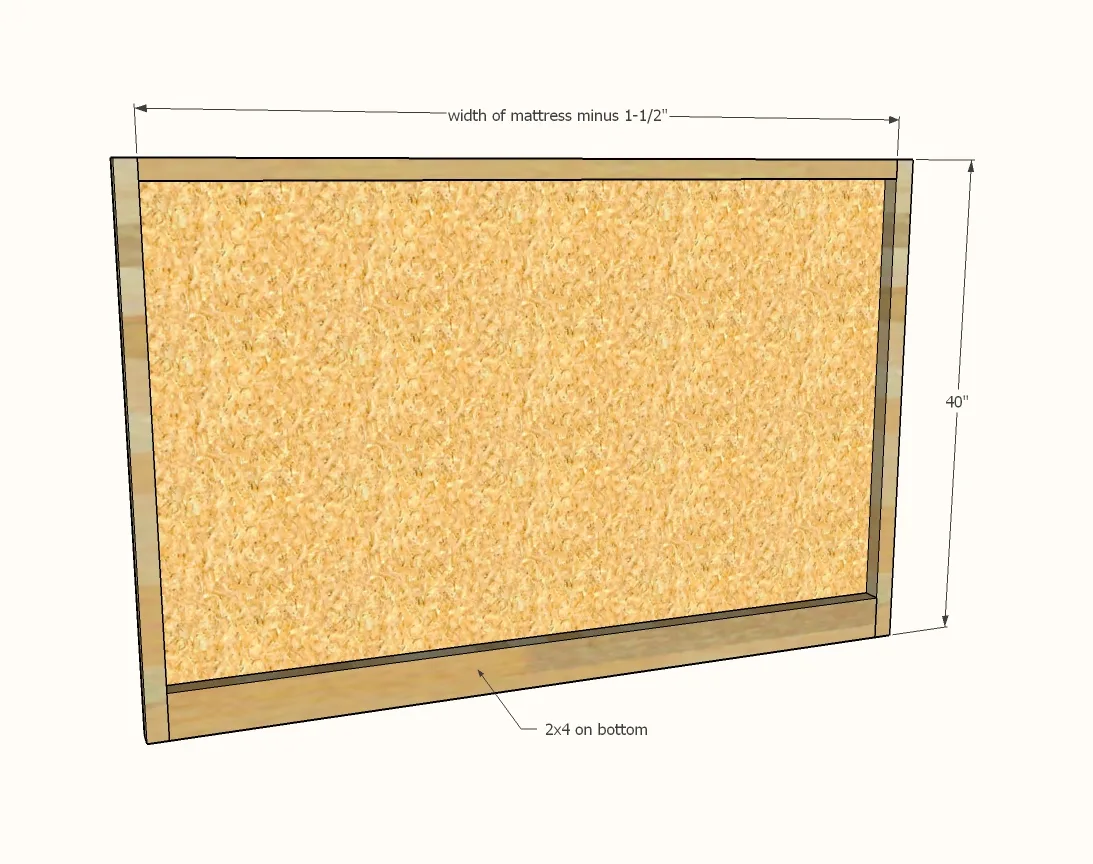
- 2 - 2x2 @ 40" - headboard sides
- 1 - 2x2 @ 58-1/2" - headboard top
- 1 - 2x4 @ 58-1/2" - headboard bottom
- 1 - 1/4" plywood @ 61-1/2" x 40" - headboard panel
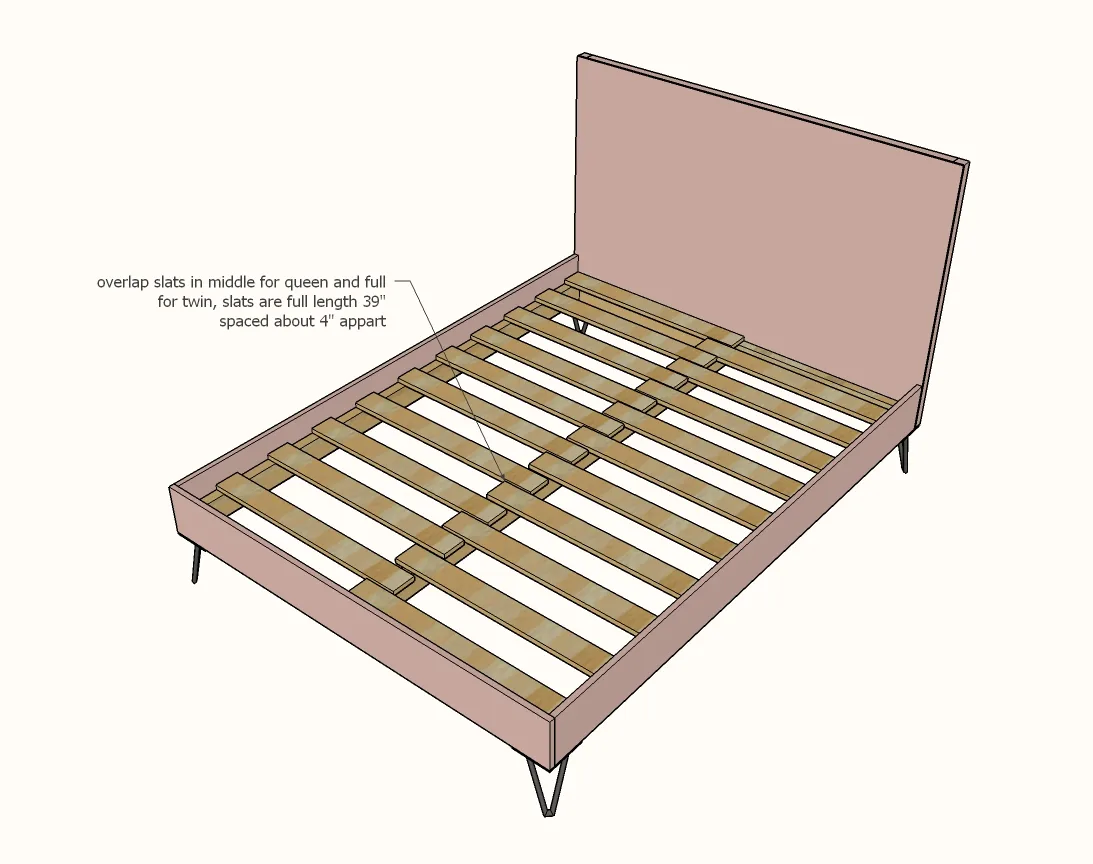
- 21 - 1x3 @ 31-3/4" - slats
- FULL - 54" x 75" Mattress
- 2 - 2x4 @ 75" - mattress frame sides
- 2 - 2x4 @ 51" - mattress frame top and bottom
- 1 - 2x4 @ 72" - mattress frame center support
- 2 - 1x8 @ 75" - siderails
- 1 - 1x8 @ 55-1/2" - footboard
- 2 - 2x2 @ 40" - headboard sides
- 1 - 2x2 @ 52-1/2" - headboard top
- 1 - 2x4 @ 52-1/2" - headboard bottom
- 1 - 1/4" plywood @ 55-1/2" x 40" - headboard panel
- 18 - 1x3 @ 31-3/4" - slats
- TWIN - 39" x 75" Mattress
- 2 - 2x4 @ 75" - mattress frame sides
- 2 - 2x4 @ 36" - mattress frame top and bottom
- 2 - 1x8 @ 75" - siderails
- 1 - 1x8 @ 40-1/2" - footboard
- 2 - 2x2 @ 40" - headboard sides
- 1 - 2x2 @ 37-1/2" - headboard top
- 1 - 2x4 @ 37-1/2" - headboard bottom
- 1 - 1/4" plywood @ 40-1/2" x 40" - headboard panel
- 10 - 1x3 @ 39" - slats
- measuring tape
- square
- pencil
- safety glasses
- hearing protection
- drill
- circular saw
- staple gun
Step by step
Step 1
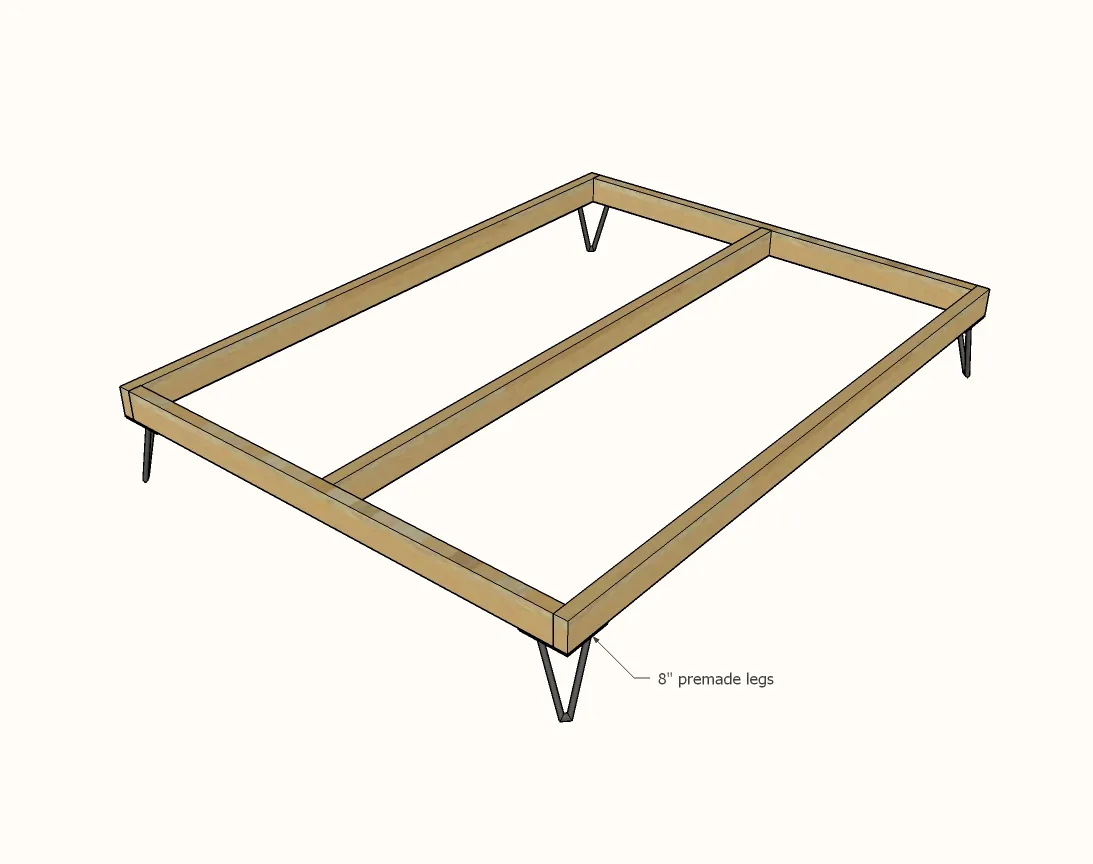
Layout bed frame boards and screw together with 3" screws - two screws per joint. For the twin, you won't need the center support.

Step 2
Attach legs to bottom of bed frame.
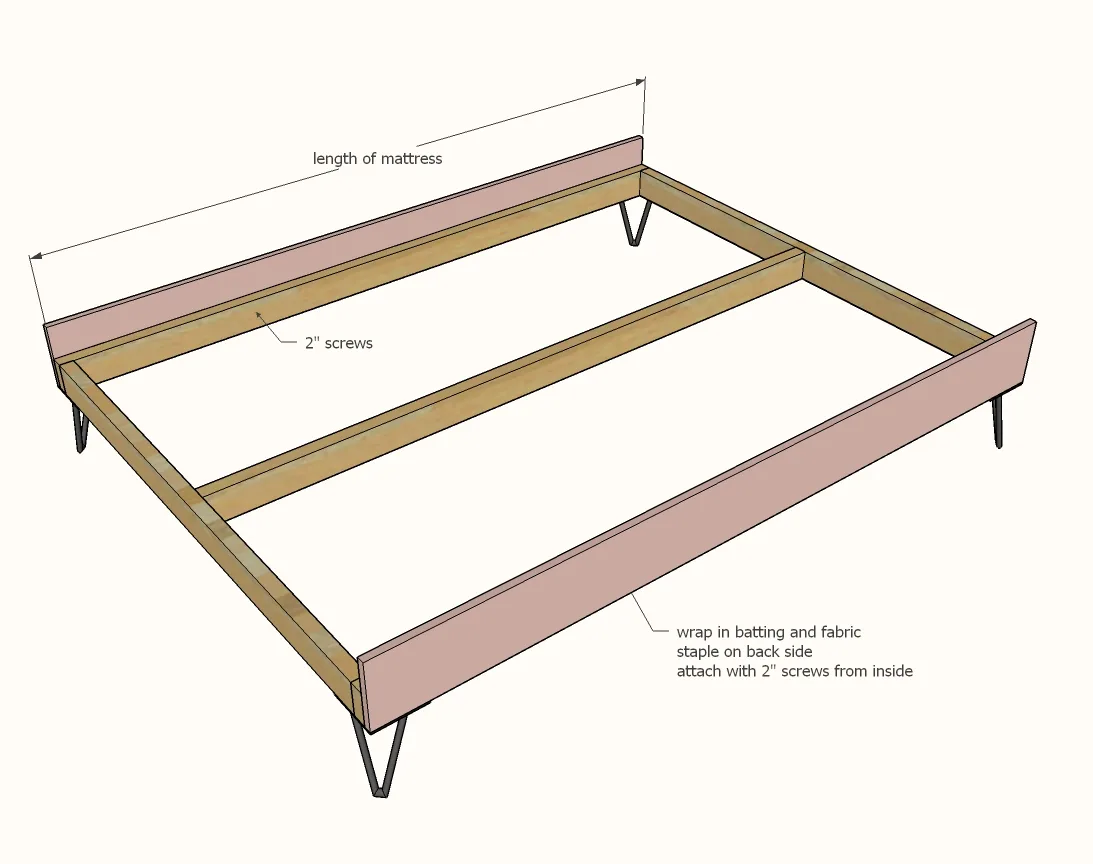
Cut fabric and batting about 4" larger (width and lengthwise) than the siderails.
Wrap siderails in fabric and staple on. Attach flush to bottom of the 2x4 frame with 2" screws from inside.
Step 4
Repeat steps for bottom rail.
Step 5
Step 6

Step 7
Finishing
Sand all surfaces, starting with a medium grit and finishing with fine. Wipe off the dust, fill any holes or gaps with wood filler, and sand smooth once dry. Apply primer if you're painting, then finish with your choice of paint or stain and seal with a durable clear topcoat. For outdoor projects, use exterior-rated primer, paint or stain, and sealer so the piece stands up to the weather.