Gift Wrapping Cart
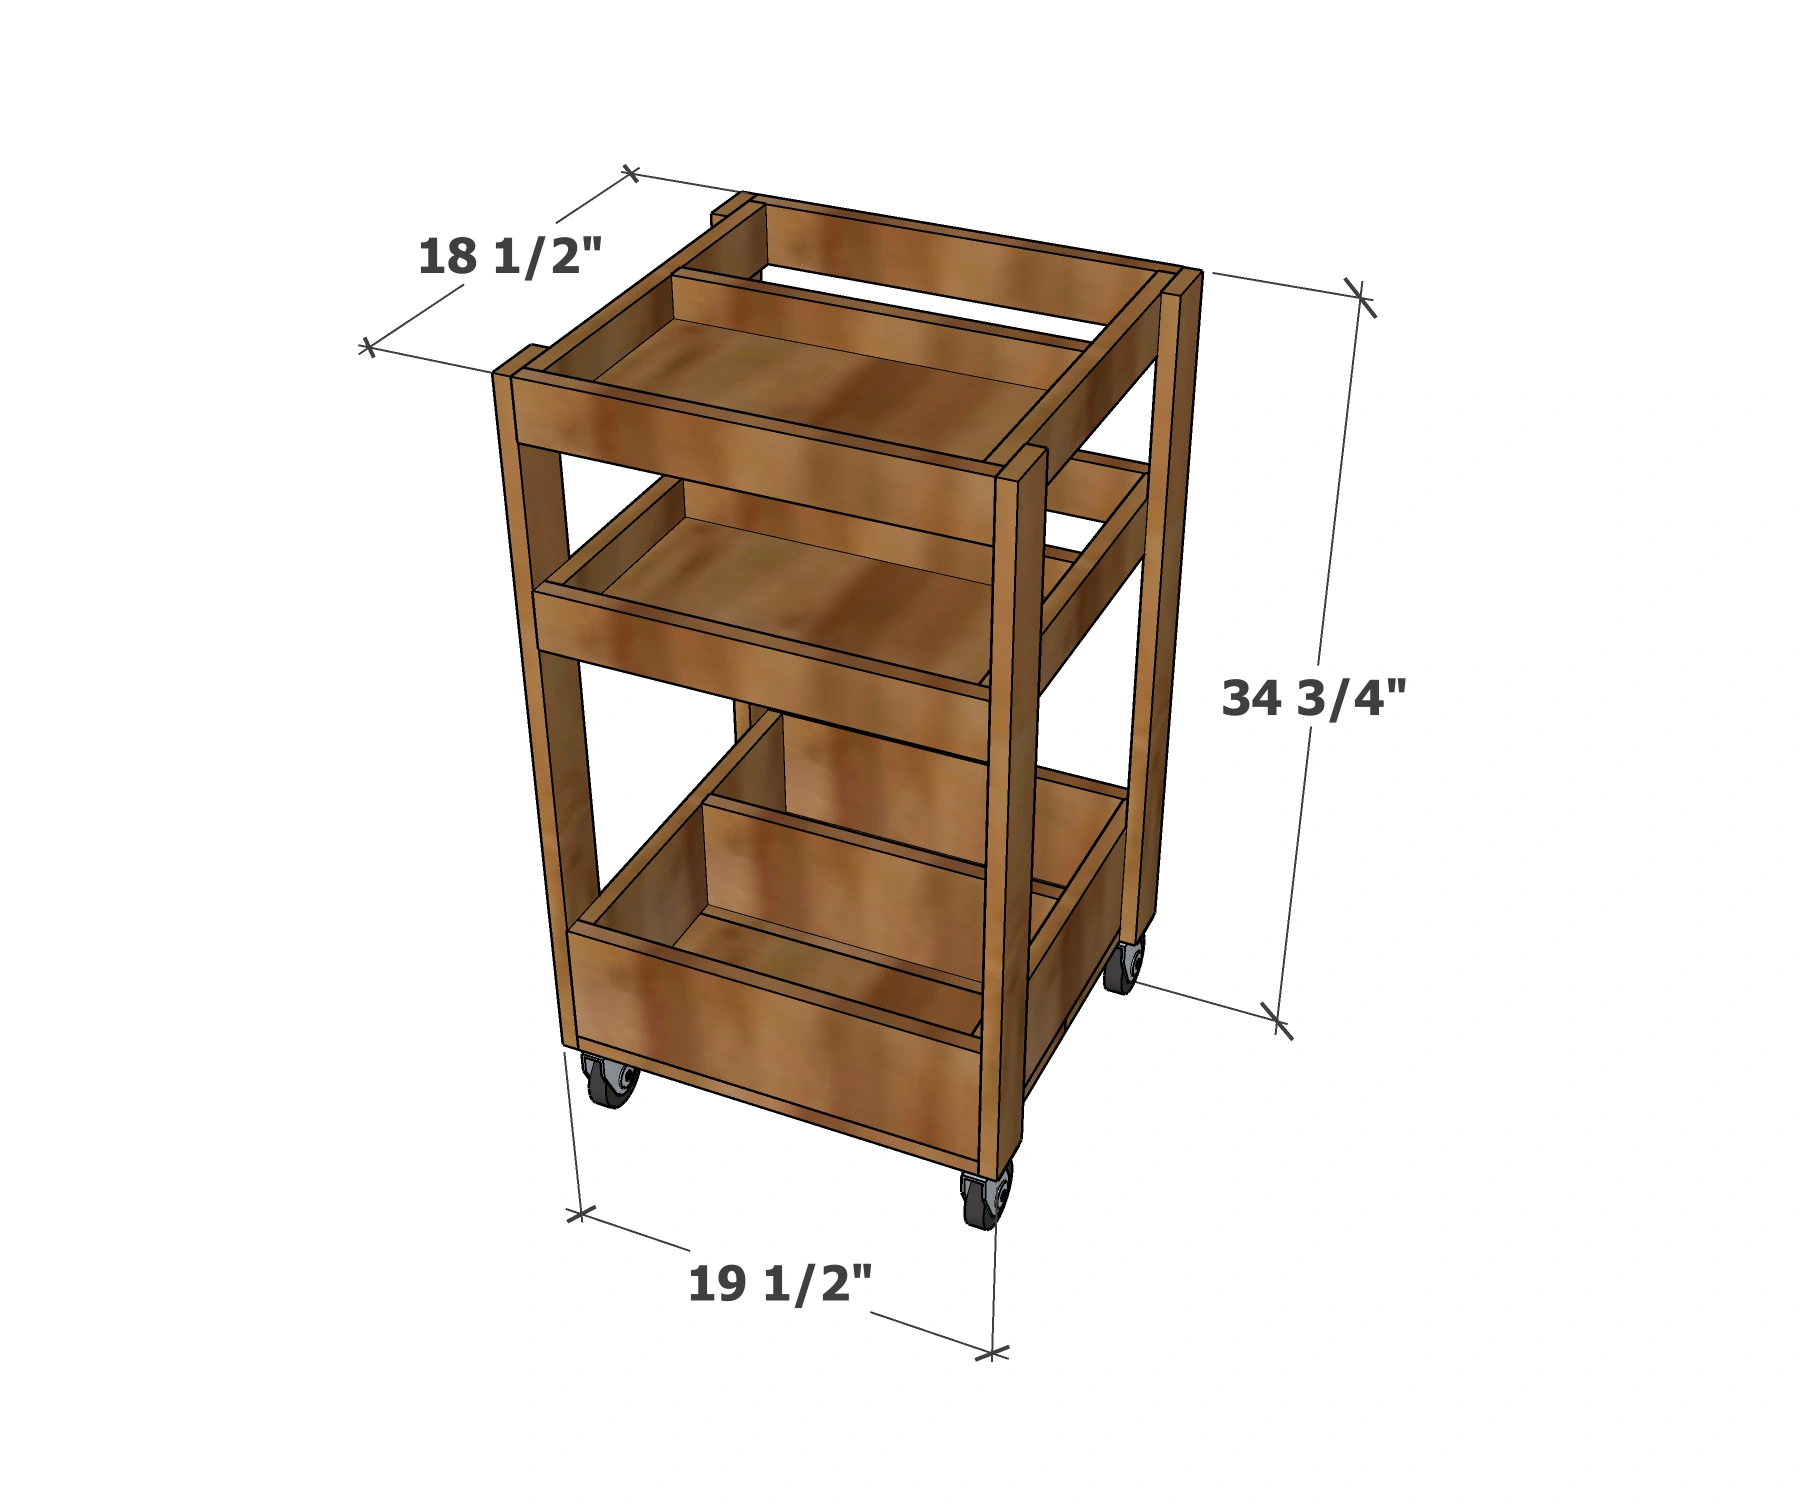
Organize your gift wrapping supplies in this beautiful cart! Featuring storage for rolls, and shelves for ribbons and bags, customize with dowels for more ribbon storage. This is a free step by step project plan from including diagrams, shopping and cut list.

Dimensions
Use the size-specific shopping and cut lists below.
What you need
- 4 - 1x3 @ 8 feet long
- 1 - 1x6 @ 8 feet long
- 1 - 1x10 @ 6 feet long
- 4 - caster wheels with screws for attaching
- 1-1/4" brad nails
- wood glue
- wood stain or paint for finishing
- 4 - 1x3 @ 18" - outer frame, longer piece
- 4 - 1x3 @ 17" - outer frame, shorter piece
- 2 - 1x3 @ 16-1/2" - inner divider
- 2 - 1x6 @ 18" - outer frame, longer piece
- 2 - 1x6 @ 17" - outer frame, shorter piece
- 1 - 1x6 @ 16-1/2" - inner divider
- 2 - 1x10 @ 16-1/2" - 1x3 frame bottoms
- 2 - 1x10 @ 18" - 1x6 frame bottoms
- 4 - 1x3 @ 30-1/2" - legs
- measuring tape
- square
- pencil
- safety glasses
- drill
- circular saw
- nailer
- sander
Step by step
Step 1
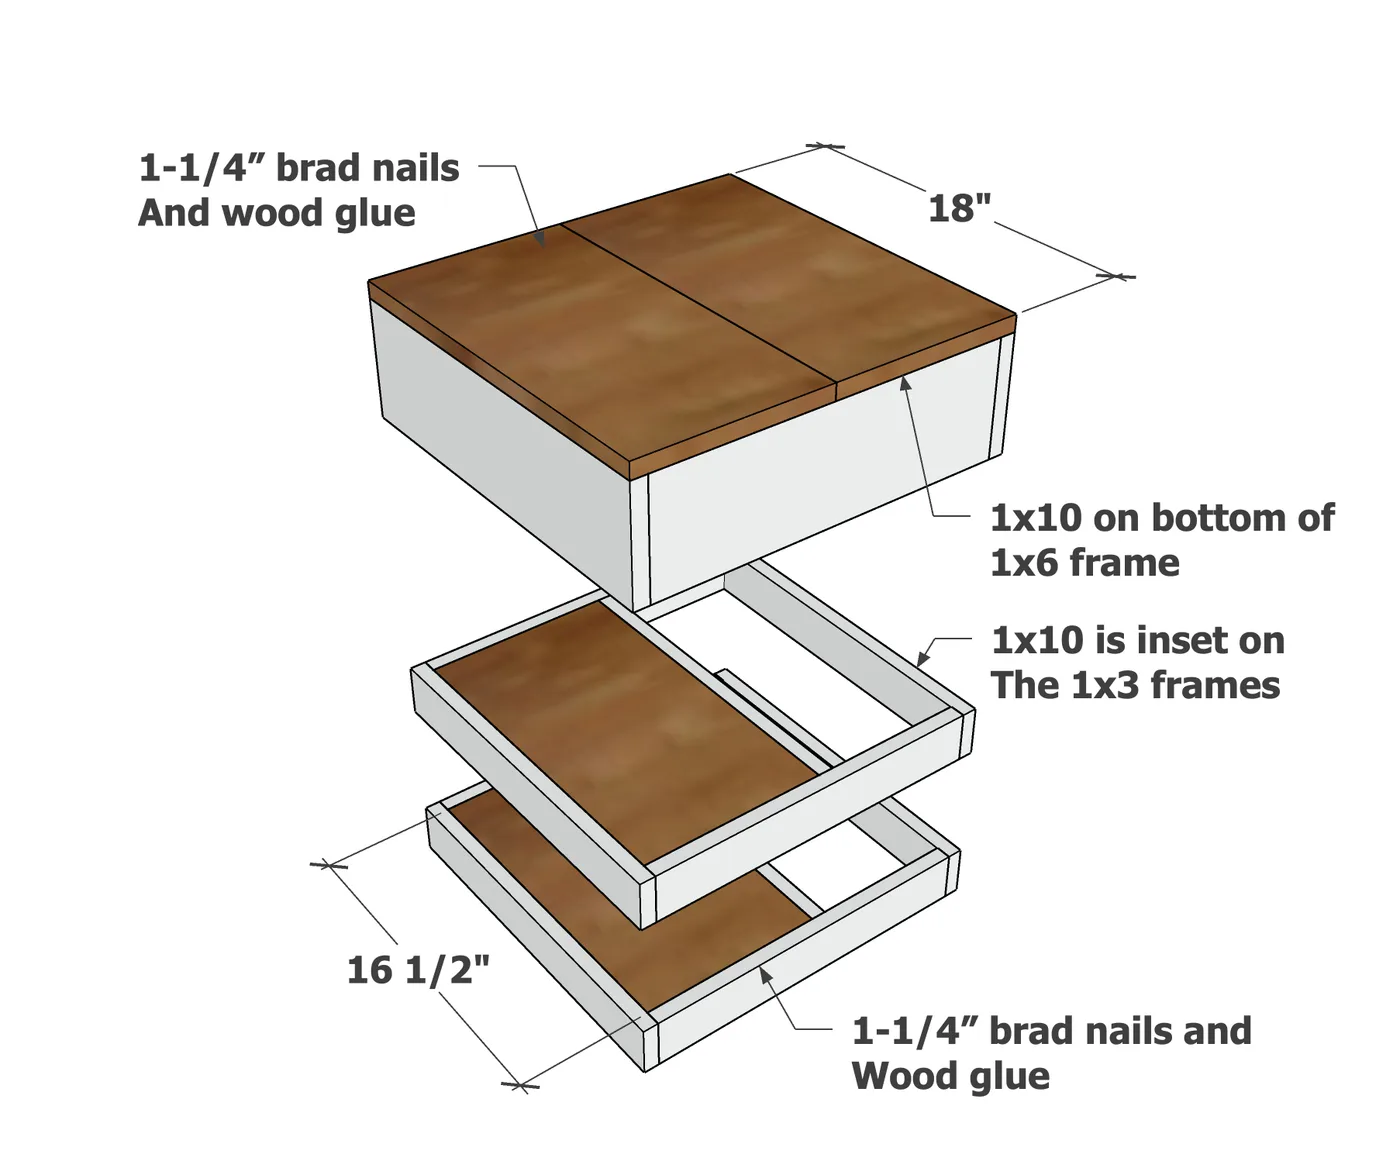
Build two frames using 1x3s and one frame using 1x6s, all layed out as shown in the diagram.

Attach 1x10 pieces inset on the 1x3 frames.
Attach 1x10 pieces on the bottom of the 1x6 frame.
Step 3
Attach legs to the sides of the trays.

Step 4
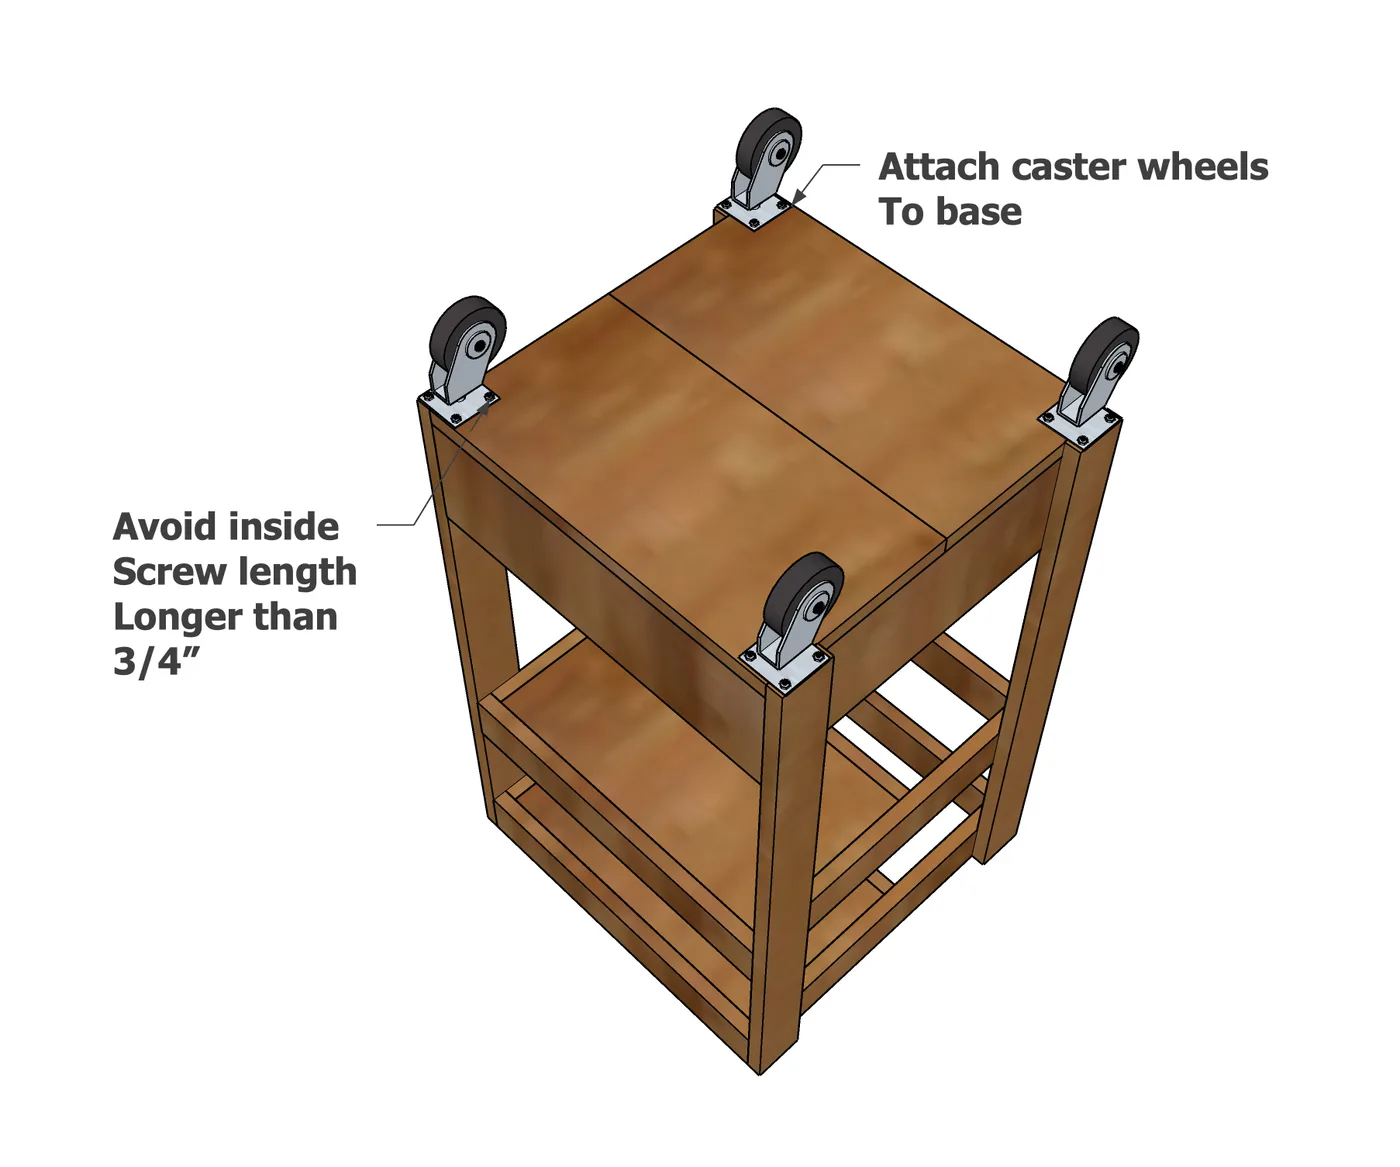
Screw caster wheels to the base.
Finishing
Sand all surfaces, starting with a medium grit and finishing with fine. Wipe off the dust, fill any holes or gaps with wood filler, and sand smooth once dry. Apply primer if you're painting, then finish with your choice of paint or stain and seal with a durable clear topcoat. For outdoor projects, use exterior-rated primer, paint or stain, and sealer so the piece stands up to the weather.


