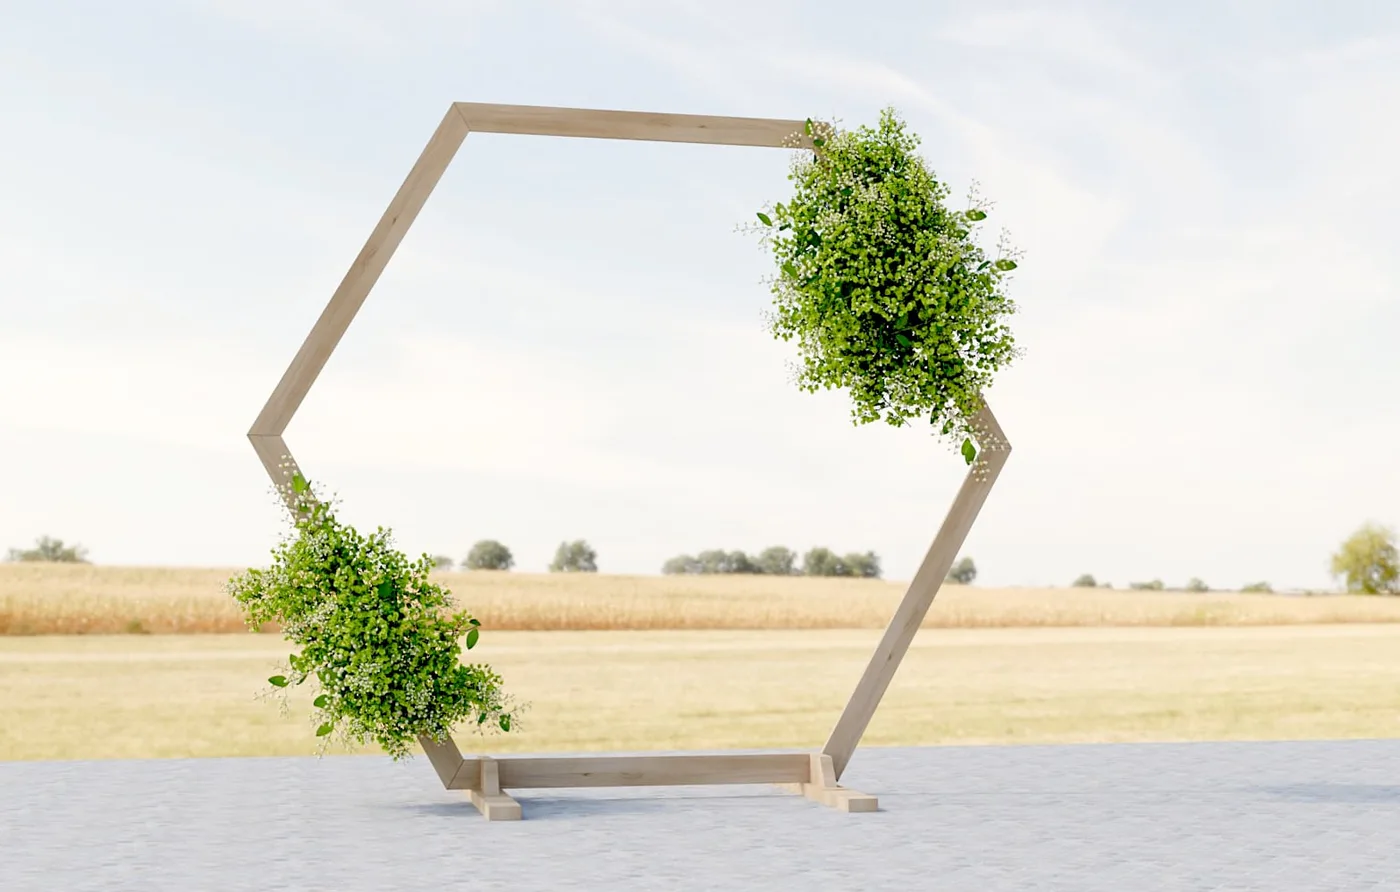
Hexagon Wedding Arch
to make your own hexagon wedding arch from Ana You can make your own hexagon wedding arch for under $30 using. Plans are suitable for beginner woodworkers, and can be built using basic tools. Stain any color of your choice. Step by step plans with diagrams, shopping and cut list - everything you need to build your own hexagon wedding arch quickly and cheaply.
What you need
- 3 - 1x4 boards, 8 feet long (can be furring strip)
- 1 - 2x4 board, 8 feet long
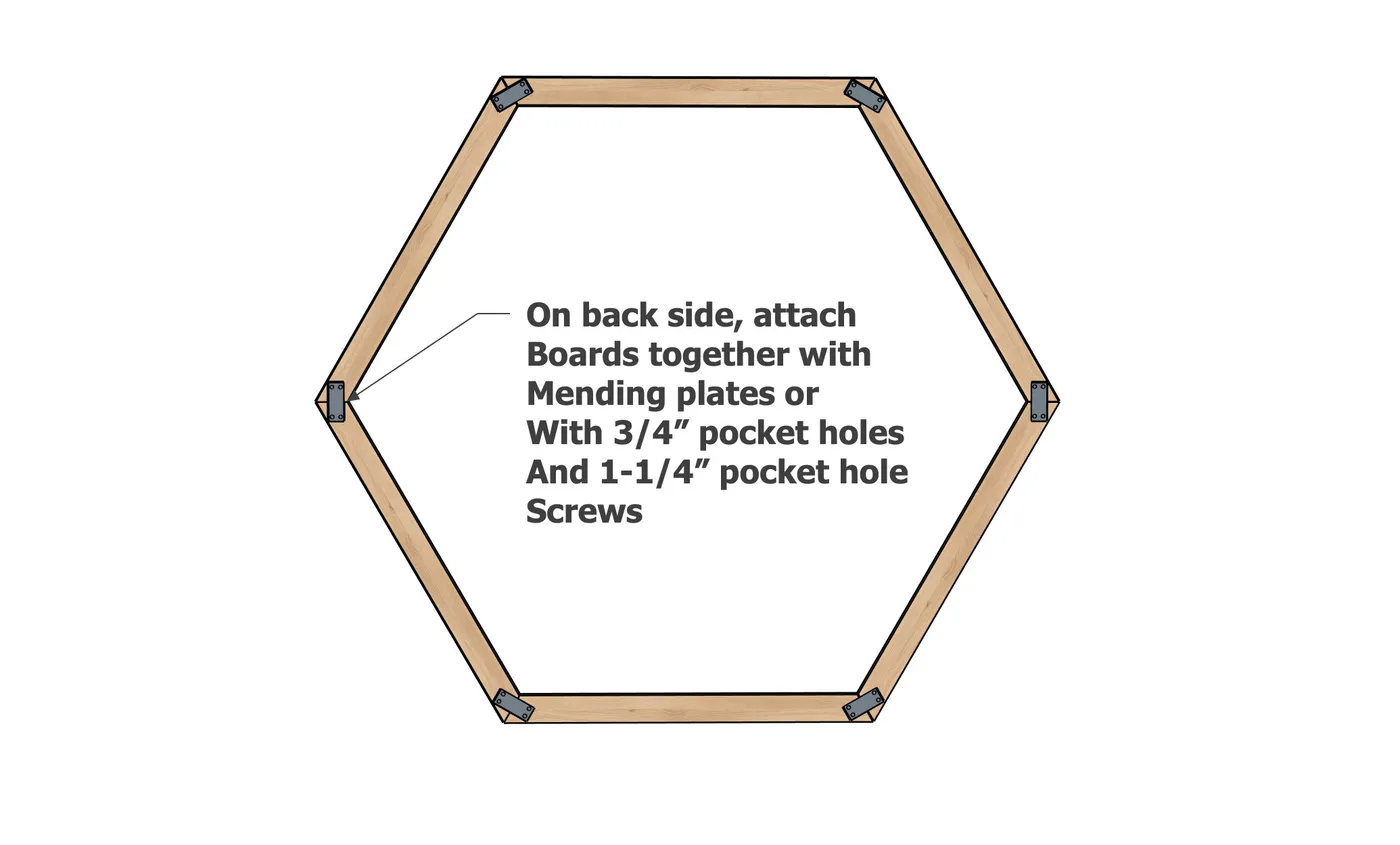
- 6 - small tie plates with 3/4" screws OR 12 - 1-1/4" pocket hole screws
- 8 - 2-3/4" star bit self tapping screws (spax or similar brand)
- wood stain in desired color
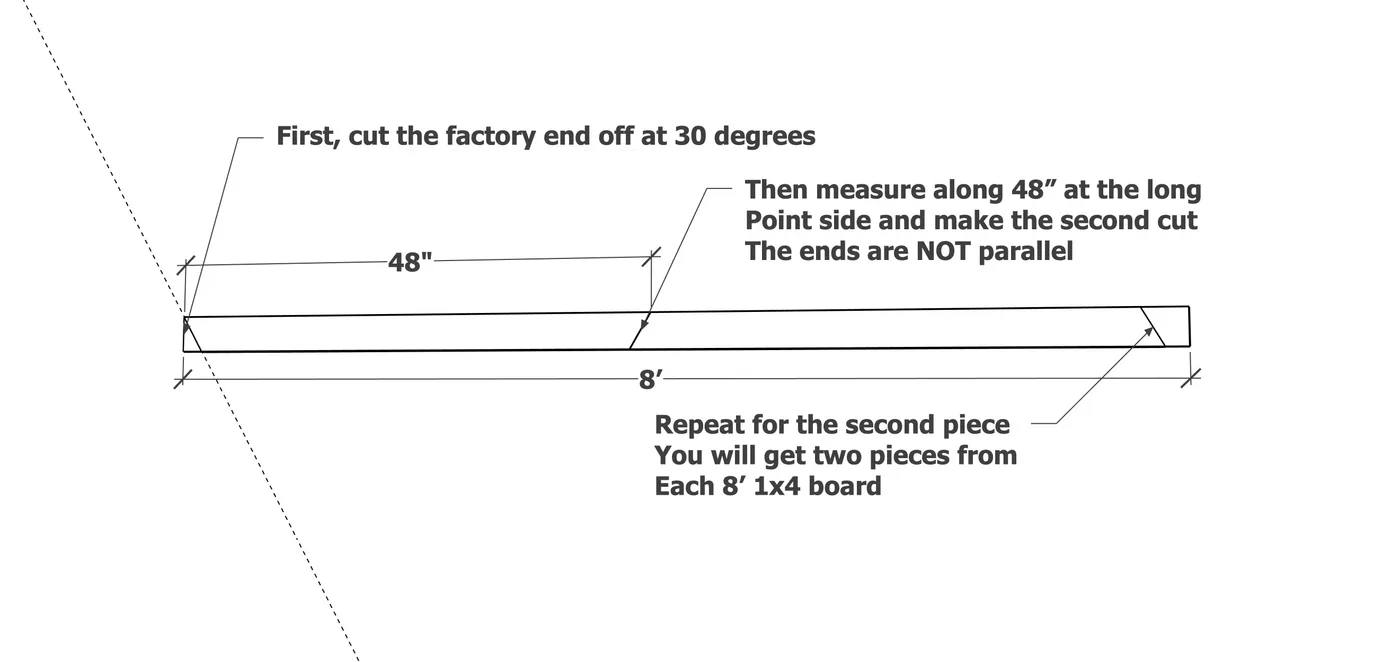
- 6 - 1x4 @ 48" - long point to long point measurement, both ends cut at 30 degrees off square, ends NOT parallel
- 2 - 2x4 @ 30"
- 4 - 2x4 @ 9" - one end cut at 30 degrees off square, long point measurement*
DO NOT cut short pieces, instead cut the short pieces first from the full length 2x4.
- measuring tape
- pencil
- safety glasses
- drill
- compound miter saw
- sander
Step by step
Cutting
Set the miter saw to 30 degree off square angle cut. Cut the end off of a 1x4 board. Then measure and cut the first piece. Repeat for the second piece. You will be able to get two pieces per 1x4 board. Cut the pieces for the base out of the 2x4 as directed in the cut list.
Layout the hexagon pieces on a flat surface and attach together at the corners.
If the wood is splitting, predrill a hole to help prevent splitting. If you use pocket holes, this is a cheaper and better method of joinery.
Step 3
Build two of the bases as shown, use a scrap piece of the 1x4 as a guide for spacing the center gap. You want this gap to be tight to hold the arch in place.

Set the hexagon in the base. It can be additionally screwed from under the base.
It is recommended to stake out the arch so it does not tip.

Finishing
Sand all surfaces, starting with a medium grit and finishing with fine. Wipe off the dust, fill any holes or gaps with wood filler, and sand smooth once dry. Apply primer if you're painting, then finish with your choice of paint or stain and seal with a durable clear topcoat. For outdoor projects, use exterior-rated primer, paint or stain, and sealer so the piece stands up to the weather.