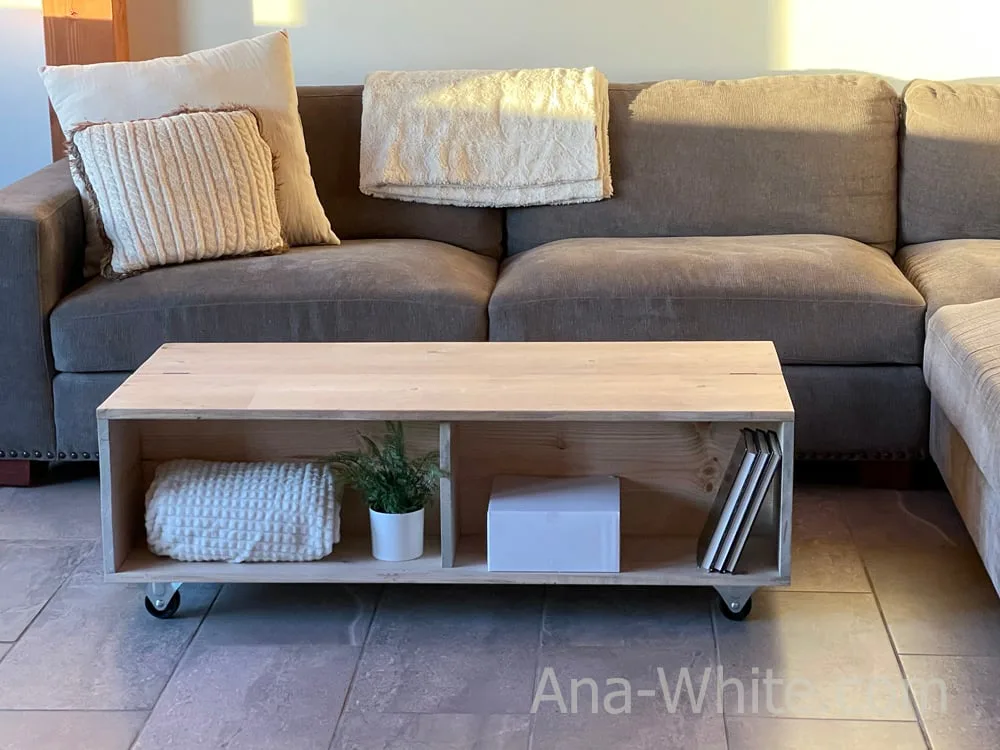
Homestead Coffee Table
Homestead Coffee Table ( ) Build a sturdy, timeless coffee table with a clean farmhouse-modern look and a handy lower shelf for baskets, books, or blankets. The Homestead Coffee Table is designed to be beginner-friendly, using common lumber and straightforward cuts—no complicated joinery required. The includes a full step-by-step tutorial, a complete cut list, and clear diagrams so you can build with confidence and get a beautiful finished table fast.

Dimensions
Use the size-specific shopping and cut lists below.

What you need
- 1 - 2x4 @ 12 feet long
- 2 - 2x6 @ 8 feet long
- 1 - 2x8 @ 12 feet long OR 1 - 1x12 @ 8 feet long
- 2-1/2" pocket hole screws (recommended)
- 2-1/2" star bit screws
- sand paper
- wood stain
*use light yellow wood tone for indoor projects, red toned wood boards for exterior
- TOP
- (3) 2x8 @ 48″
- (3) 2x6 @ 38″
- Build two identical leg assemblies.
- (4) 2x4 @ 13-1/4″, 10° angle cuts on both ends (parallel) - long point to short point measurement
- (2) 2x4 @ 14-5/8″, 10° angle cuts on both ends (NOT parallel), long point to long point measurement
- (2) 2x4 @ 17-7/8″, 10° angle cuts on both ends (NOT parallel), long point to long point measurement
- (2) 2x6 @ 20-3/4″, 10° angle cuts on both ends (NOT parallel), long point to long point measurement
Modification I made in my build - I used two 1x12 @ 42" for the top
BOTTOM SHELF
LEG ASSEMBLIES
- measuring tape
- square
- pencil
- safety glasses
- kreg-jig
- drill
- compound miter saw
- sander
Step by step
Step 1
Build two leg sets identical. Your coffee table will look much better if you hide joinery using a pocket hole jig, but you can also use 2-1/2" self tapping screws to build. TIP: As done in the video, it is much easier to build this by attaching first with 2" brad nails and glue. Then do the pocket holes.

Step 2
Attach base plate with the self tapping screws.

position the legs on the underside of the tabletop boards. Attach legs to the tabletop boards.
TIP: For a nicer top, build top first with 1-1/2" pocket holes and 2-1/2" pocket hole screws.

Step 4
Place the bottom shelf boards inside the coffee table. Attach from underneath with the 2-1/2" screws.

Finishing
Sand all surfaces, starting with a medium grit and finishing with fine. Wipe off the dust, fill any holes or gaps with wood filler, and sand smooth once dry. Apply primer if you're painting, then finish with your choice of paint or stain and seal with a durable clear topcoat. For outdoor projects, use exterior-rated primer, paint or stain, and sealer so the piece stands up to the weather.