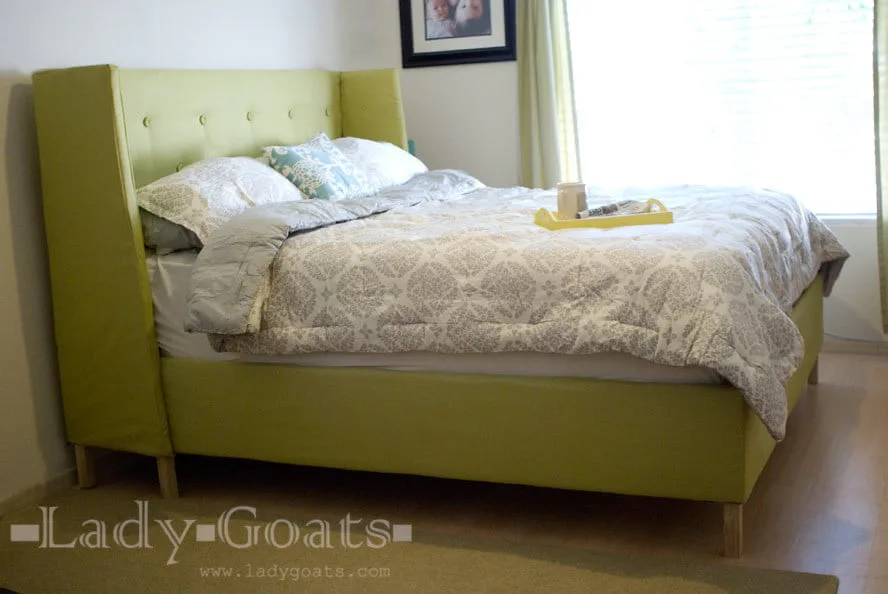
Morris Upholstered Bed
DIY upholstered bed! Free step by step tutorial.
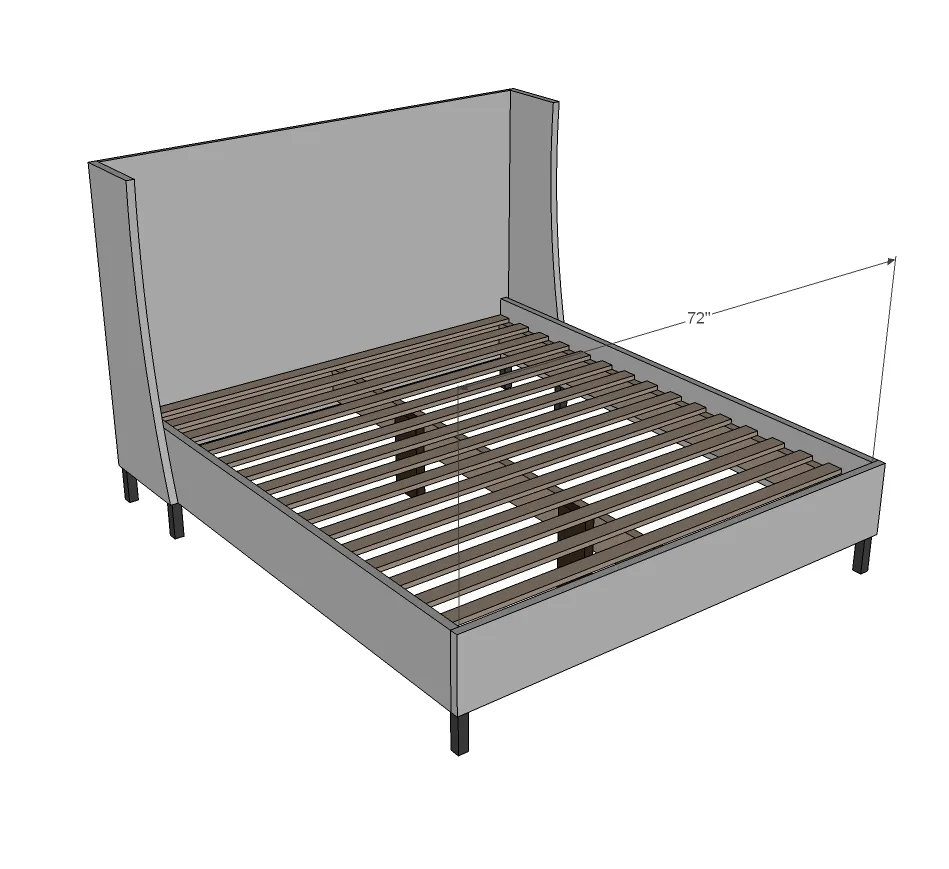
Dimensions
Use the size-specific shopping and cut lists below.

What you need
- 2 sheets 3/4" plywood
- 5 – 2x6 @ 8 feet or stud length
- 6 – decorative 6” parson style feet
- 4 – corner brackets
- 2 – standard brackets
- 6 yards 1/2 thick batting - Gina recommends 1/2" thick foam
- Spray adhesive
- ½” staples and staple gun
- Sewing notions and thread
- 2 1/2" PH screws or 3" screws for countersinking
- 1 1/4" PH screws
- 2" screws for attaching siderails to bed frame
Fabric – amount will depend on if using pattern/directional fabric – recommend decorator weight 54” width
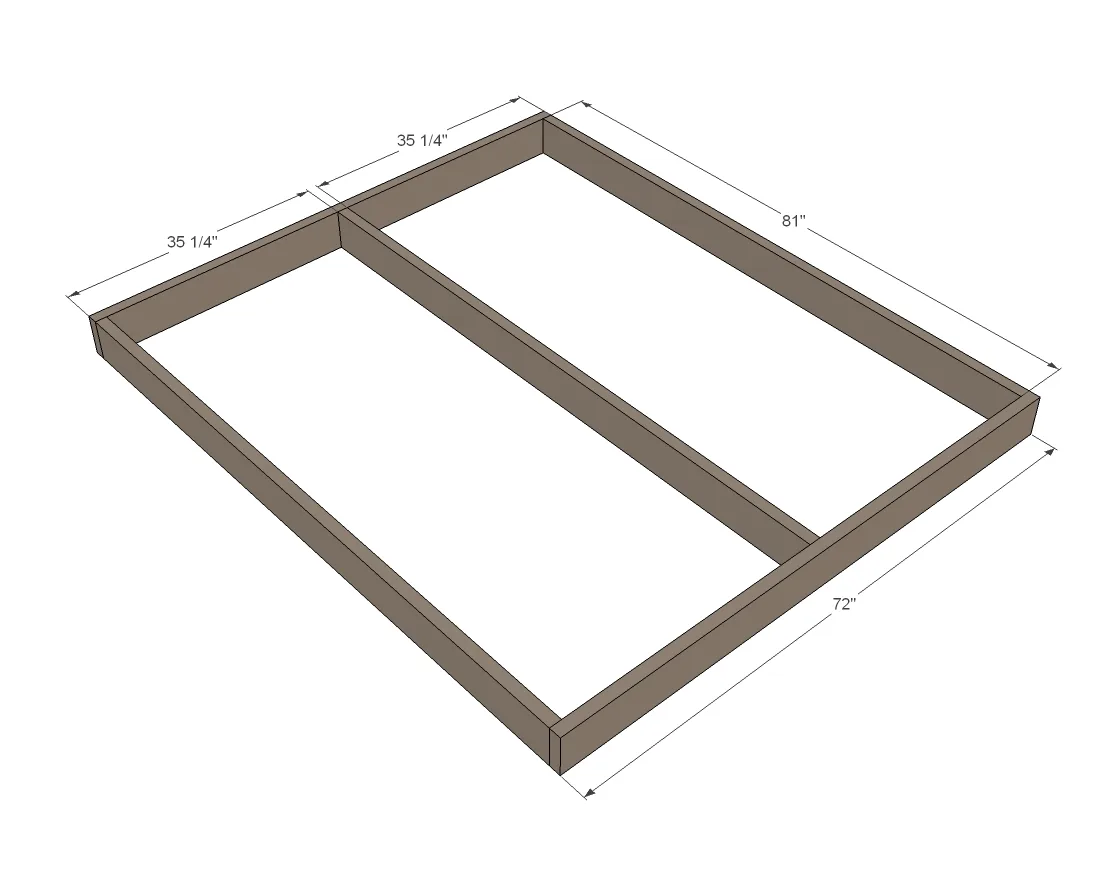
- 2 – 2x6 @ 72”
- 3 – 2x6 @ 81”
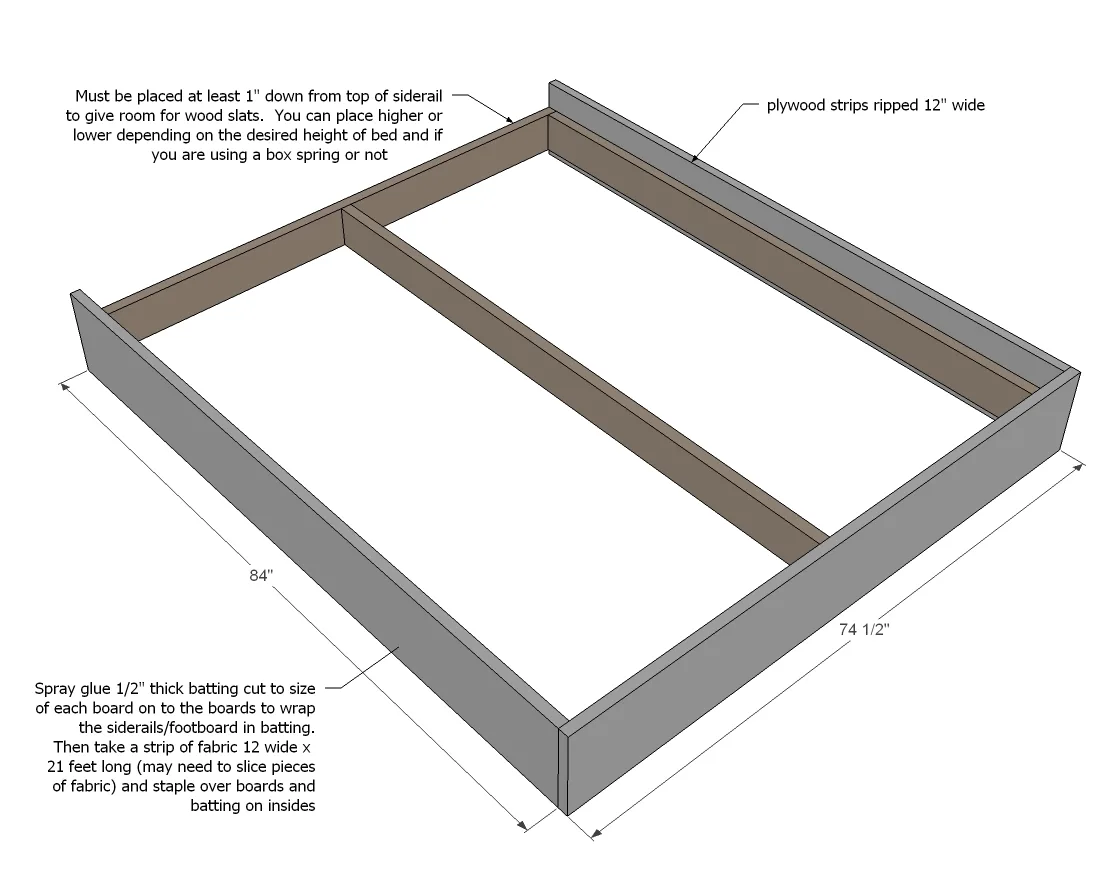
- 2 – ¾” plywood 11 ½” x 84”
- 1 – ¾” plywood 11 ½” x 73 ½”
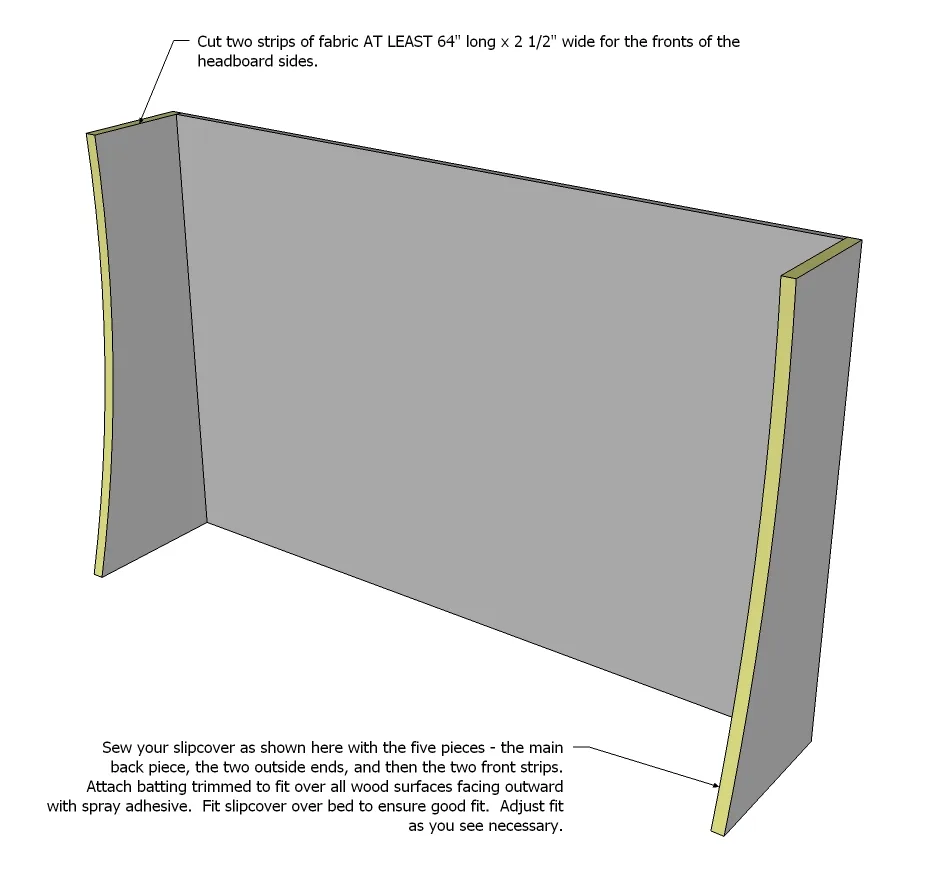
- 1 – ¾” plywood 75” x 48”
- 2 – ¾” plywood 17” x 48” (tapering to 12”)
Wood slats will be 72” or use box spring
- measuring tape
- square
- pencil
- safety glasses
- hearing protection
- drill
- circular saw
- nailer
- sander
- staple gun
- countersink drill bit
Step by step
Step 1
Gina is right - building the bed is going to be the easy part. And it starts easy - just make a box with the 2x boards.
Step 2
Then attach with 2" screws upholstered side rails. You could also upholster in place as well - there should be room.
Step 3
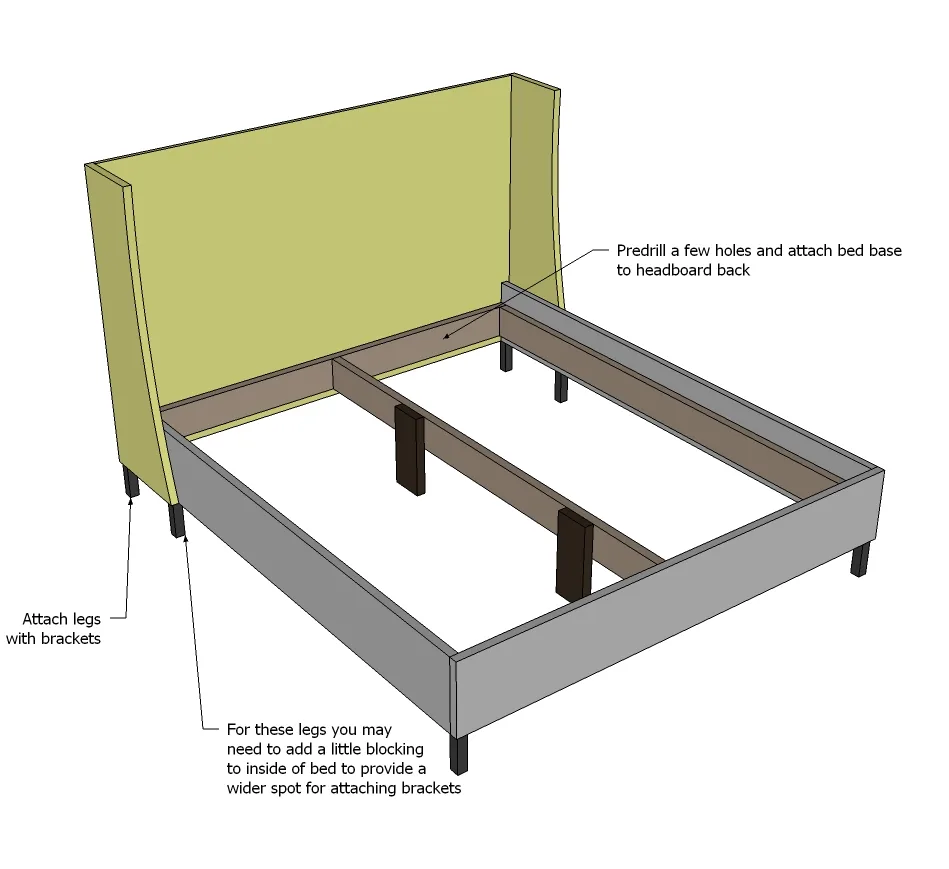
Use scraps up to make additional legs for support where you need it. These guys are the real "legs" on this bed.

Step 4
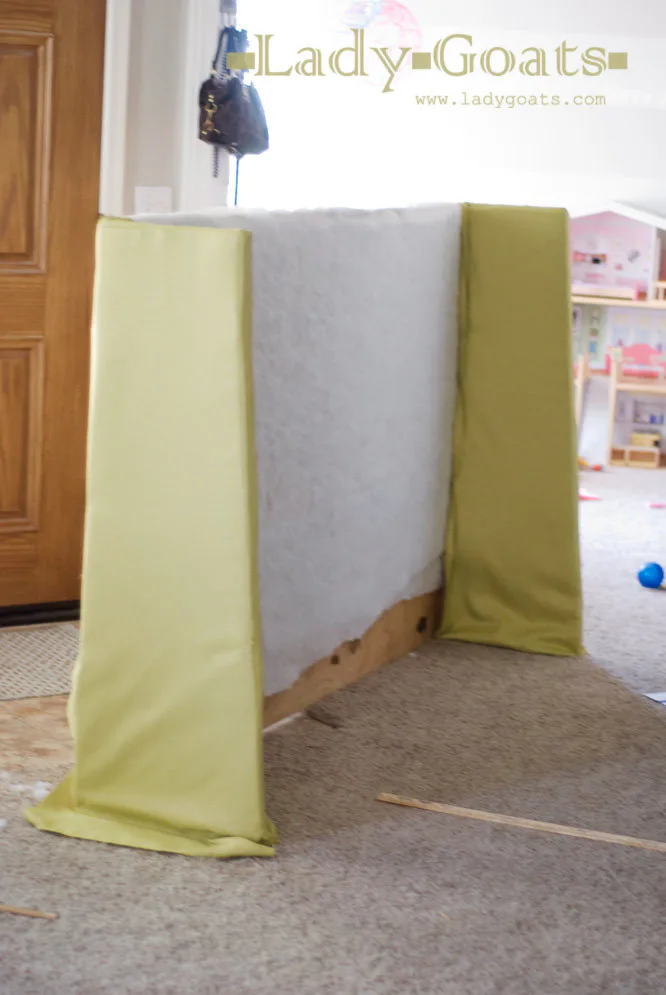
Gina ended up just slipcovering the pieces, and then attaching together - please read her post for more details here.

Step 5

Step 6
Step 7
Then we attach it all together - adding the legs on as well.
Step 8
And add slats for the mattress if you are not using a box spring.
Step 9
For more details on the upholstery - and all those buttons - please visit Gina at Lady Goats. Thanks Gina!!!
Finishing
Sand all surfaces, starting with a medium grit and finishing with fine. Wipe off the dust, fill any holes or gaps with wood filler, and sand smooth once dry. Apply primer if you're painting, then finish with your choice of paint or stain and seal with a durable clear topcoat. For outdoor projects, use exterior-rated primer, paint or stain, and sealer so the piece stands up to the weather.