Simple Rolling Bar Cart
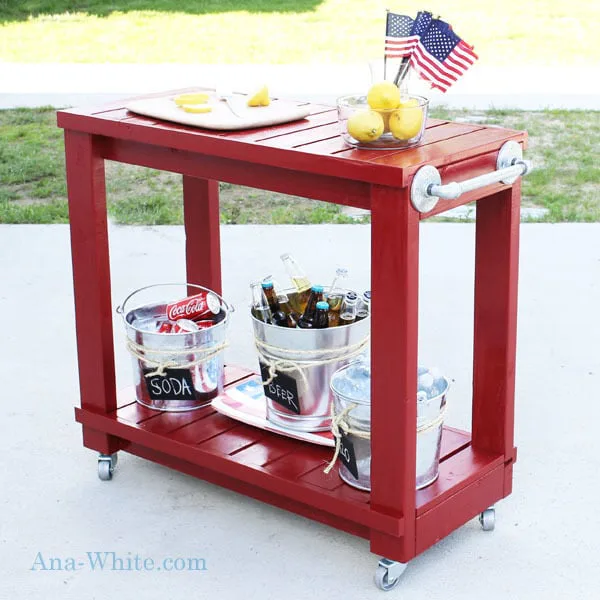
Create your own beautiful, customizeable and functional rolling bar cart. with diagrams and shopping list and cut list.
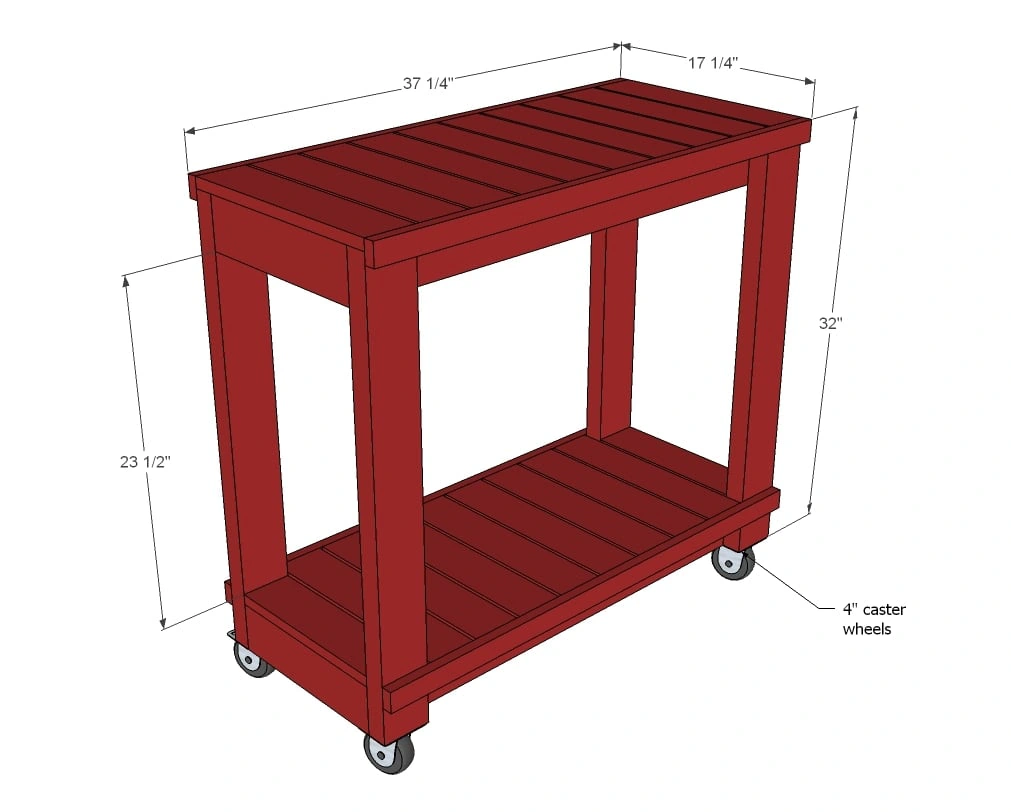
Dimensions
Use the size-specific shopping and cut lists below.
What you need
- 4 - 2 x 4 x 8'
- 3 - 1 x 4 x 10'
- 2 - 1 x 2 x 8'
- 2-1/2" self tapping exterior screws
- 1-1/4" galvanized staples or screws (for attaching slats)
- glue
- 4 - 4" caster wheels
- towel bar or pipe fitting for towel bar
- glue, paint and primer
- 4 - 2 x 4 @ 12-3/4" - End Aprons
- 4 - 2 x 4 @ 34-1/4" - Side Aprons
- 4 - 2 x 4 @ 31-1/4" - Legs
- 2 - 1 x 4 @ 12-3/4" - Shorter bottom shelf slats
- 18 - 1 x 4 @ 15-3/4" - Top and bottom shelf slats
- 4 - 1x2 @ 37-1/4" - End Trim
- measuring tape
- pencil
- safety glasses
- hearing protection
- drill
- compound miter saw
- sander
- staple gun
- countersink drill bit
Step by step
Step 1
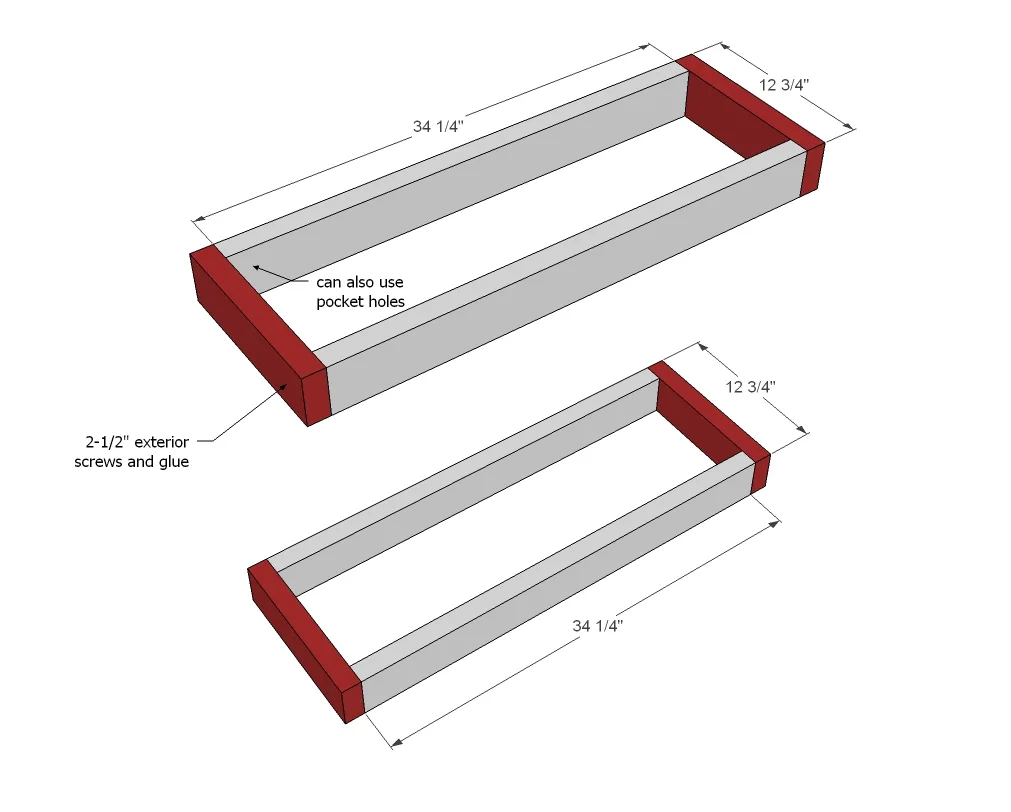
Assemble the two frames first with 2-1/2" exterior screws and wood glue.
Step 2
Attach the legs to the frames.

Step 3
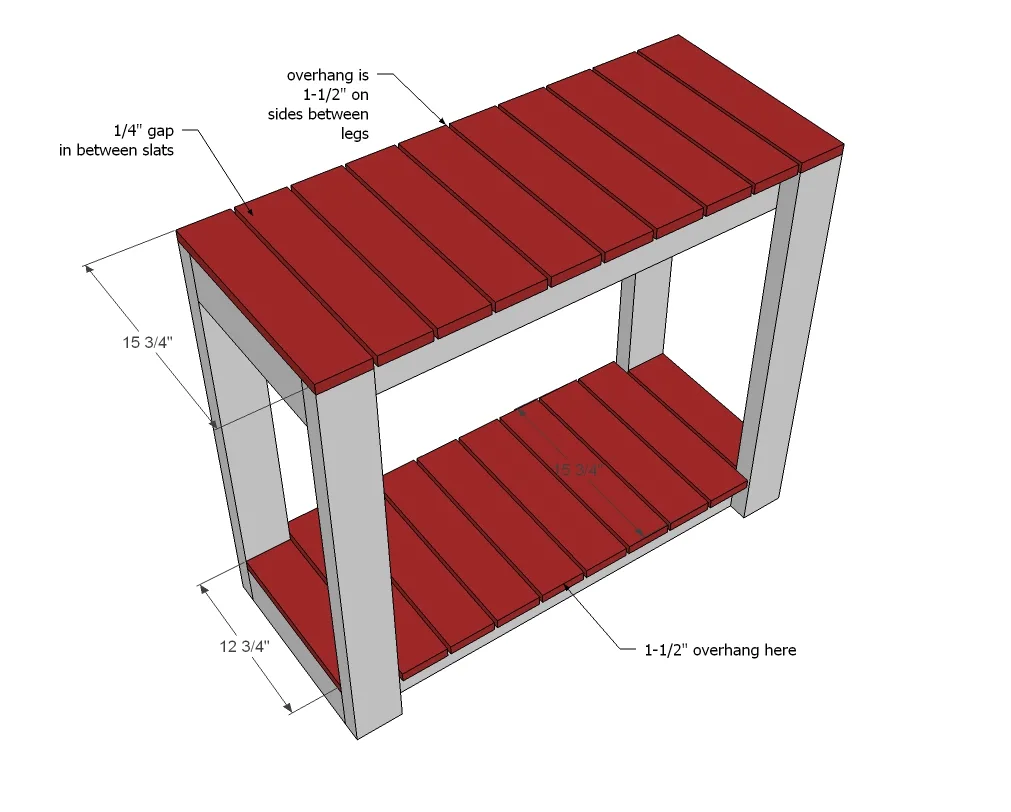
Attach slats to frame tops with either staples, nails or screws using glue.
Step 4
Trim edges out with 1x2s with glue and staples, nails or screws.

Step 5

Finishing
Sand all surfaces, starting with a medium grit and finishing with fine. Wipe off the dust, fill any holes or gaps with wood filler, and sand smooth once dry. Apply primer if you're painting, then finish with your choice of paint or stain and seal with a durable clear topcoat. For outdoor projects, use exterior-rated primer, paint or stain, and sealer so the piece stands up to the weather.


