Wooden Plate Rack
Save up to 90% off furniture and build your own. This wooden plate rack is super easy to build, no special tools required. Free tutorial.

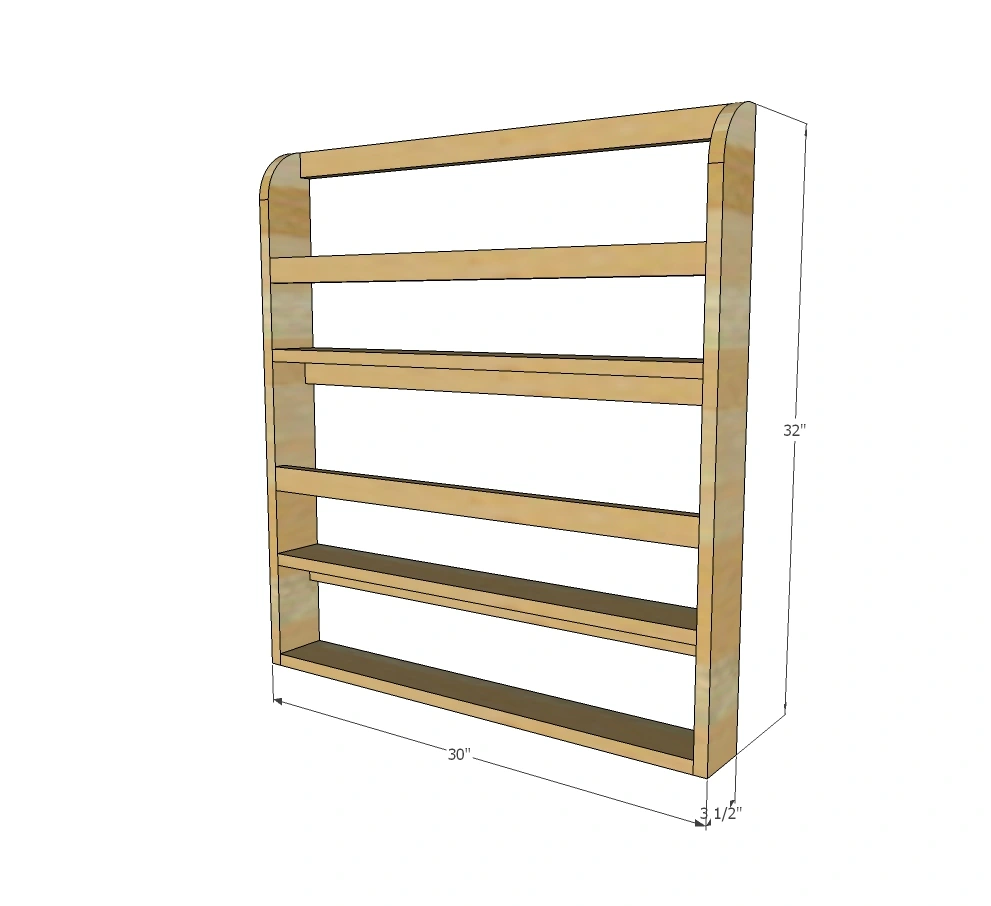
Dimensions
Use the size-specific shopping and cut lists below.
What you need
- 2 - 1x4 @ 8 feet long
- 2 - 1x2 @ 8 feet long
screws for hanging on wall depending on wall material, stud framed wall with drywall on inside use 3" wood screws
- 2 - 1x4 @ 32" - sides of wooden plate rack
- 3 - 1x4 @ 28-1/2" - shelves
- 5 - 1x4 @ 28-1/2" - rails and back supports
- measuring tape
- square
- pencil
- safety glasses
- hearing protection
- circular saw
- nailer
- sander
- level
Step by step
Step 1
Attach the 1x4 boards together to create the storage. You can use nails, as the completed plate rack is attached to the wall creating additional structure, just use glue whenver nailing.

Step 2
Glue and nail the rails to the wooden plate rack framing to complete. Hang on wall into studs through the back 1x2s under the shelves.

Finishing
Sand all surfaces, starting with a medium grit and finishing with fine. Wipe off the dust, fill any holes or gaps with wood filler, and sand smooth once dry. Apply primer if you're painting, then finish with your choice of paint or stain and seal with a durable clear topcoat. For outdoor projects, use exterior-rated primer, paint or stain, and sealer so the piece stands up to the weather.