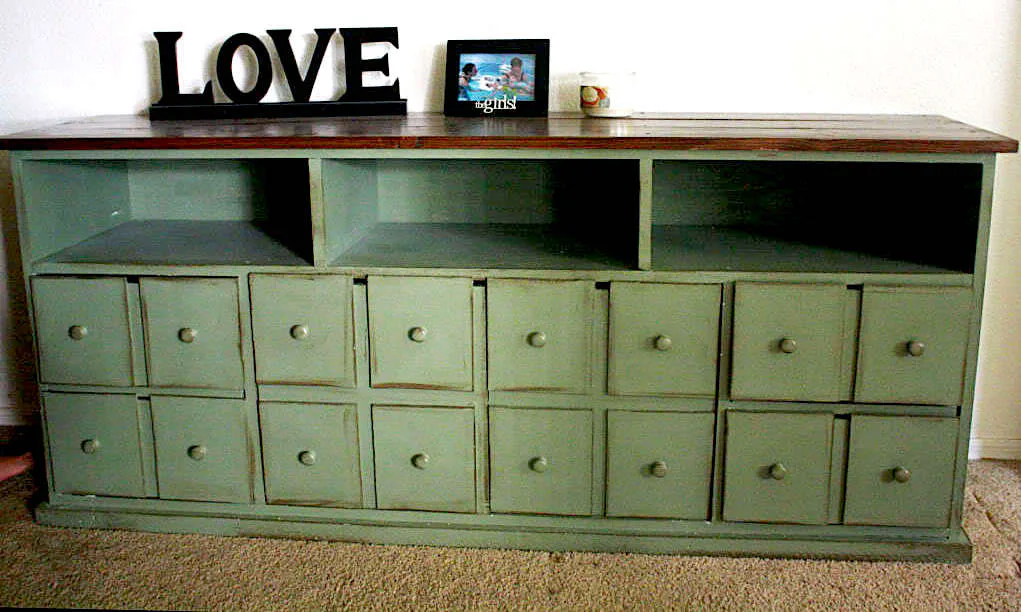
Barn Door Entertainment Center
s are a smart and beautiful solution to a tv in the living room. The barn door easily slides open to hide or display the tv. Our woodworking plans make it easy to build your own barn door cabinet - for just a fraction of the cost to buy. It's easy to modify to fit your space and storage needs. Our step by step plans include shopping list, cut list and full 3d diagrams..

Dimensions
Use the size-specific shopping and cut lists below.
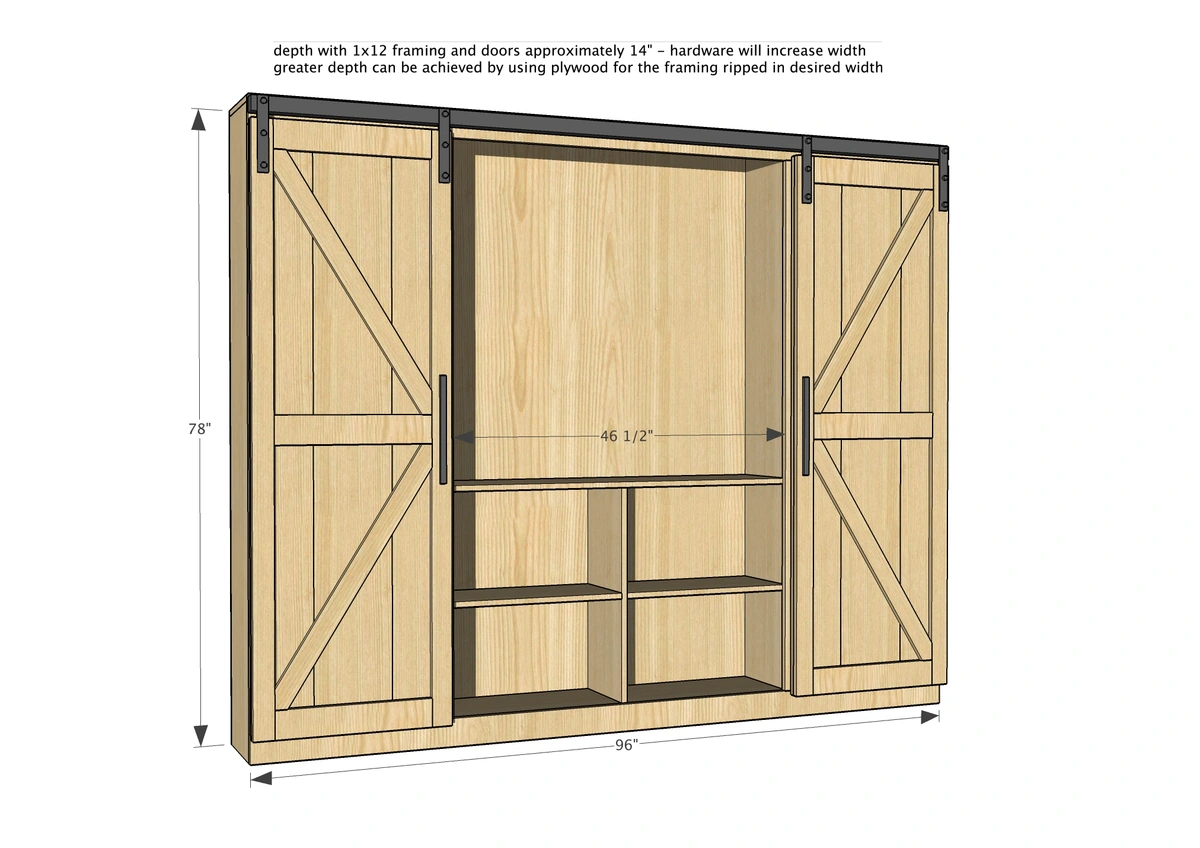
What you need
- 8 - 1x12 @ 8 feet long
- 1 - 1x12 @ 10 feet long - cut 27-3/4" and 77-1/4" from this board
- 2 - sheets 1/4" plywood
- 4 - 1x2 @ 6 feet long
- 2 - 1x4 @ 8 feet long
- 8 foot barn door track system
Materials for door not included in shopping list - built to suit hardware
- 1 - 1x12 @ 96" - top
- 2 - 1x12 @ 77-1/4" - sides
- 2 - 1x12 @ 73-3/4" - divider
- 1 - 1x12 @ 94-1/2" - bottom shelf
- 1 - 1x12 @ 47-1/4" - tv shelf (add two more shelves for no tv)
- 1 - 1x12 @ 27-3/4" - tv shelf divider
- 8 - 1x12 @ 22-7/8" - side tower shelves
- 2 - 1x12 @ 23-1/4" - middle shelves
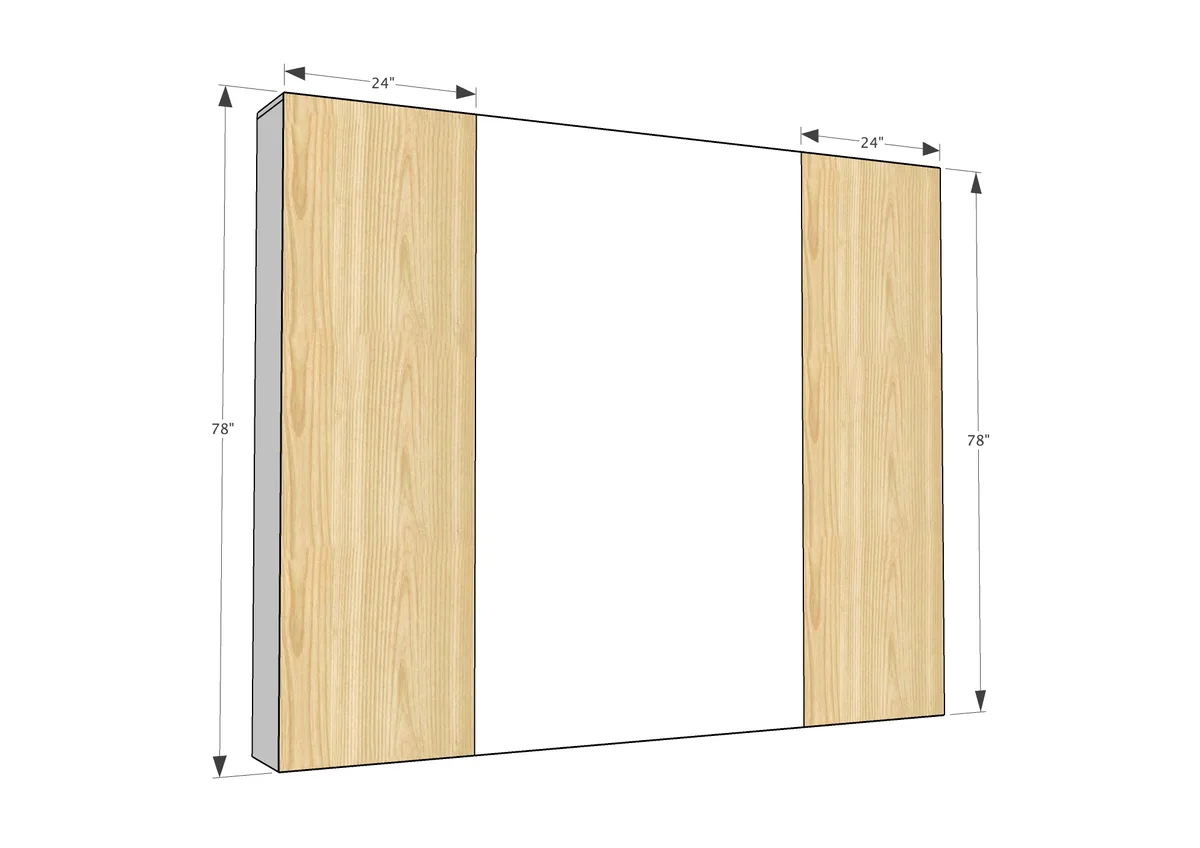
- 1 - 1/4" plywood @ 48" x 78" - middle back
- 2 - 1/4" plywood @ 24" x 78" - side back
- 2 - 1x4 @ 96" - top and bottom face frame
- 4 - 1x2 @ 71 - face frame stiles
BARN DOOR - CUT TO FIT AND TO HARDWARE KIT Materials not included in materials list
- measuring tape
- square
- pencil
- safety glasses
- hearing protection
- kreg-jig
- drill
- jigsaw
- compound miter saw
- nailer
Step by step
Step 1
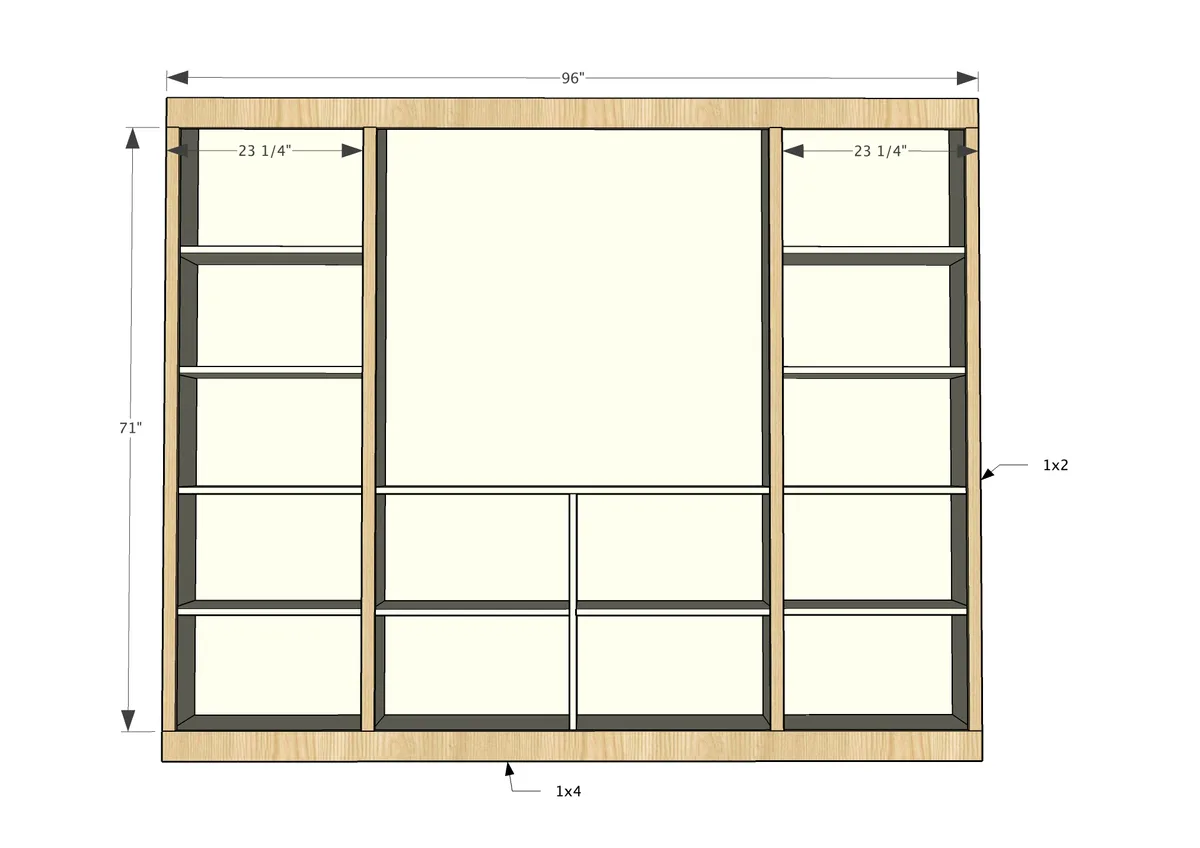
Build the frame of the sliding door cabinet storage box using 3/4" pocket holes and 1-1/4" pocket hole screws. Hide pocket holes on insides.

Step 2
Add the media unit pieces to the sliding door cabinet. For no media unit, or a tv that doesn't fill the space, add additional shelves to top.

Step 3
Add shelves using 3/4" pocket holes and 1-1/4" pocket hole screws.

Step 4
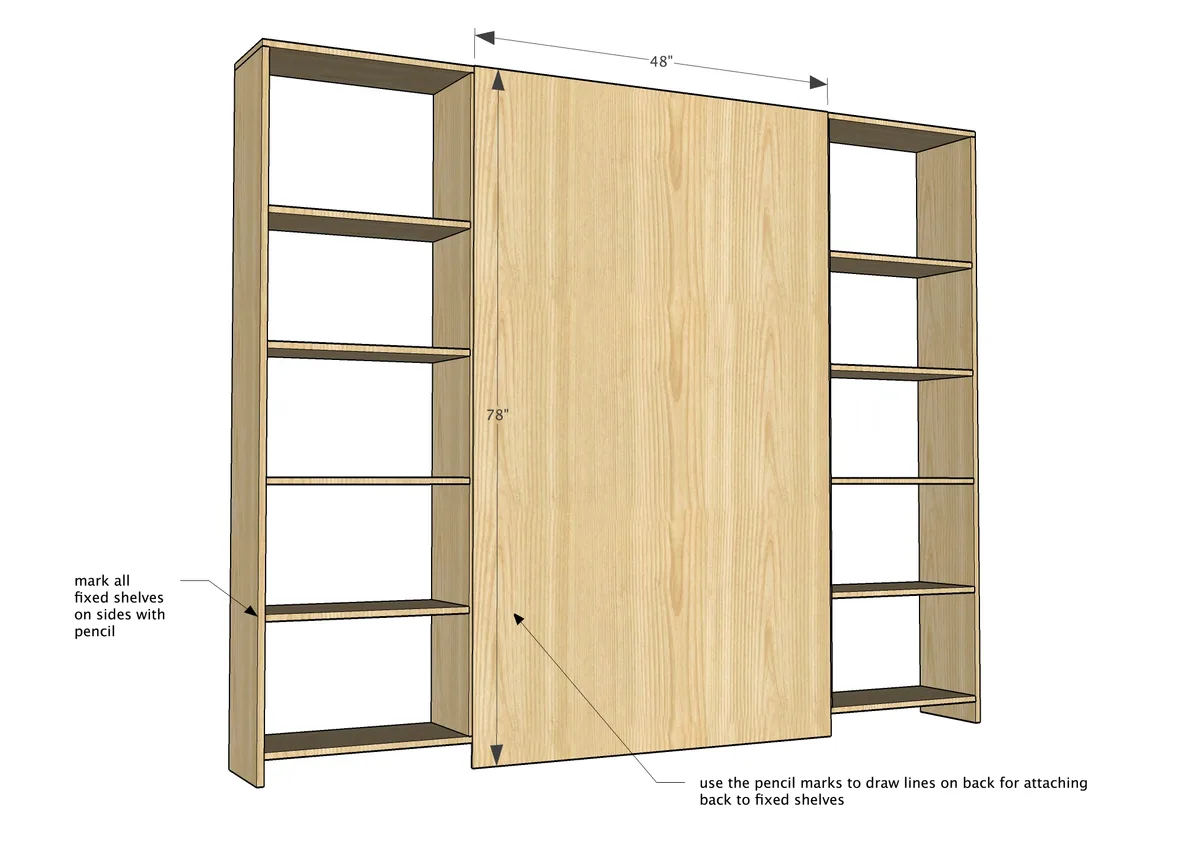
Attach back to center. Mark the location of all fixed shelves on sides first, and then place plywood on back with glue. Then draw lines between side marks to locate the fixed shelves. Nail or staple on with 3/4" fasteners. Center piece should land on center of the 1x12s.
Step 5
Step 6
Build face frame first with 3/4" pocket holes and 1-1/4" pocket hole screws. Nail and glue face frame on with 1-1/4" brad nails.
Step 7
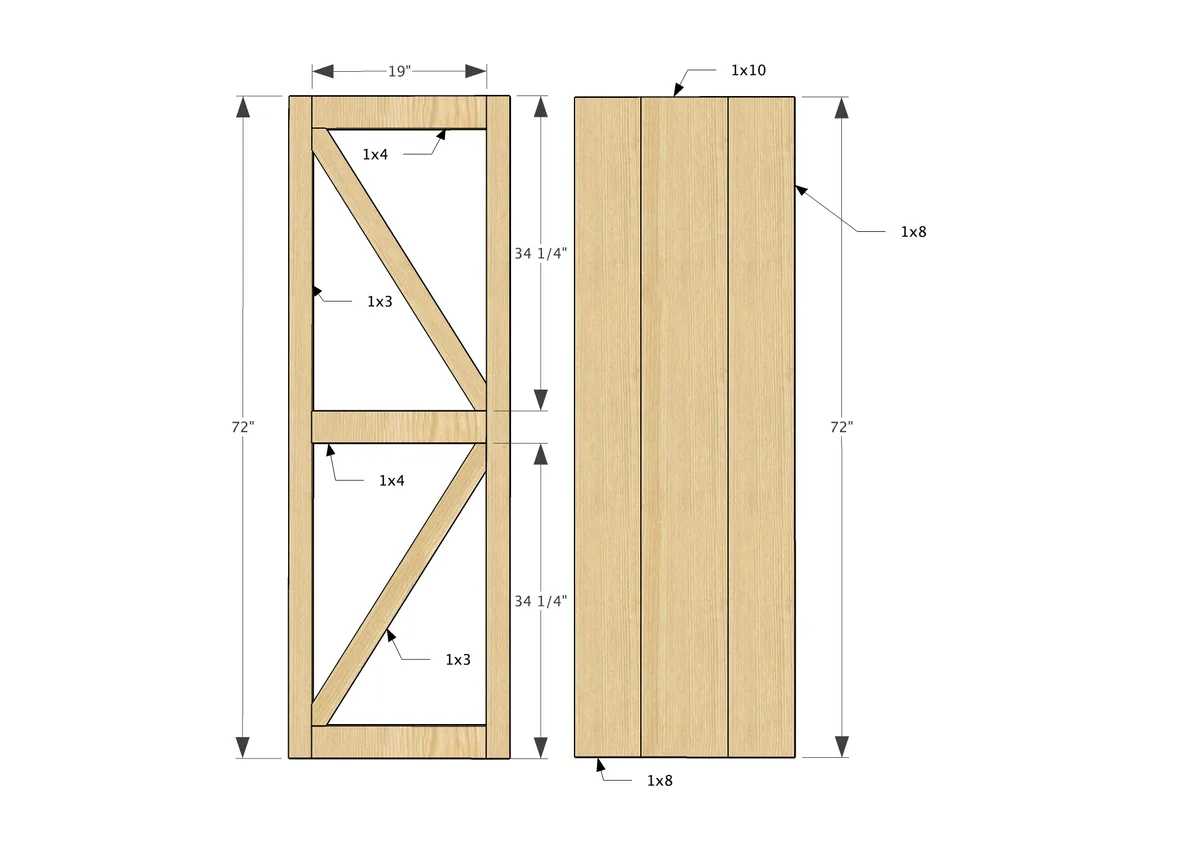
This is the recommended door but you should build your doors to fit your hardware. This door will be 1-1/2" thick. For the cross support pieces, simply build the main frame with pocket holes, then set the cross piece in place (uncut) and trace the angles. Then cut the angles with a jigsaw.
Step 8
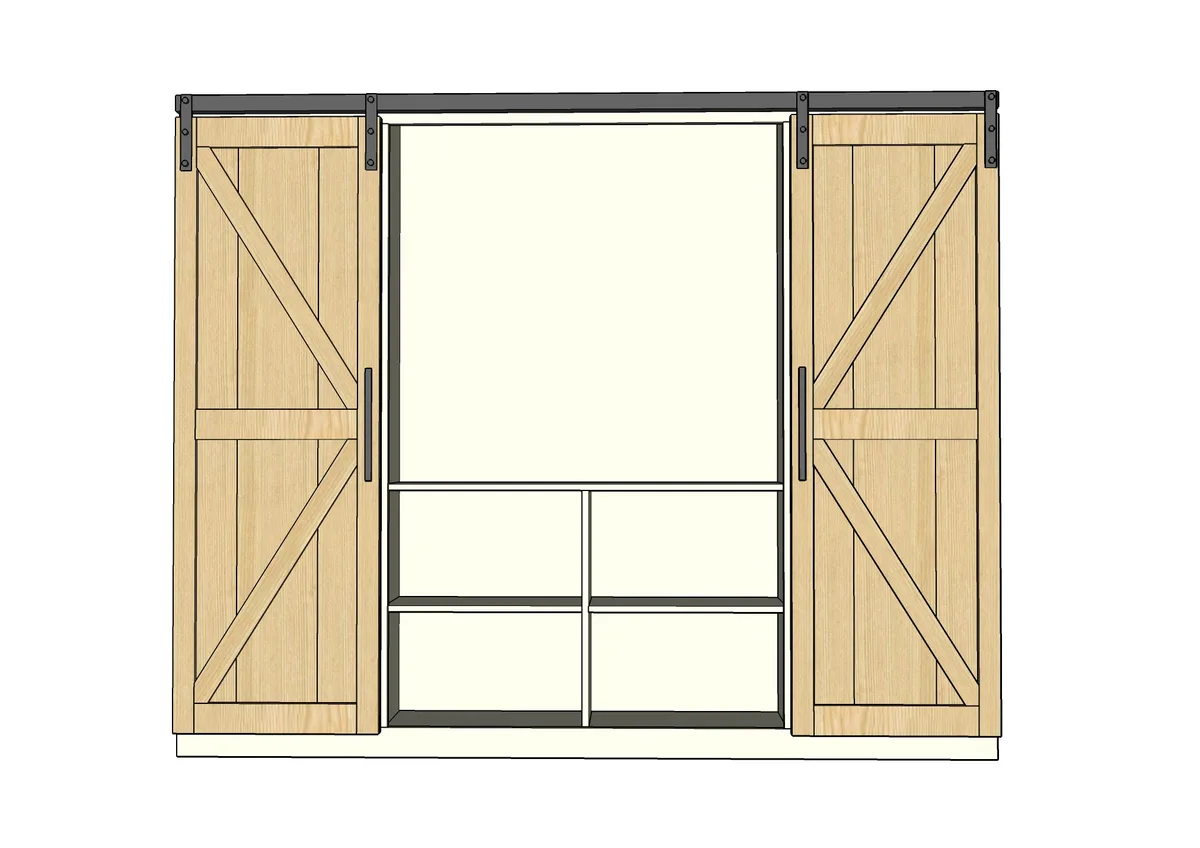
Attach doors with hardware kit. Because of the weight of the doors, I recommend attaching securely the entire project to the wall. You may need to add a cleat at the top, or use L brackets to attach the top to the wall. DO NOT depend on the 1/4" plywood to secure the project to the wall.
Finishing
Sand all surfaces, starting with a medium grit and finishing with fine. Wipe off the dust, fill any holes or gaps with wood filler, and sand smooth once dry. Apply primer if you're painting, then finish with your choice of paint or stain and seal with a durable clear topcoat. For outdoor projects, use exterior-rated primer, paint or stain, and sealer so the piece stands up to the weather.