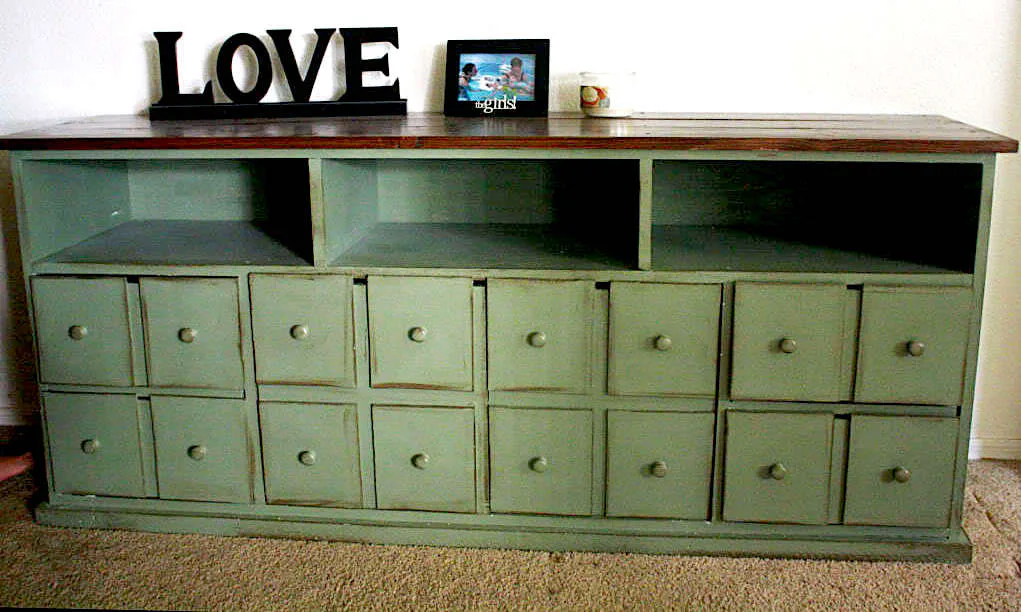
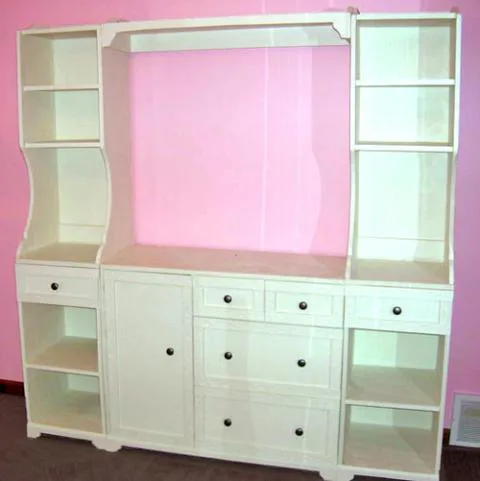
Madeline Side Hutches for the Nursery Changing Wall
Beautiful scalloped sides on these hutches create charm on the Madeline Nursery Changing Wall. Featuring a large tabletop surface and two shelves, this hutch is perfect for all of baby's things. Shown with the rest of the Madeline Collection.
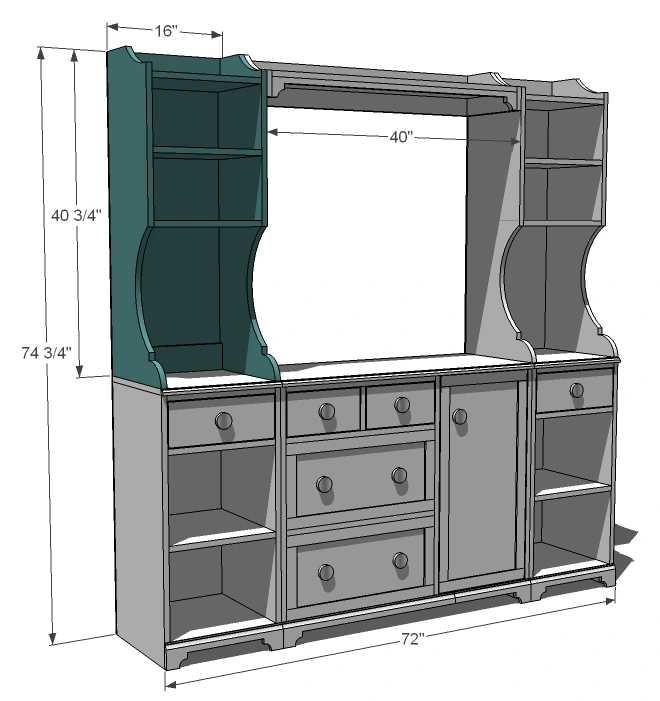
Dimensions
Use the size-specific shopping and cut lists below.
What you need
- 1 – 1×12 (you will only need about 4 feet per hutch)
- 8′ of 1×16 (you should have leftovers from the base unit)
- 1 -1×4 (you only need about 3′)
- 1/4″ plywood, MDF, or luaun
- 2″ nails
- 1 1/4″ nails
- wood glue
- wood filler
Shopping List for 1 Hutch
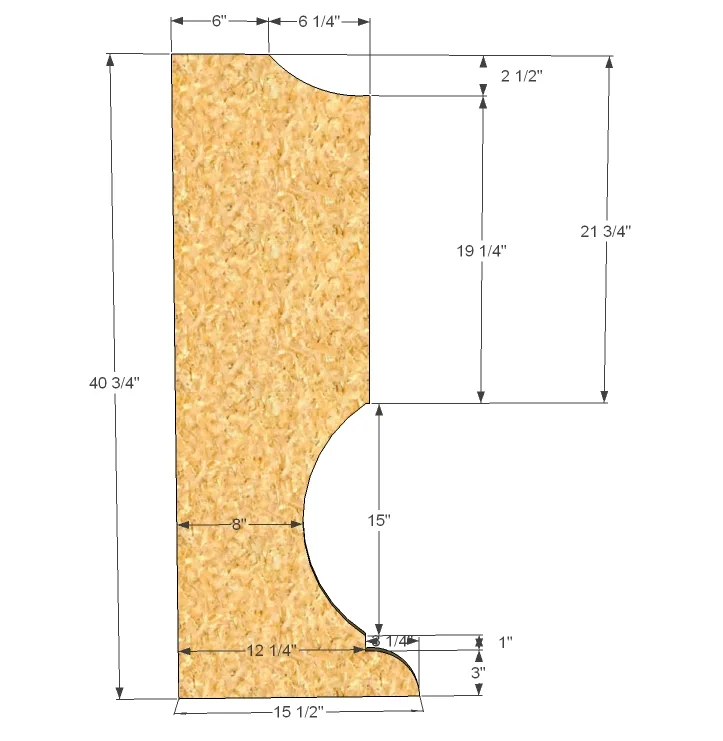
- 2 – 1×16 @ 40 3/4″ (Sides, you will need to scallop out sides with a jigsaw)
- 3 – 1×12 @ 14 1/2″ (Shelves)
- 2 – 1×4 @ 14 1/2″ (Top and Bottom Supports)
- 1 – 1/4″ Backing @ 40 3/4″ x 16″ (Back)
Cut List for 1 Hutch
- measuring tape
- square
- pencil
- hammer
- safety glasses
- hearing protection
- kreg-jig
- drill
- circular saw
- jigsaw
- sander
Step by step
Step 1
Sides. Cut out the sides as shown above. Cut one out and then use it as a pattern to cut the other out. Important: the top part needs to be 12 1/4″ wide. This is shown above. Use a jigsaw.
Step 2
Shelves. Mark the sides as shown above and use 2″ nails and glue to fasten the shelves in place.
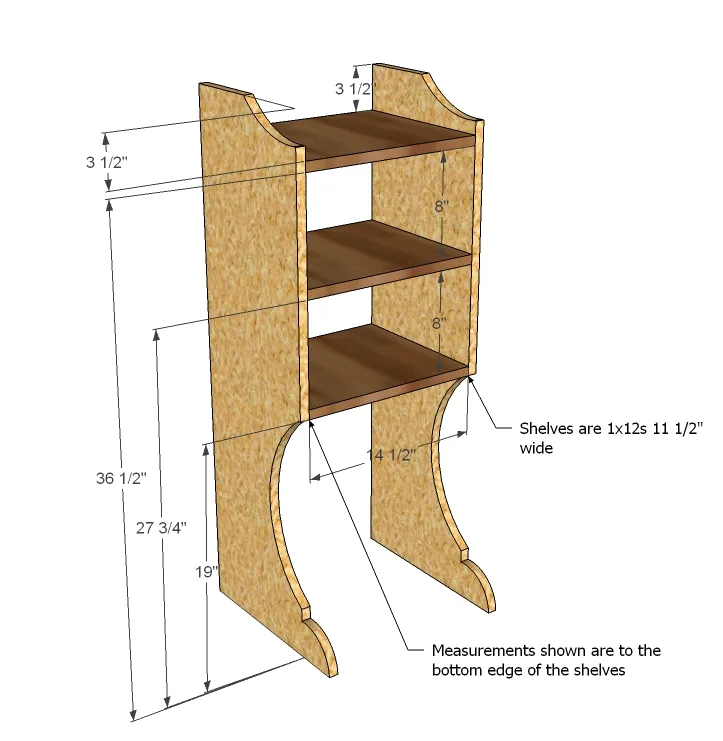
Step 3
Top and Bottom Supports. Using glue and 2″ nails or screws, fasten the top and bottom supports as shown above.
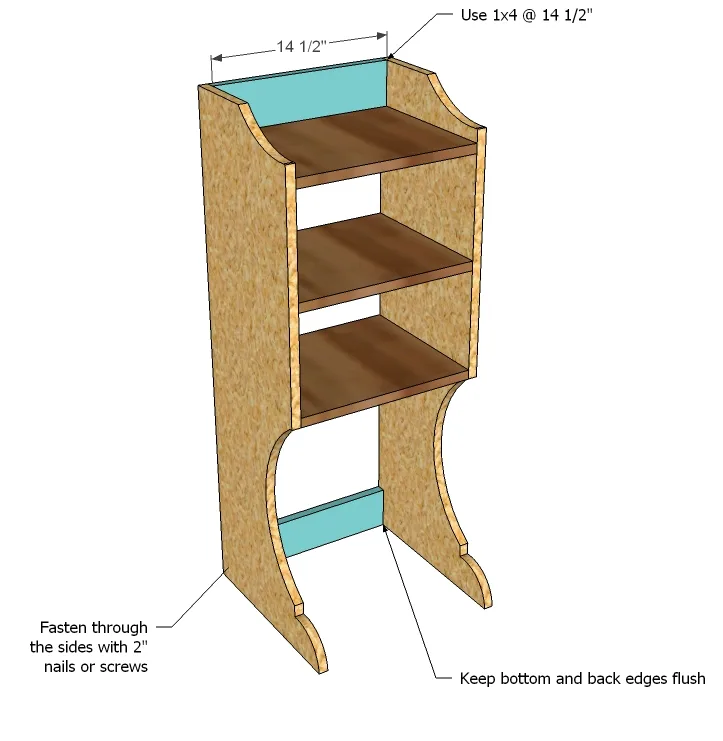
Step 4
Back. Fasten the back as shown above. Take a square and use glue and 1 1/4″ nails.
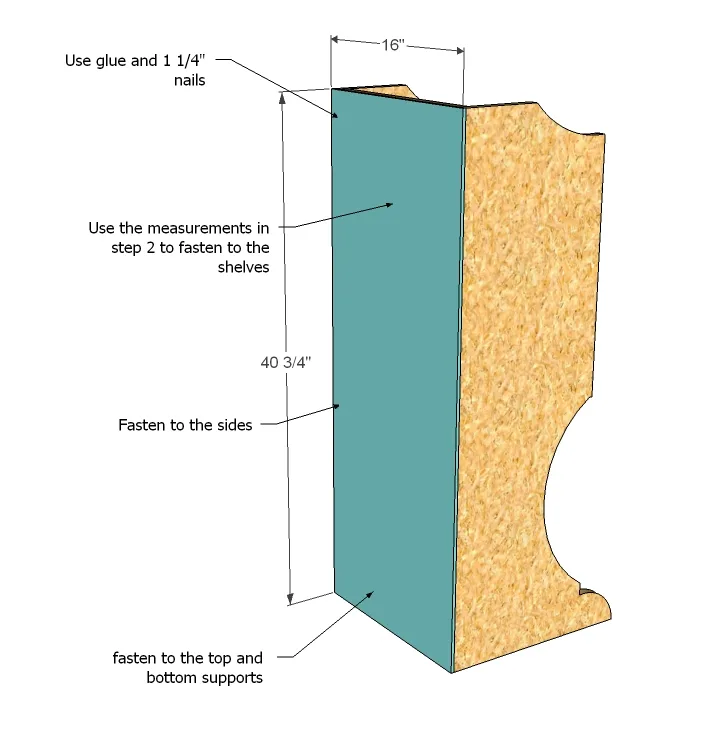
Step 5
Assembling. Recommended that you fasten the hutches to a stud in the wall behind the hutch to keep from falling forward. You can also use a simpson strong time to attach the hutch to the base unit easily.
Finishing
Sand all surfaces, starting with a medium grit and finishing with fine. Wipe off the dust, fill any holes or gaps with wood filler, and sand smooth once dry. Apply primer if you're painting, then finish with your choice of paint or stain and seal with a durable clear topcoat. For outdoor projects, use exterior-rated primer, paint or stain, and sealer so the piece stands up to the weather.