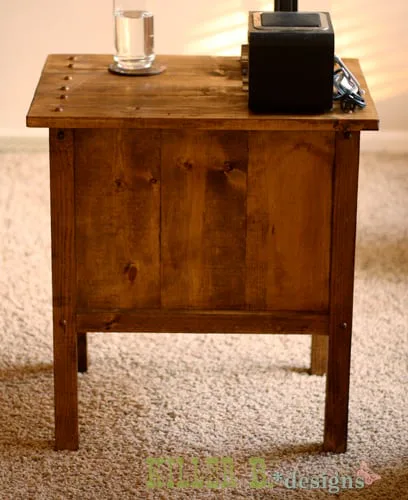
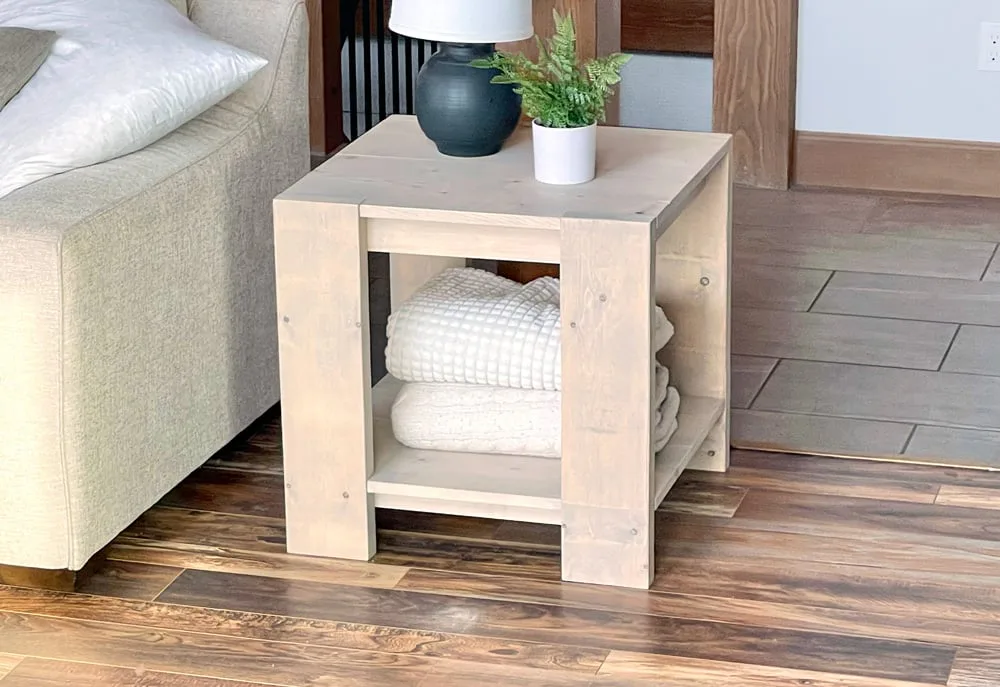
Simple White Outdoor End Table
Free simple easy step by step project plan to build a Restoration Hardware inspired end table. Features simple design, slatted top with breadboard ends.

Dimensions
Use the size-specific shopping and cut lists below.

What you need
- measuring tape
- square
- pencil
- safety glasses
- hearing protection
- kreg-jig
- drill
- circular saw
- nailer
- sander
- level
- countersink drill bit
Step by step
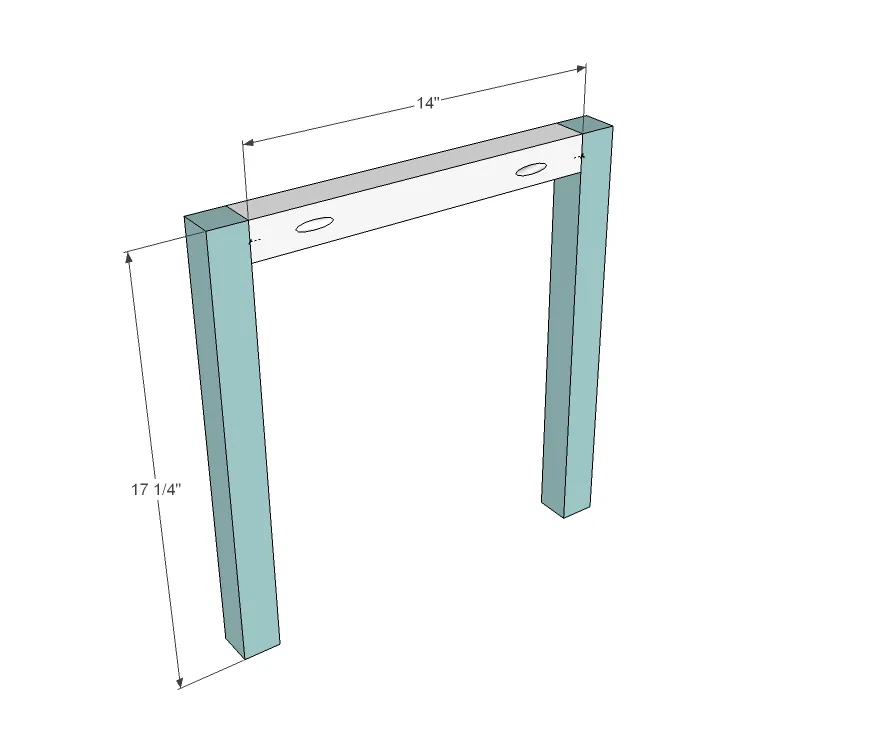
Step 1
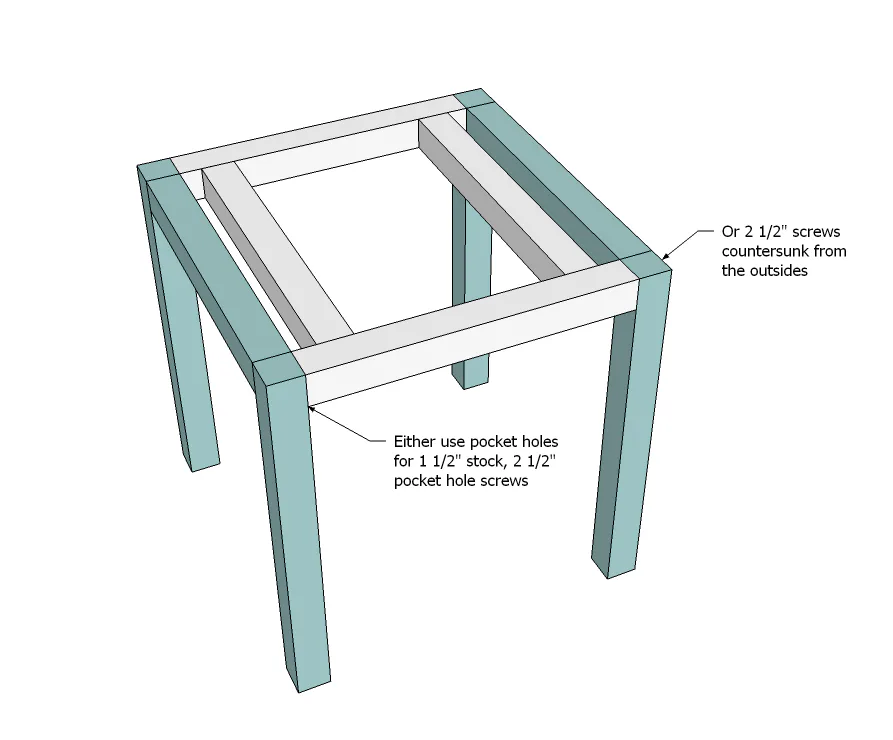
Build two legs as shown above. You can use the Kreg Jig set for 1 1/2" stock and 2 1/2" pocket hole screws or simply use 2 1/2" screws countersunk and wood glue.
Step 2
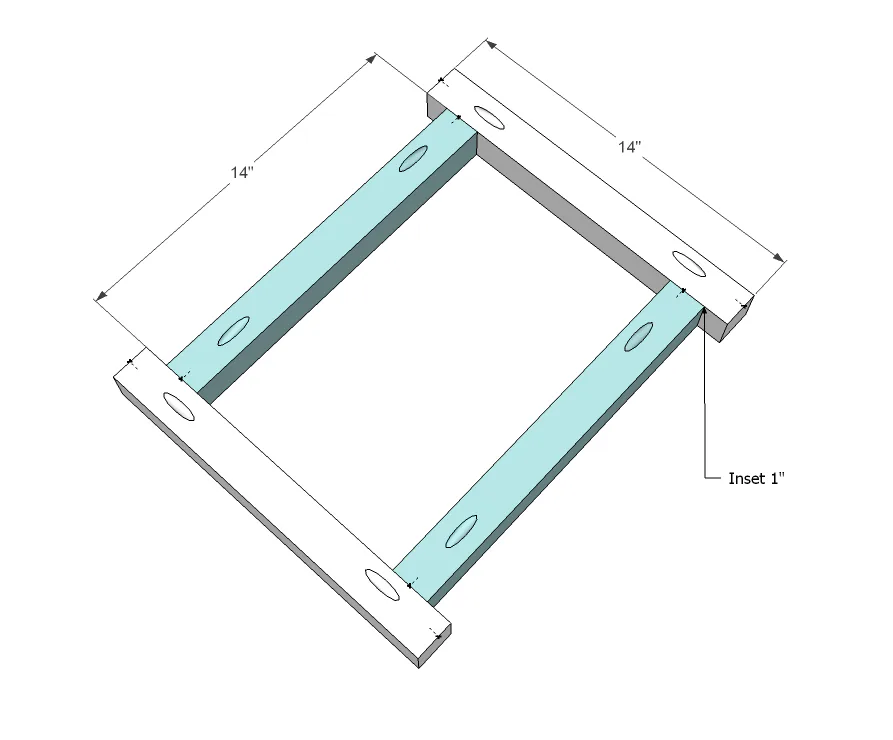
Tabletop Frame. Build the tabletop frame as shown above. Again, pocket holes or 2 1/2" screws and glue.
Step 3
Attach legs to frame as shown above. Hide pocket holes to the inside if used.
For Kreg Jig users - skip to step 6.
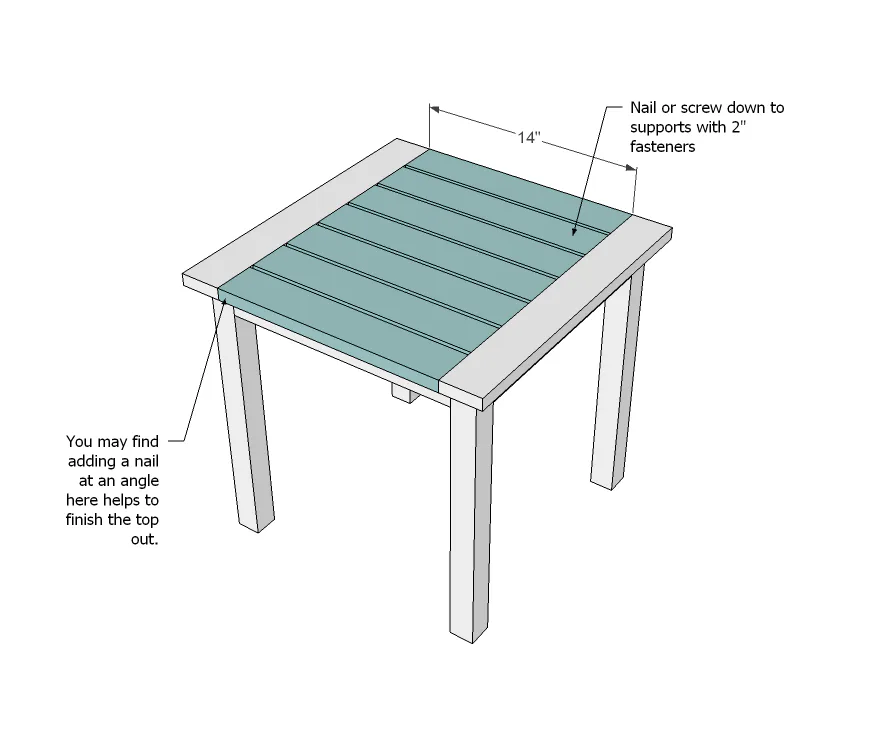
Attach breadboard ends as shown above, flush to the inside of the apron. Nail or screw down with glue and 2" fasteners. You could alternatively screw from underside to hide screw holes.

Step 5
Step 6
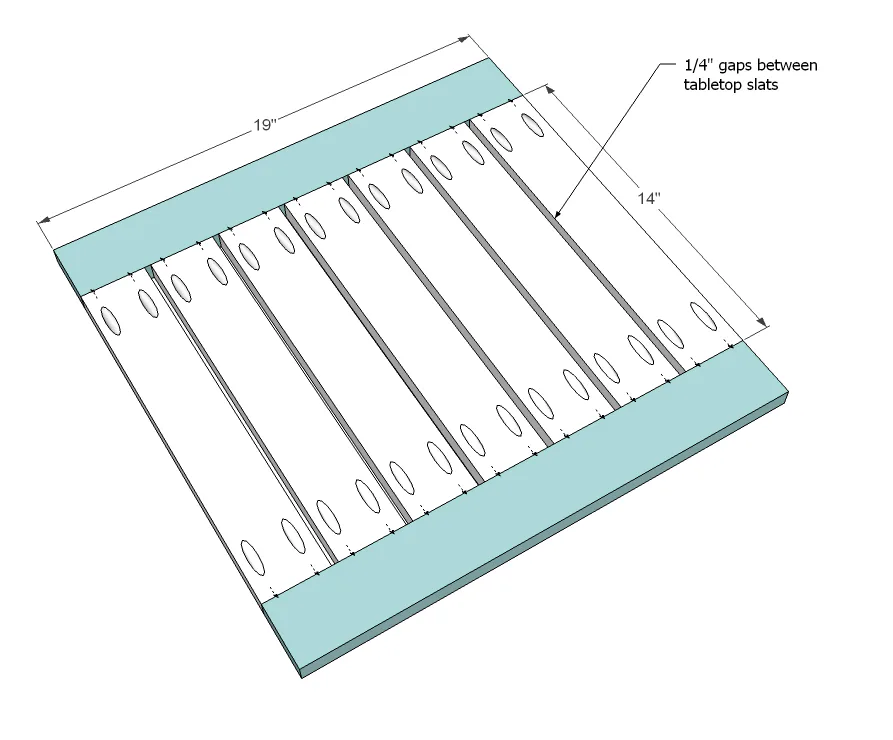
For Kreg Jig users, set your jig for 3/4" stock and attach tabletop boards to breadboards with 1 1/4" pocket hole screws and wood glue.
Step 7
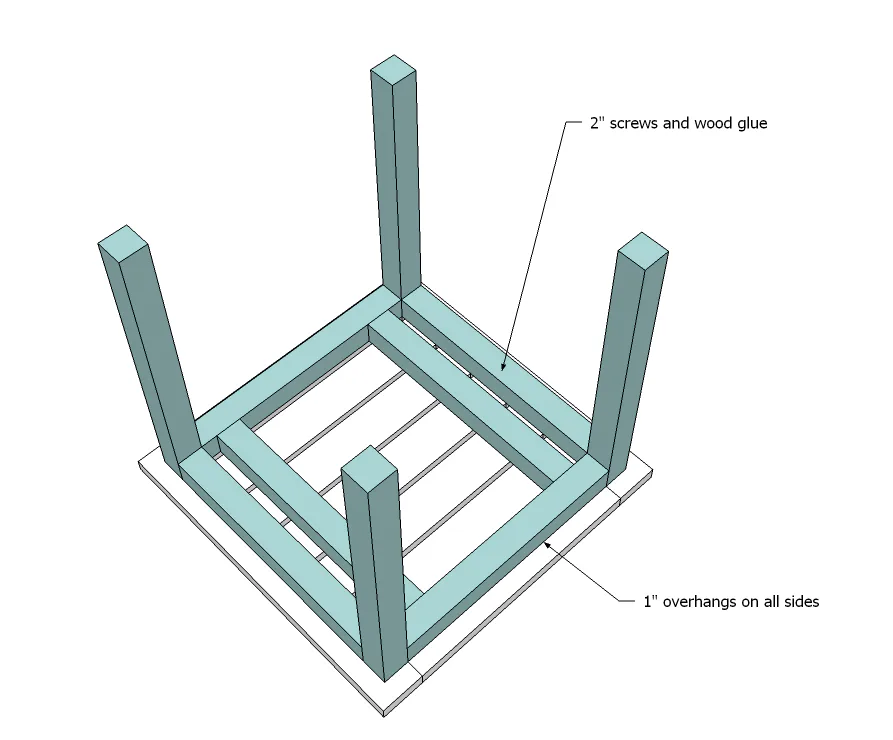
Then use 2" screws to attach base to tabletop, concealing pocket holes on the underside.
Finishing
Sand all surfaces, starting with a medium grit and finishing with fine. Wipe off the dust, fill any holes or gaps with wood filler, and sand smooth once dry. Apply primer if you're painting, then finish with your choice of paint or stain and seal with a durable clear topcoat. For outdoor projects, use exterior-rated primer, paint or stain, and sealer so the piece stands up to the weather.