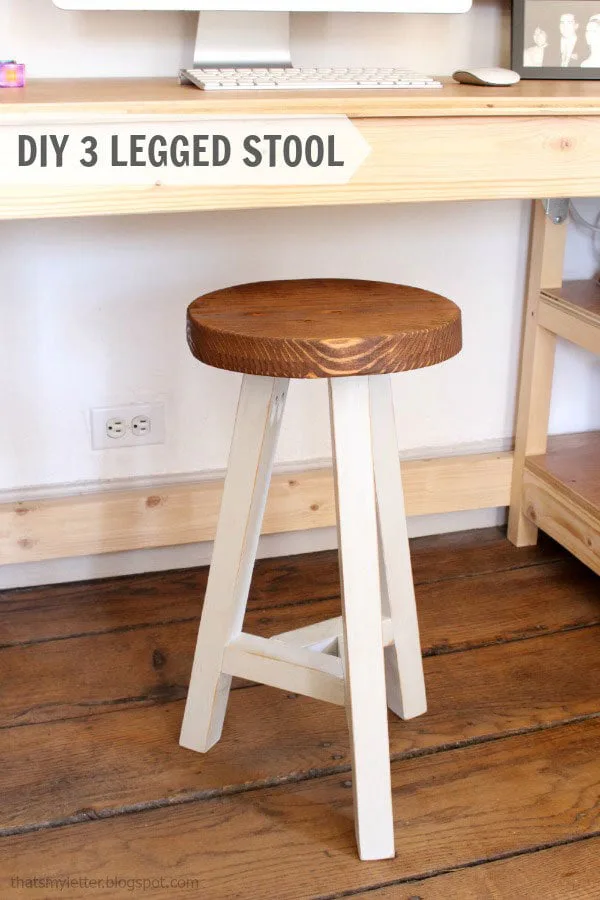
Vintage Style Three Legged Stool
I'm so honored today to get to share a project built by one of my building besties, Jaime from That's My Letter.
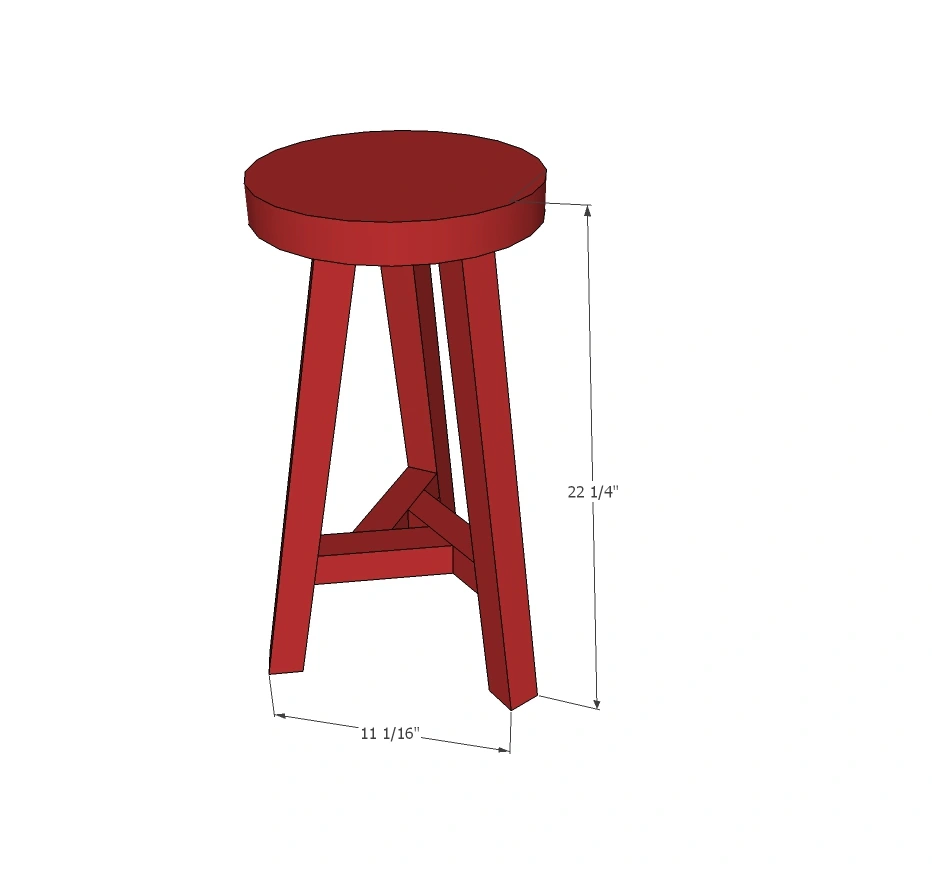
Dimensions
Use the size-specific shopping and cut lists below.
What you need
- 1 - 2x2x8 pine board 1 - 2x12 fir board scrap @ 11”l
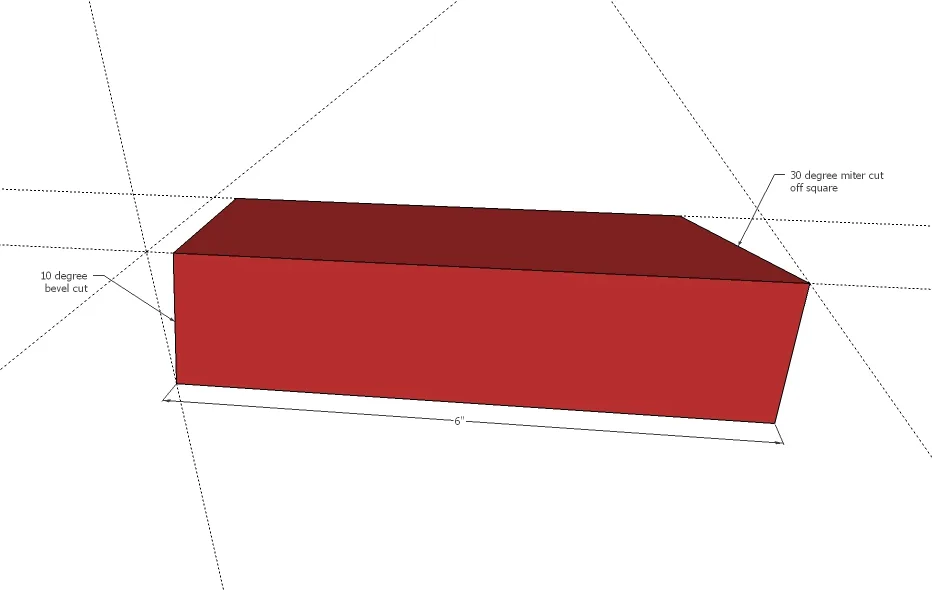
- 3 - 2x2 @ 21”l (both ends 10 degree miter parallel) (legs) - 3 - 2x2 @ 6”l (one end 10 degree miter, one end 30 degree miter, angle off set from each other - see diagram) (center supports) - 1 - 2x12 @ 11”l (seat)
- measuring tape
- square
- pencil
- safety glasses
- hearing protection
- kreg-jig
- drill
- jigsaw
- compound miter saw
Step by step
Step 1
Cut the three cross supports first. These will be a little tricky since the angles are cut on different sides of the boards, but once you get one, it will be smooth sailing from there. Drill pocket holes on underside (see next diagram) with your Kreg Jig set for 1-1/2" stock.
Step 2
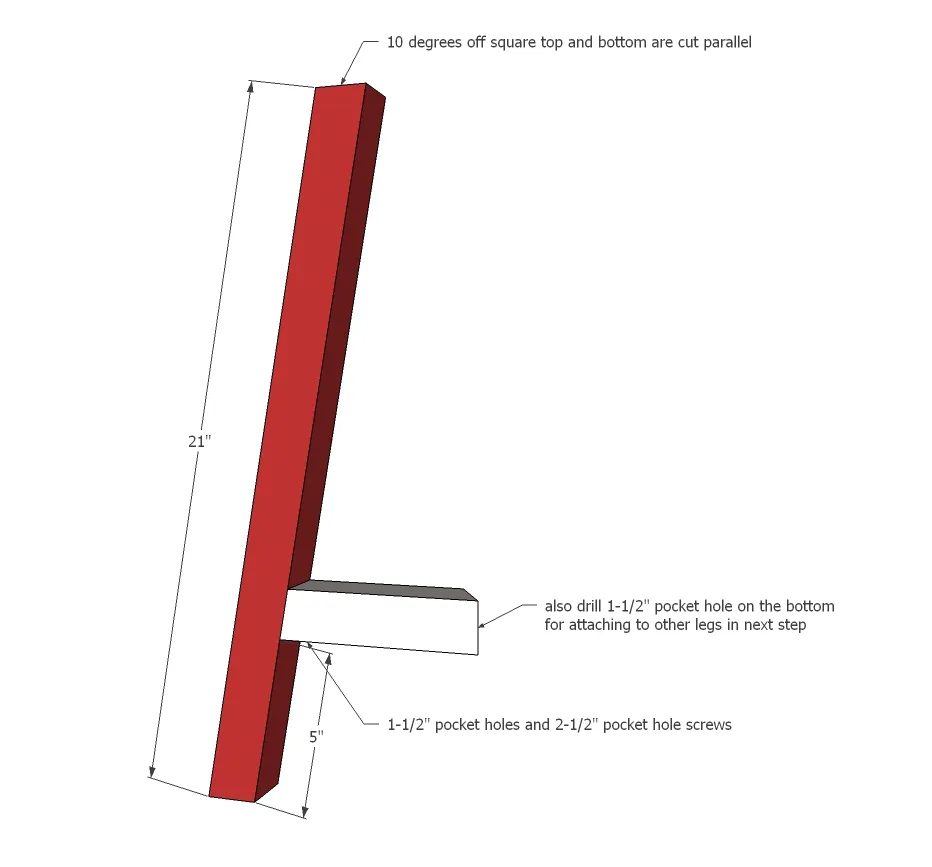
Drill 1-1/2" pocket holes facing upward on the inside of your three legs. Then attach the cross support 5" up from bottom of leg on inside. Do this for all three legs. Use 2-1/2" pocket hole screws and glue.
Step 3
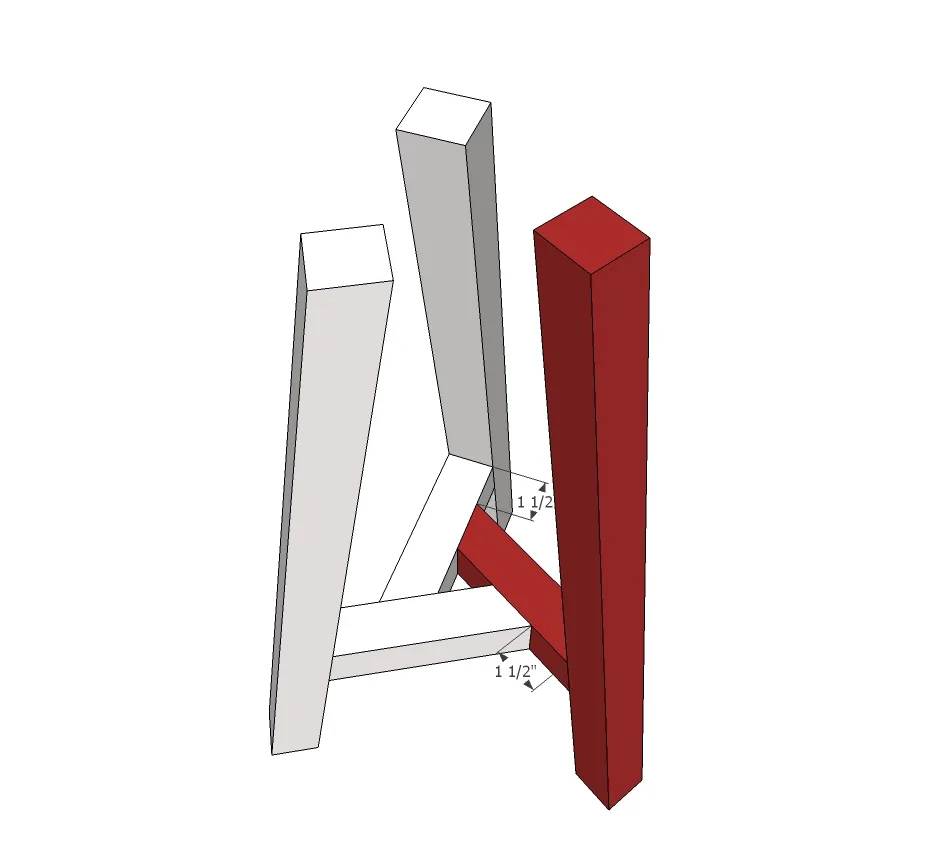
Attach the three cross supports to each other on the underside, 1-1/2" in from the legs. Use 2-1/2" pocket hole screws and glue.
Step 4
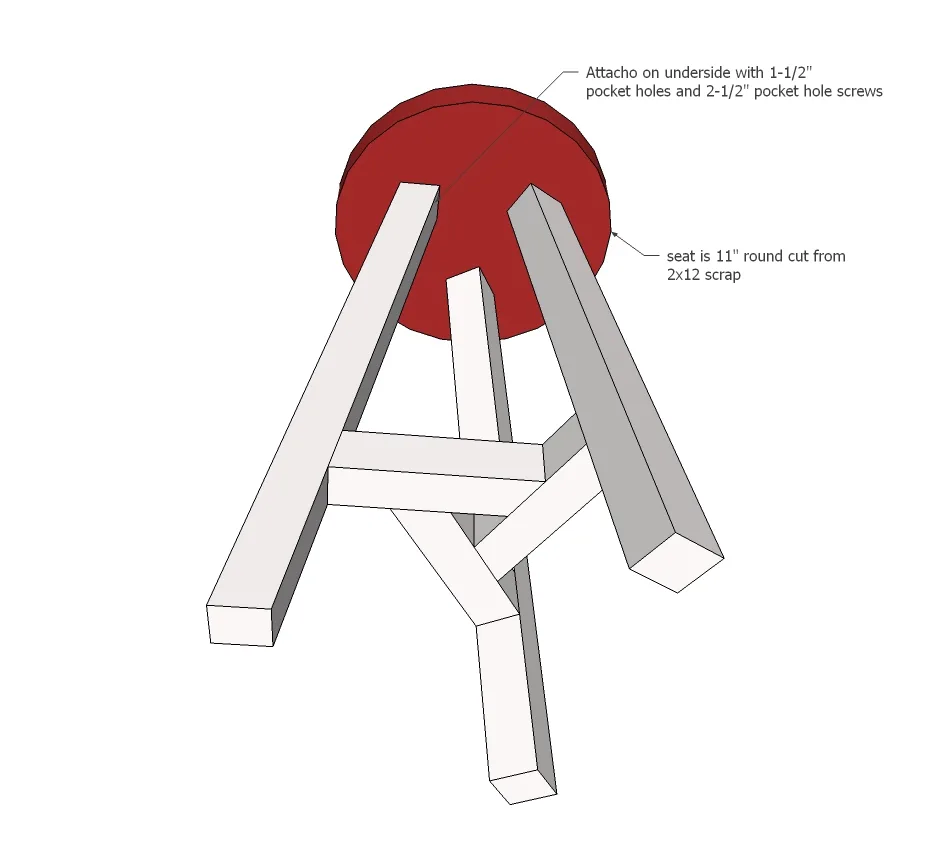
Finally attach all three legs to the stool seat with 2-1/2" pocket hole screws.
Finishing
Sand all surfaces, starting with a medium grit and finishing with fine. Wipe off the dust, fill any holes or gaps with wood filler, and sand smooth once dry. Apply primer if you're painting, then finish with your choice of paint or stain and seal with a durable clear topcoat. For outdoor projects, use exterior-rated primer, paint or stain, and sealer so the piece stands up to the weather.